WEB-VERSIONGetting Started GuideTAMPER-RESISTANT OUTLETCat. No. ZW15R
![]() Welcome to the Decora SmartTM family of Z-Wave® enabled devices
Welcome to the Decora SmartTM family of Z-Wave® enabled devices
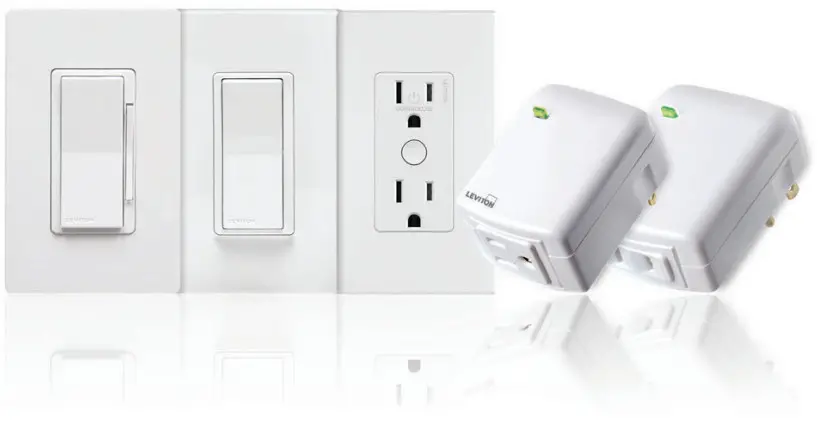 See the complete line of Z-Wave enabled dimmers, switches, outlets, fan speed controllers, and plug-ins at leviton.com/decorasmart.
 Welcome
The Decora Smart branded Z-Wave enabled outlet is designed for use with modern Z-Wave hubs. This product can be operated in any Z-Wave network with other Z-Wave certified devices from other manufacturers. Your outlet will act as a repeater in the network to increase the reliability of the network. Using mesh networking technology, Z-Wave provides quick reliable, secure communication to a wide variety of smart products.
The aesthetic will look at home with your matching Decora® branded electrical products. Tamper-resistant outlets help protect against electrical injuries. An integrated vanishing status light provides simple indications of your outlet’s status as well as assistance in joining the network and setting up your outlet.
? We are here to help![]() CALL 1-800-824-3005 (USA) 1-800-405-5320 (Canada)ONLINE decorasmartsupport.leviton.comCHAT www.leviton.com/contactus
CALL 1-800-824-3005 (USA) 1-800-405-5320 (Canada)ONLINE decorasmartsupport.leviton.comCHAT www.leviton.com/contactus![]() EMAIL [email protected]
EMAIL [email protected]
What you need to make it work:
To install and use your Z-Wave enabled outlet.
- A Z-Wave compatible hub.
- A Z-Wave mesh network to join within 30 feet of installation location.
- An available interior wall box with a hot, neutral, and ground wire.WARNING: Do not use aluminum wire.To ensure proper communication do not use metal wallplates.
- Compatible with outlet loads up to 15A.
| RATINGS | |
| General Use | 15A – 120VAC, 50/60Hz |
| Magnetic | 15A – 120VAC, 50/60Hz |
| LED/CFL | 5A – 120VAC, 50/60Hz |
| Incandescent | 1500W – 120VAC, 50/60Hz |
| Motor | 3/4 HP – 120VAC, 50/60Hz |
| Operating Temp | 0°C – 40°C (32°F – 104°F) |
| Operating Humidity | 0-90% non-condensing |
| NETWORK | |
| Z-Wave Plus | 908.42 MHz |
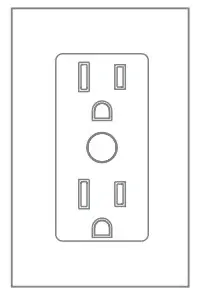
Features

Installation
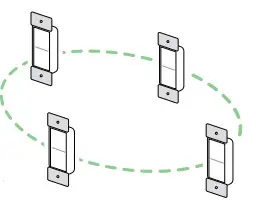
For additional support use the support options in the My Leviton app or contact technical services (page 4).NOTE: Z-Wave is a mesh network. Ensure your device is installed within 30 feet of the hub or another Z-Wave enabled device. Communication through exterior surfaces will likely reduce transmission distances.
 WARNING: TO AVOID FIRE, SHOCK OR DEATH, turn o power at the circuit breaker.
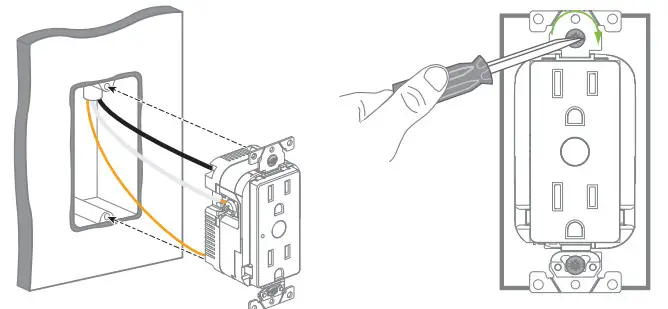
- Work on only one connection at a time.
- Connect wires as shown.NOTE: Wire sizes for Hot and Neutral must be #14-12 AWG. Strip length is marked on the device. Tighten terminal screws to 14 in-lbs (1.6 N-m).

If your backbox looks di erent, consult an electrician
Test and install
- Gently push wires into the wall box. Do not overtighten wall box screws.
- Install wallplate base and snap on Decora wallplate.
- Restore power. Congratulations!Your Z-Wave-enabled outlet is ready to control your fixture.
SmartStart
Your Decora Smart branded outlet is compatible with SmartStart
SmartStart enabled products can be added into a Z-Wave network by scanning the Z-Wave QR Code found on the top of the outlet or the back of the box with a controller providing SmartStart inclusion. No further action is required and the SmartStart product will be added automatically within 10 minutes of being switched on and in the network vicinity.
 The QR Code and DSK is found on the side of the outlet. If required, the pin code is underlined on the label. This image is an example, please use the code found on the product or product packaging.
Add your outlet to a hub
Leviton Decora Smart branded Z-Wave enabled products support two methods of inclusion. When using a Z-Wave Plus certified controller choose Network Wide Inclusion or SmartStart. If network-wide inclusion does not discover your device, try classic inclusion.Network Wide Inclusion to A Z-Wave NetworkModern Z-Wave Plus hubs support network-wide inclusion which allows your device to be included in the network using devices already paired to your home automation hub. Start with the devices closest to the hub and work your way outward.
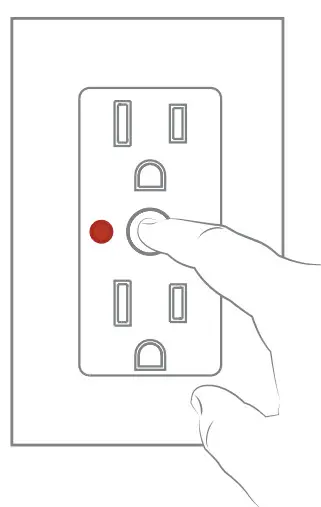
- To enter programming mode, hold the button for 7 seconds. The status light will turn amber. Release and the status light will blink.
- Tap the button 1 time. The status light will quickly flash green.
- The outlet is now ready to learn into the Z-Wave network. Follow directions for the Z-Wave controller to complete the process.
- . Upon successful addition to the network, the status light will turn o and then flash green 4 times. If it was not successfully added to the network, the status light will flash red 4 times.
Classic Inclusion To A Z-Wave Network
For older controllers, Classic Inclusion is supported. Depending on the age of the controller it will need to be 3 to 35 feet from the device when included.
- To enter programming mode, hold the button for 7 seconds. The status light will turn amber. Release and the status light will blink.
- Follow the Z-Wave controller instructions to enter inclusion mode.
- Tap the button one time. The status light will quickly flash green.
- The Z-Wave controller will confirm successful inclusion to the network.
Exclusion From A Z-Wave Network
When removing an outlet from a Z-Wave network, it is best practice to use the exclusion command found in the Z-Wave controller.
- To enter programming mode, hold the button for 7 seconds. The status light will turn amber. Release and the status light will blink.
- Follow Z-Wave controller directions to enter exclusion mode. Tap the top of the paddle 1 time. The status light will quickly flash green.
- The Z-Wave controller will remove the device from the network.
Factory Default
 Factory Default
When removing a device from a network it is best practice to use the exclusion process. In situations where a device needs to be returned to factory default follow the following steps. A reset should only be used when a controller is inoperable or missing.
- After holding the button for 7 seconds, the status light will turn amber. Continue holding the button for another 7 seconds (total of 14 seconds). Light will quickly flash red/amber.
- Release the button and the device will reset.
Customization
Status light setup
Leviton Decora Smart branded Z-Wave enabled devices have a status light. The functionality of this light can be changed.Status Mode: Light on when the load is on.The status light shows the current state of the load:
- To enter programming mode, hold the button for 7 seconds. The locator light will turn amber.
- Tap the button 4 times. The status light will quickly flash green/amber.
- Tap the button 1 time. The status light will flash green 4 times to confirm the selection.
Light on when the load is off.
The status light is used to easily find the outlet in a dark room:
- To enter programming mode, hold the button for 7 seconds.The locator light will turn amber.
- Tap the button 4 times. The status light will quickly flash green/amber.
- Tap the button 2 times. The status light will flash amber 4 times to confirm the selection.
The light is always off.
- To enter programming mode, hold the button for 7 seconds.The status light will turn amber. Release and the status light will blink.
- Tap the button 4 times. The status light will quickly flash green/amber.
- Tap the button 3 times. The status light will flash red 4 times to confirm the selection.
Advanced Options
Leviton Decora Smart branded products are configurable over the Z-Wave network. Compatible Z-Wave controllers can add support for additional advanced options. Consult your Z-Wave controller manufacturer for compatibility with advanced feature support.Status LED Configuration
- Parameter No: 7, Length: 1 Byte
- Valid Values = 0 to 255 (default 255)0 = LED Off254 = Status Mode255 = Locater Mode
Z-Wave Supported Associations
Your outlet supports the following associations: Group Number: 1
- Maximum Nodes: 5
- Name: Lifeline
- Profile: 0x0001
- Command Class: 0x5A01, 0x2503 and Ox8703
Additional Supported Z-Wave Classes
In addition to the standard Z-Wave Commands, your outlet supports:
| Z-WAVE PLUS INFO | ASSOCIATION |
| ASSOCIATION GRP INFO | S2 SECURITY |
| S0 SECURITY | VERSION |
| MANUFACTURER-SPECIFIC | CONFIGURATION |
| DEVICE RESET LOCALLY | POWERLEVEL |
| SWITCH BINARY | BASIC |
| SCENE ACTUATOR CONF | SCENE ACTIVATION |
| TRANSPORT SERVICE | FIRMWARE UPDATE MD |
| SUPERVISION | INDICATOR |
| MULTI-CHANNEL ASSOCIATION |
Safety First
 Safety First
WARNING: TO AVOID FIRE, PERSONAL INJURY OR DEATH DO NOT USE for the control of high power heating appliances such as portable heaters. There can be unexpected consequences if not used with care. For example, an empty co ee pot can be remotely turned on. If that should happen, your co-ee pot could be damaged from overheating. If an electric heater is turned on by remote control while clothing is draped over it, a fire could result. This module will not control lighting that is used with electronic low-voltage and high-frequency power supply transformers, nor high-pressure discharge lamps (HID lighting). This includes mercury vapor, sodium vapor, and metal halide lamps.WARNINGS:
- This product is to be installed and/or used in accordance with electrical codes and regulations.
- Indoor use only.
- If you are unsure about any part of these instructions, consult an electrician.
- Turn off power at the circuit breaker when servicing.
- Save this instruction sheet. It contains important technical data along with testing and troubleshooting information which will be useful after installation is complete.
ADDITIONAL RATINGS:
- Purpose of control: Operating Control
- Action Control Type: 1
- Pollution Degree: 2
- Impulse Voltage: 2500V
Limited 2 Year Warranty
For Leviton’s limited product warranty, go to www.leviton.com. For a printed copy of the warranty, call 1-800-824-3005.
FOR CANADA ONLYFor warranty information and/or product returns, residents of Canada should contact Leviton in writing at Leviton Manufacturing of Canada Ltd to the attention of the Quality Assurance Department, 165 Hymus Blvd, Pointe-Claire (Quebec), Canada H9R 1E9 or by telephone at 1-800-405-5320.FCC COMPLIANCE STATEMENTThe enclosed device complies with Part 15 of the FCC Rules. Operation is subject to the following two conditions: (i.) This device may not cause harmful interference (ii.) This device must accept any interference received, including interference that may cause undesired operation. Any changes or modifications not expressly approved by Leviton could void the user’s authority to operate this equipment. This equipment has been tested and found to comply with the limits for a Class B digital device, pursuant to part 15 of the FCC Rules. These limits are designed to provide reasonable protection against harmful interference in a residential installation. This equipment generates uses and can radiate radio frequency energy and, if not installed and used in accordance with the instructions, may cause harmful interference to radio communications. However, there is no guarantee that interference will not occur in a particular installation. If this equipment does cause harmful interference to radio or television reception, which can be determined by turning the equipment o and on, the user is encouraged to try to correct the interference by one or more of the following measures:
- Reorient or relocate the receiving antenna.
- Increase the separation between the equipment and receiver.
- Connect the equipment into an outlet on a circuit di erent from that to which the receiver is connected.
- Consult the dealer or an experienced radio/TV technician for help.
FCC CAUTION
Any changes or modifications not expressly approved by Leviton Manufacturing Co., Inc., could void the user’s authority to operate the equipment.FCC SUPPLIER’S DECLARATION OF CONFORMITY: Model ZW15R outlet is manufactured by Leviton Manufacturing Co., Inc., 201 N. Service Rd., Melville, NY 11747. www.leviton.com. This device complies with part 15 of the FCC Rules. Operation is subject to the following two conditions: (1) This device may not cause harmful interference, and (2) this device must accept any interference received, including interference that may cause undesired operation.IC STATEMENTThis device complies with Industry Canada license-exempt RSS standard(s). Operation is subject to the following two conditions: (1) this device may not cause interference, and (2) this device must accept any interference, including interference that may cause undesired operation of the device.RF EXPOSURE AND CO-LOCATION: To comply with FCC OET Bulletin 65 and ISED RF exposure limits for the general population and uncontrolled exposure, this device shall be installed and operated with a minimum distance of 7.9 inches (20 cm) between the radiator and your body. Also, must not be co-located or operated in conjunction with any other antenna or transmitter.Copyright and Trademark InformationThe Leviton logo, Decora Smart and Decora are registered trademarks of Leviton Manufacturing Co., Inc. in at least the United States, Canada, and Mexico. Z-Wave and Z-Wave Plus have registered trademarks of Silicon Labs and its subsidiaries in the U.S., Mexico, Argentina, Brazil, and other countries. Use herein of other third-party trademarks, service marks, trade names, brand names, and/or product names are for informational purposes only, are/may be the trademarks of their respective owners; such use is not meant to imply affiliation, sponsorship, or endorsement. No part of this document may be reproduced, transmitted or transcribed without the express written permission of Leviton Manufacturing Co., Inc.Copyright 2020 Leviton Mfg. Co., Inc.
If you need help…![]() CALL 1-800-824-3005 (USA) 1-800-405-5320 (Canada)ONLINE decorasmartsupport.leviton.comCHAT www.leviton.com/contactus
CALL 1-800-824-3005 (USA) 1-800-405-5320 (Canada)ONLINE decorasmartsupport.leviton.comCHAT www.leviton.com/contactus![]() EMAIL [email protected]
EMAIL [email protected]
 report this ad
Leviton Manufacturing Co., Inc.201 North Service Road, Melville, NY 11747Telephone: 1-800-824-3005 Visit Leviton’s website at www.leviton.com© 2020 Leviton Manufacturing Co., Inc.All rights reserved. Specifications are subject to change at any time without notice.DG-000-ZW15R-02A
[xyz-ips snippet=”download-snippet”]