Mooer Studio SoftwareUser Manual
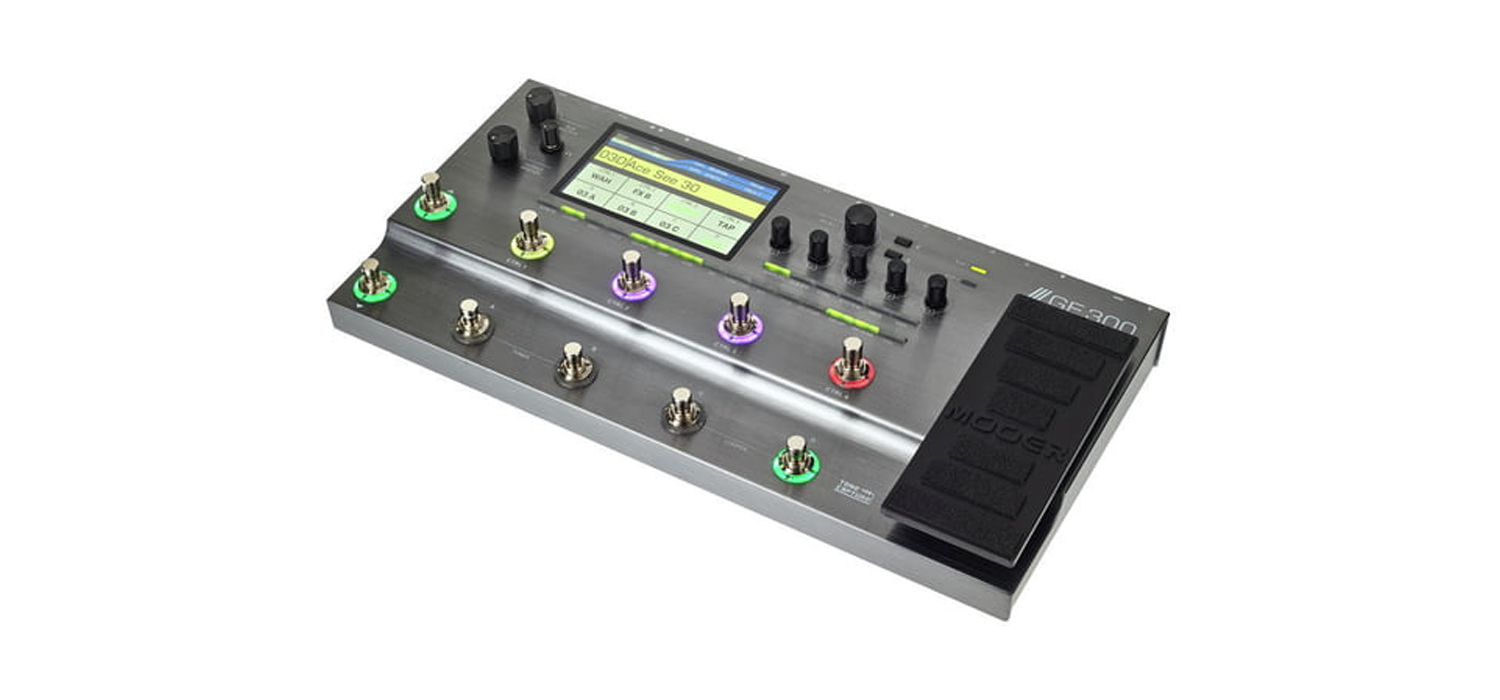
GE300
Introduction
MOOER Studio for GE300 is the editor software for the GE300. This software supports Win7 and higher or Mac OS V. 10.10 and higher.
Users can edit preset parameters, manage preset patches, import/export files (Including preset files, LOOPER files and impulse response files), as well as performfirmware updates.
We recommend reading this manual carefully before using the Studio software.
Download and Install
Enter the official MOOER website: , click on SUPPORT-DOWNLOADS, and select the relevant software depending o www.mooeraudio.com n your computers operating system.OS requirements:Windows – Win7 and higherMac OS – Mac OS 10.10 and higherDownload the software, unzip it, and open it to install.
Connection
After the MOOER studio is installed successfully, connect the GE300 with a computer via the USB cable that comes with the unit. Please open the software afterthe GE300 boots up successfully.Please follow the instructions below if the connection fails
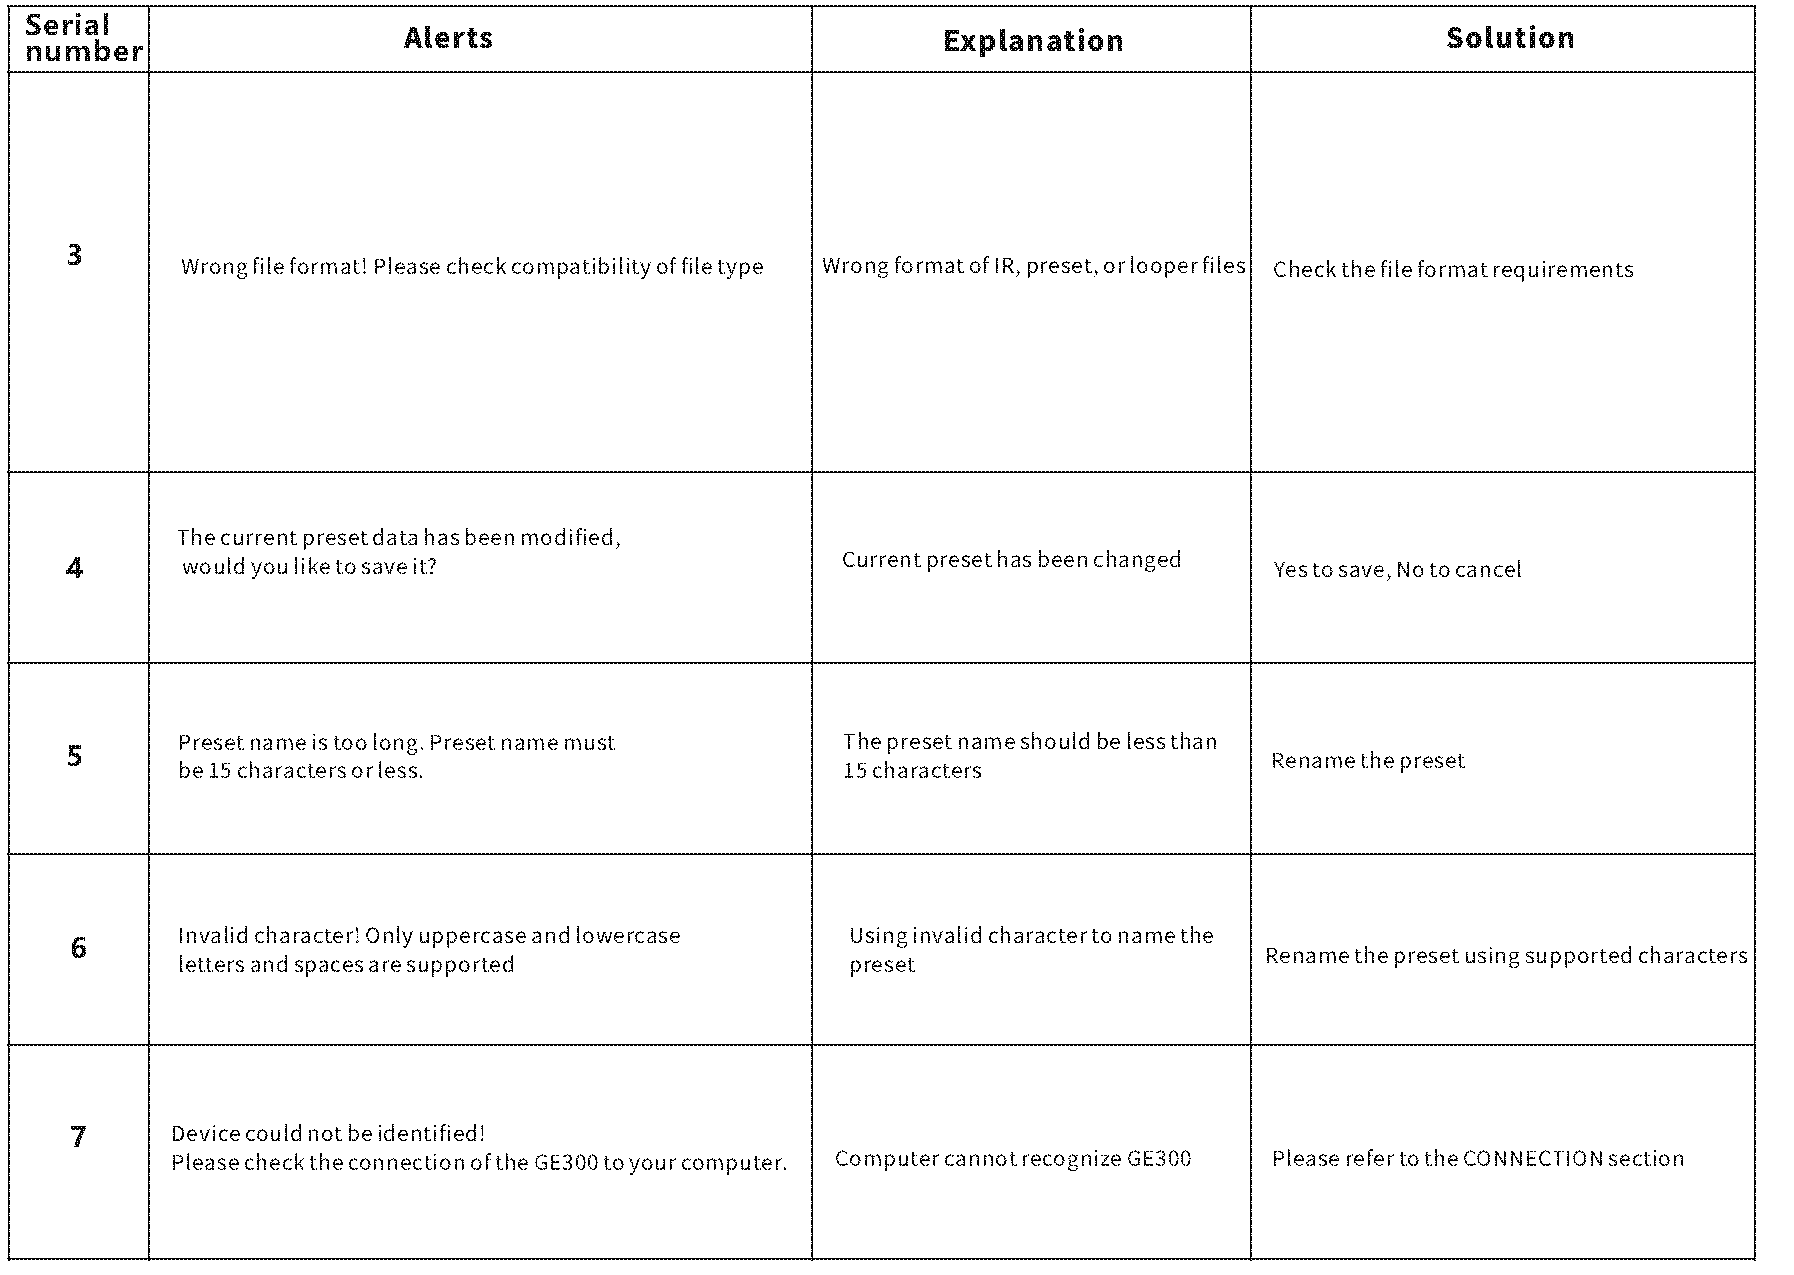
- Warning“ Device could not be identified! Please check the connection of the GE300 to your computer.”a. Check that the USB cable, GE300, and your computer are all functioning normally.b. Try to use another USB port, some USB ports cannot support GE300.c. Ensure to boot up the GE300 before opening the editor software.
- Warning“ Device versions do not match. Please update the firmware of Ge300”
It means the software version does not match the firmware version of the GE300. Please update the firmware of your GE300 before using the editor software.
Please refer to the FIRMWARE UPDATE section.If those recommendations do not work, please contact
Interface Overview
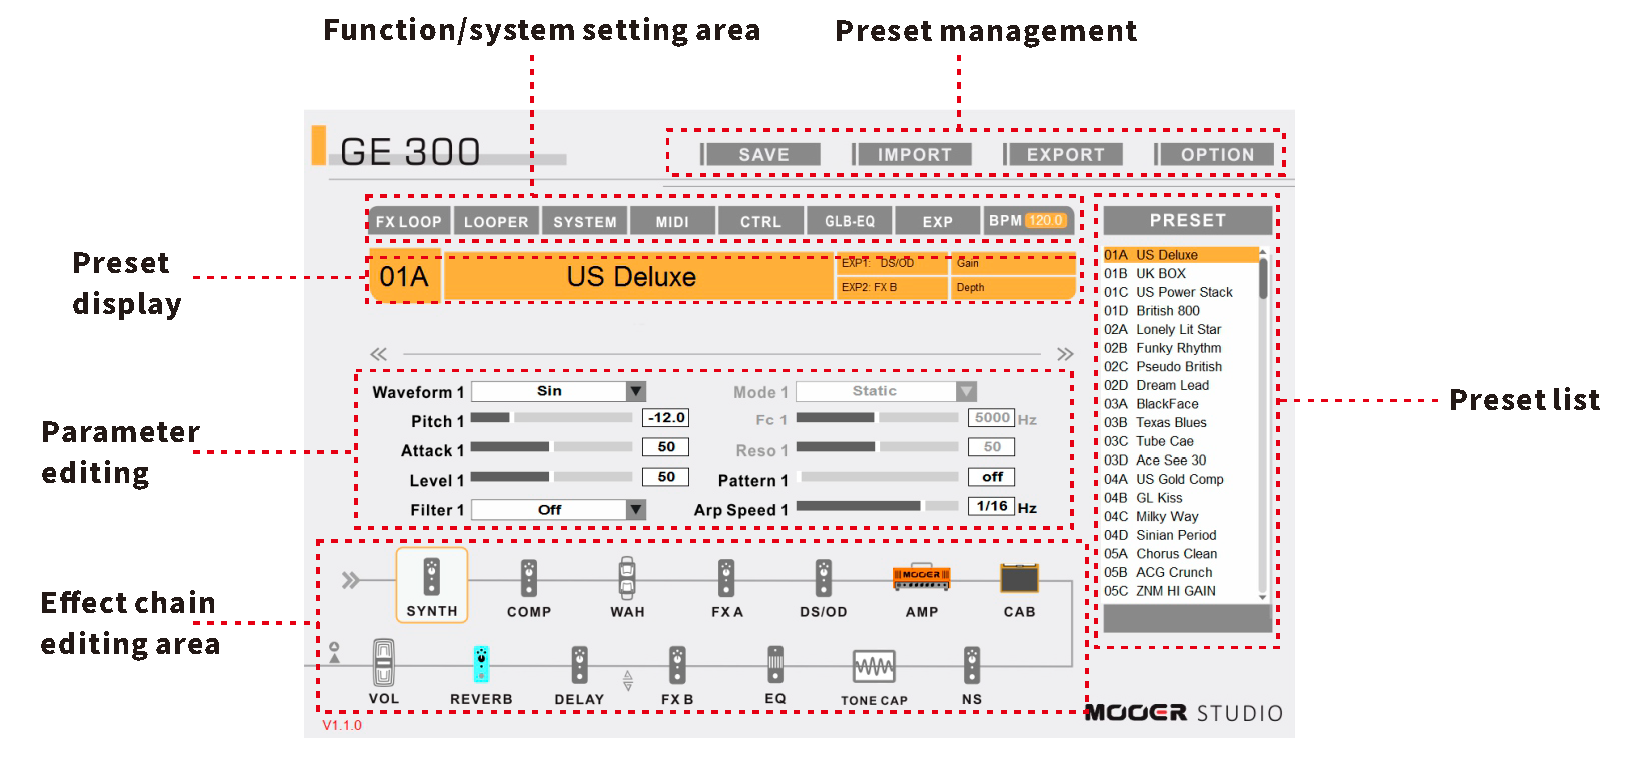
- Preset list: You can select preset patches by clicking on them. GE300 will change presets simultaneously.
- Preset management: Preset saving and import/export preset files between the GE300 and computer.
- Function/system setting area: System setting, FX LOOP, LOOPER, CTRL footswitch, and other functions can be edited here.
- Preset display: Display the basic information of current preset.
- Parameter editing: Adjust the parameters of current effect block.
- Effect chain editing area: Edit the order of selected effect chain and adjust output port.
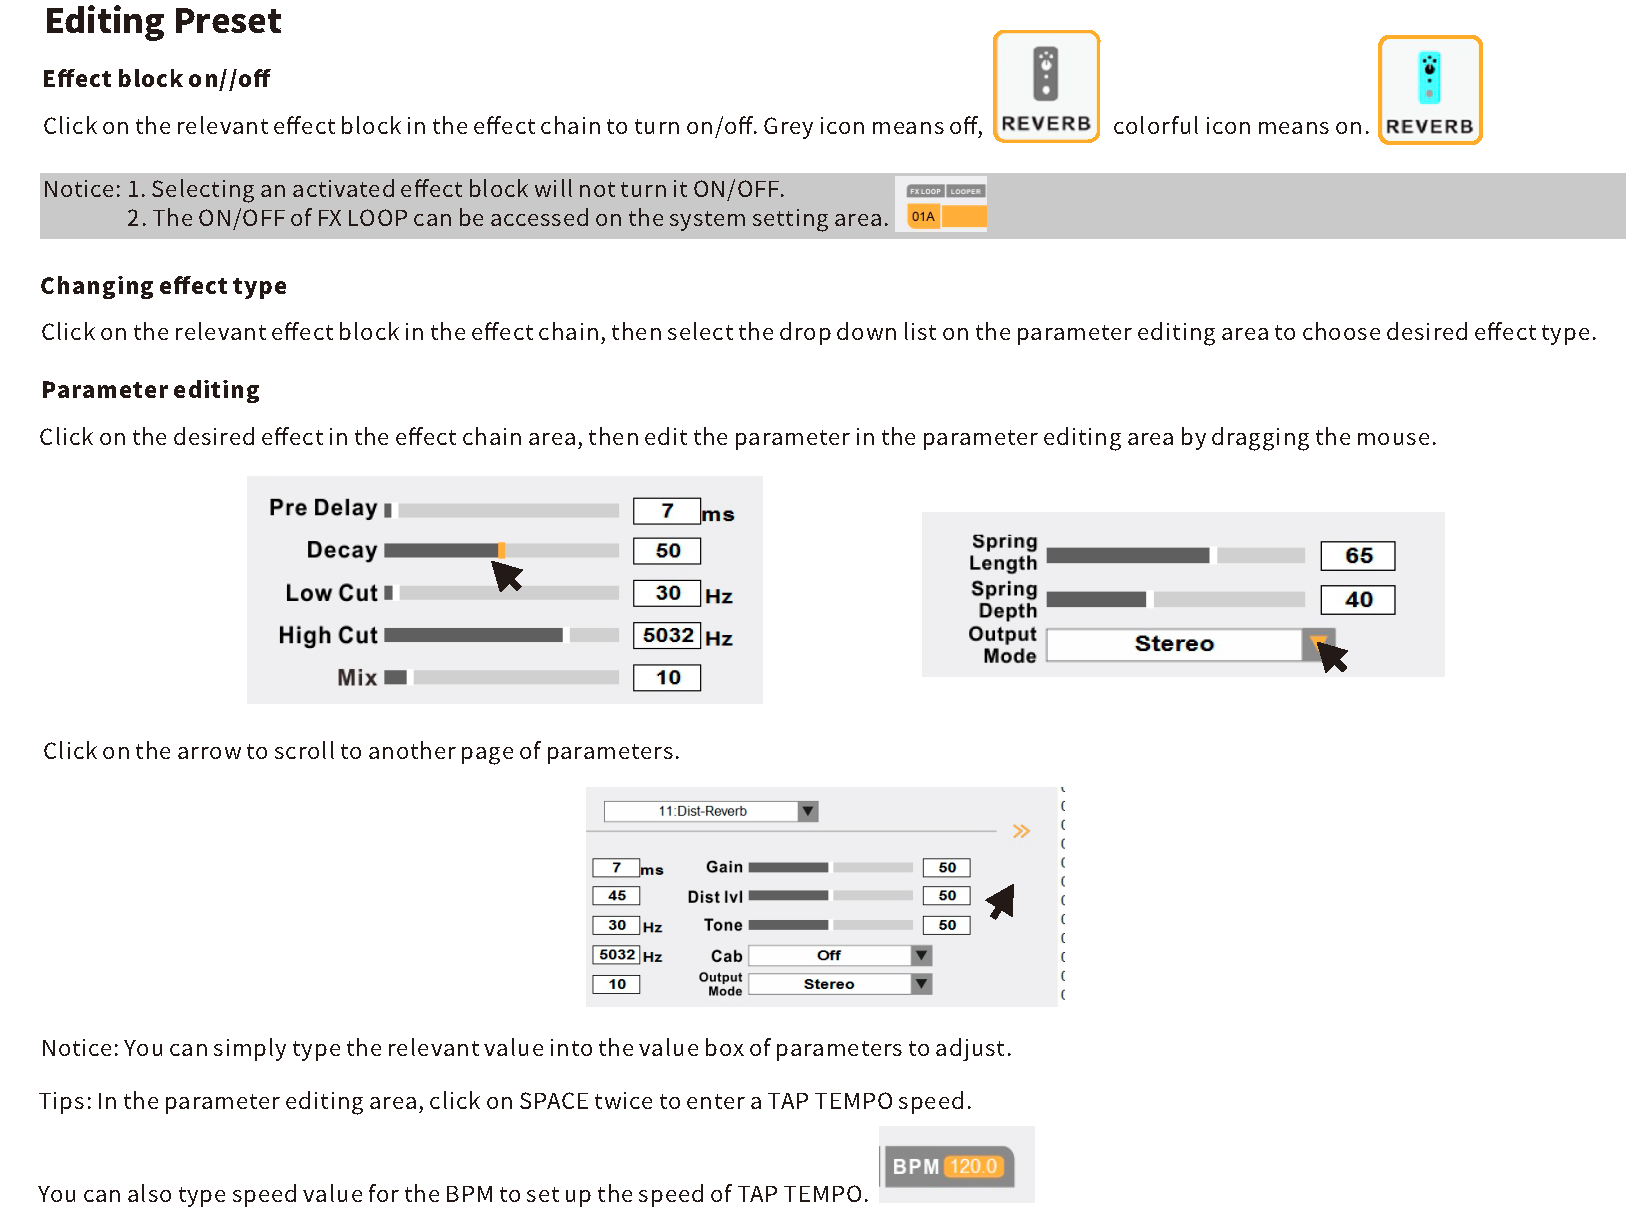
Preset Editing and Saving


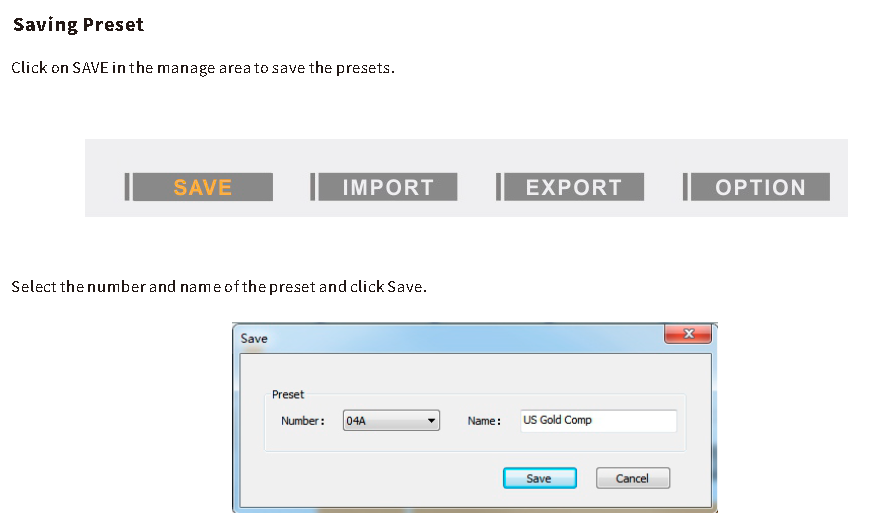
Preset Management
1. Export single preset
Windows
- Select a preset you wish to export
- Click on EXPORT in the management area
- Select an address to save
- Enter the relevant address and preset file in.mo format
Mac
- Click on EXPORT in the management area
- Select a preset you wish to export
- Select a location to save
2. Export presets pack
Windows
- Utilize the CTRL key and mouse left click to select more than one preset. dick on the first preset you wish to export, press and hold SHIFT to select another preset below. Use CTRL+A to select all presets.
- Click on EXPORT.
- Select a location to save preset.
- Save preset file in .mo format.
Mac
- Click on EXPORT in the management area.
- Utilize the COMMAND and mouse left click to select presets. Click on the first preset you wish to export, press and hold SHIFT to select another preset below. Use COMMAND+A to select all the presets.
- Click on EXPORT.
- Select a location to save preset.
- Presets pack will be stored into GE300 automatically
Tip: If you would like to adjust the order of presets, you can adjust it by renaming presets. For example, rename“ 01A-US Deluxe.mo”to“11A-US Deluxe.mo”, then the preset will be changed from 01A to 11A. Please keep the preset format as“ 00A-NAME.mo”, otherwise the editor software cannot recognize it.
Notice:
- If the number in the name of serial preset files are the same, only the last preset file will be exported.
- The preset files for GE300 cannot be shared with other MOOER devices. We recommend saving files in separate locations if you own more than one MOOER device.
TONE CAPTURE File Import/Export
The GE300 has 50 empty slots for storing user’s TONE CAPTURE files. Editor software V1.2.0 and above supports TONE CAPTURE import/export function.
TONE CAPTURE is included in the preset file.
Importing or saving over a preset with a preexisting TONE CAPTURE file may cause one of the following errors:
Importing single preset with TONE CAPTURE
- Warning:“ Do you want to replace the TONE CAPTURE file included by the preset?”
- Replace: Import the new TONE CAPTURE file to replace the old one.
- Save as: Change the import TONE CAPTUE file to another slot.“ Null” designates an empty slot,“ User” slot means a TONE CAPTURE file already exists.
Import presets pack with TONE CAPTURE
- Warning:“ TONE CAPTURE file already exists, please select an option.”
- Replace: Replace all the TONE CAPTURE files with the new files.
- Skip: Skip slots with preexisting TONE CAPTURE files.
- Cancel: Cancel operation.
Notice:
- When importing TONE CAPTURE files, you can choose to“ Replace” or“ Save as” TONE CAPTURE files to a slot with a preexisting TONE CAPTURE file.
- We recommend importing TONE CAPTURE files one by one so that you can know which TONE CAPTURE file should be replaced. Otherwise, the processwill be canceled.
IRs Import/Delete

LOOPER file Import/Export
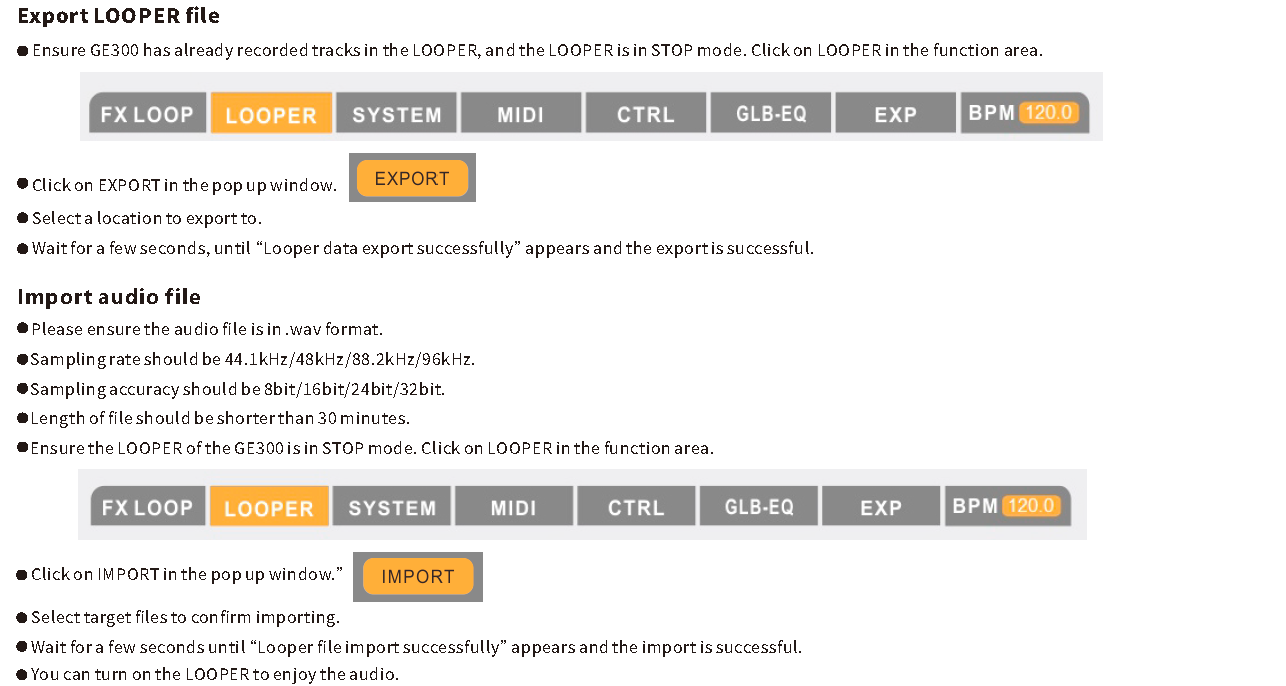
Notice:
- The length of import time depends on the size of audio file. You may need to wait for more time if the file is large.
- “ Looper data is empty, cannot export”, means the LOOPER track is empty.
- LOOPER files cannot be exported if the LOOPER is not in STOP status.
- During import/export of LOOPER files, GE300 cannot access other operations.
- If you import LOOPER files when GE300 already has LOOPER files,“ Looper data already exists, would you like to import another file? Click“ YES“ to confirm replacing the old LOOPER file, or“ NO” to cancel.
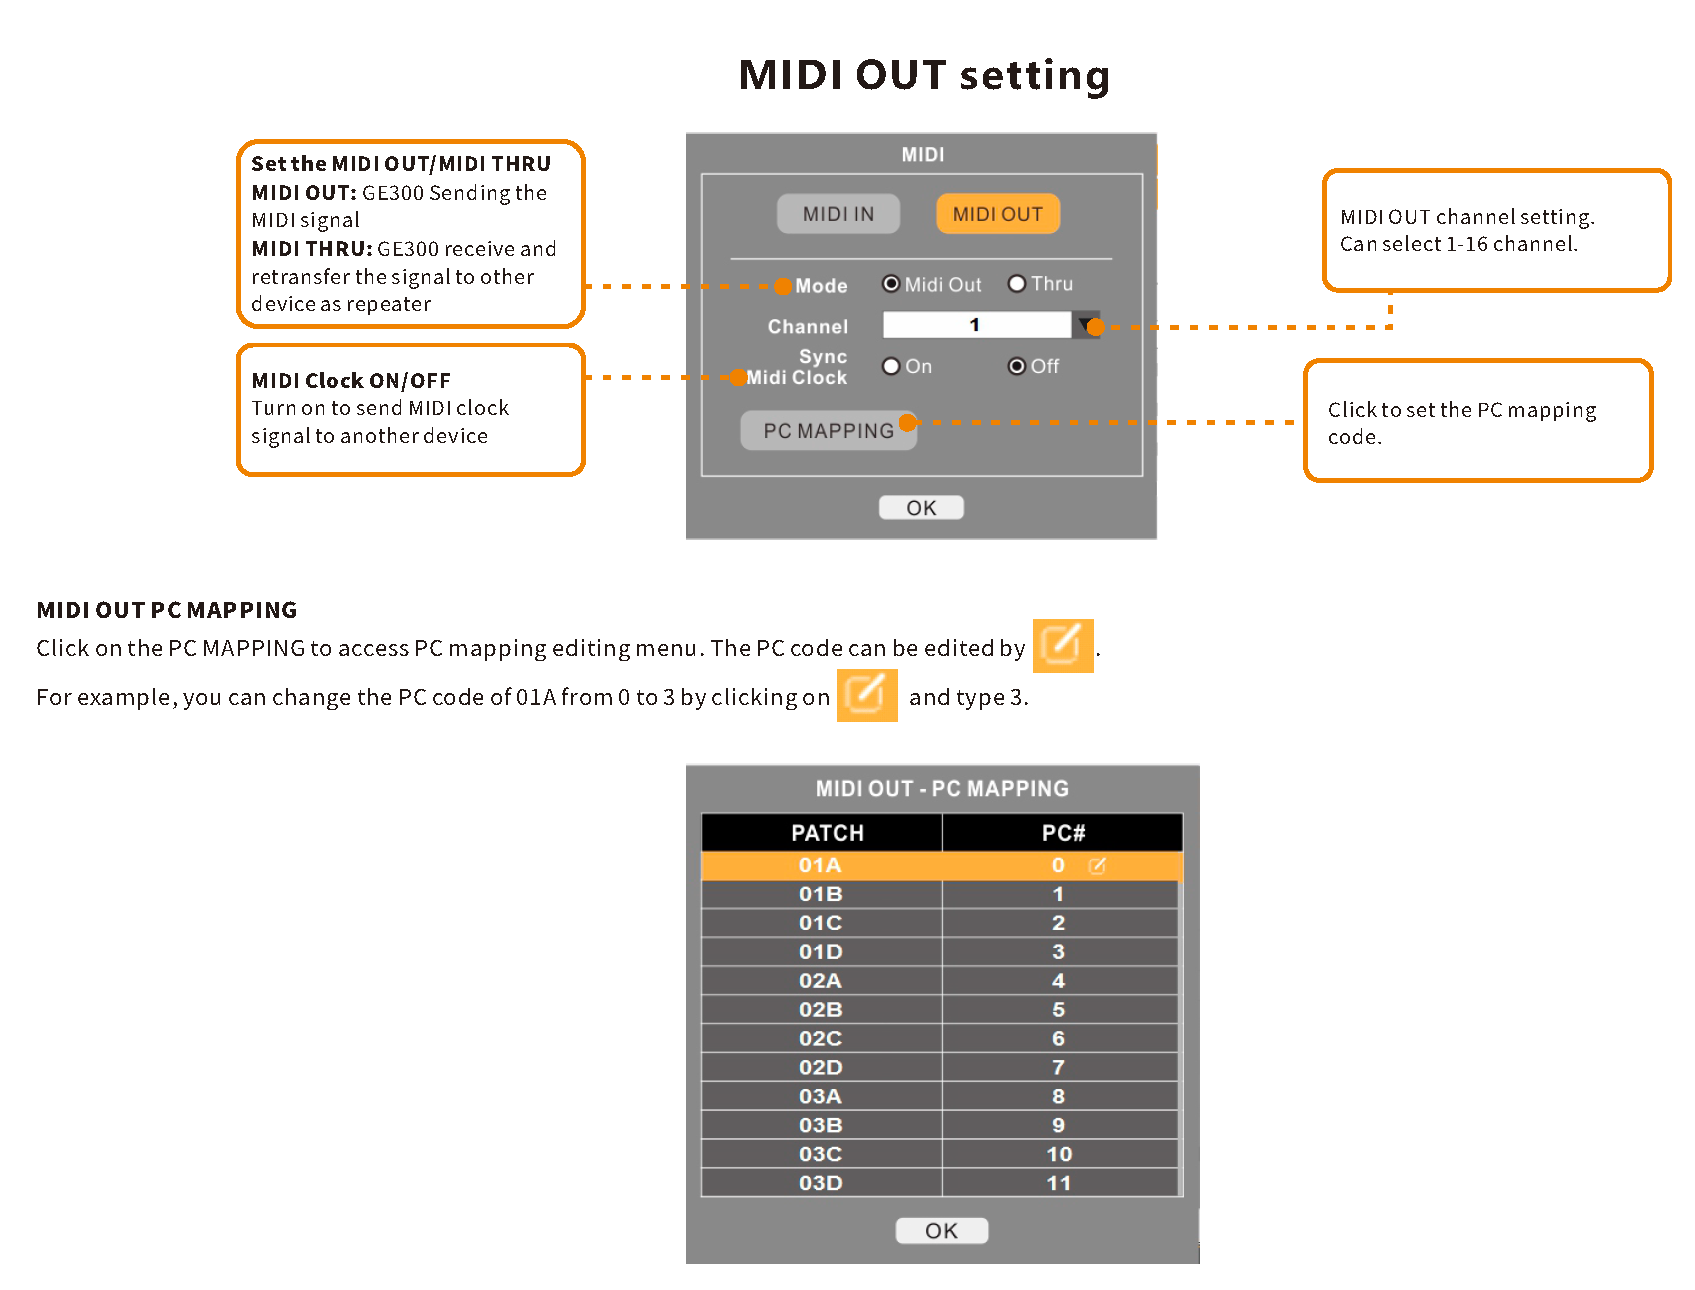
MIDI Setting

Firmware Update
Users can use the MOOER STUDIO for GE300 to update the firmware of their GE300.
Note: Please backup all presets before updating the firmware to prevent unexpected issues during the update that could cause the deletion of preset files.
- Download the software from www.mooeraudio.com , SUPPORT-DOWNLOADS.
- Unzip the file and install the software. We recommend not connecting the GE300 to your computer before the install finishes.
- Power off GE300, connect GE300 to computer after the software has installed successfully.
- Press and hold B + D footswitches simultaneously. Power on GE300, hold the B + D footswitches until it has booted to UPDATE mode.
- Open the software and click on START to start updating. It will take a few minutes to finish.
- After the update is done successfully, the GE300 will reboot automatically. The firmware version will be shown on the start screen.Then you can import those preset files to enjoy.


MOOER
www.mooeraudio.comSHENZHEN MOOER AUDIO CO. LTD6F, Unit D, Jinghang Building, Liuxian 3rd Road, Bao’an 71 District, Shenzhen, China. 518133
References
[xyz-ips snippet=”download-snippet”]