![]()
Remote Speaker MicrophoneNNTN8235, NNTN8236, PMMN4024, PMMN4040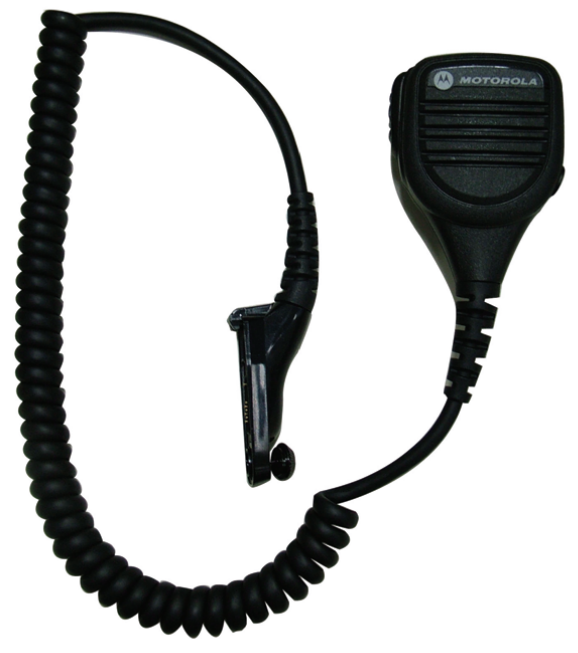
FOREWORD
Product Safety and RF Exposure Compliance Before using this product, read the operating instructions for safe usage contained in the Product Safety and RF Exposure booklet enclosed with your radio.ATTENTION!The RSM, when attached to the radio, is restricted to occupational use only to satisfy FCC RF energy exposure requirements. Before using this product, read the RF energy awareness information and operating instructions in the Product Safety and RF Exposure booklet enclosed with your radio to ensure compliance with RF energy exposure limits. For information regarding radio use in a hazardous atmosphere, please refer to the Factory Mutual (FM) Approval Product Listing, which is included with radio models that offer this capability.
DESCRIPTION
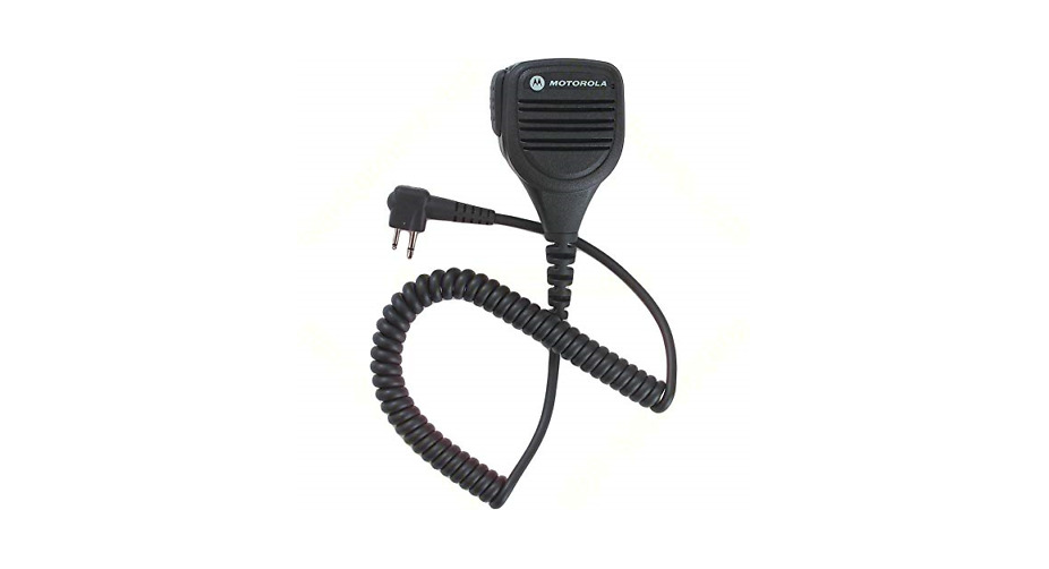
The NNTN8235, NNTN8236, PMMN4024 and PMMN4040 Remote Speaker Microphones (RSMs) provide convenient means of communicating by having a speaker, a microphone, and a PTT in a single, hand-held or clip-on accessory. The NNTN8236 and PMMN4024 also include a 3.5 mm audio jack to accept secondary receiver audio accessories.
OPERATION
Attaching the RSM to the Radio
- Turn the radio off.
- Remove the universal connector seal from the side of the radio and attach the RSM.
- Turn the radio on.
Wearing the RSM (See Figure 1)For optimum performance from your RSM, wear the radio and RSM so that the accessory cord does not cross over or touch the antenna. Also, try to wear the radio and accessory combination fairly close to each other to avoid strain on the accessory connector.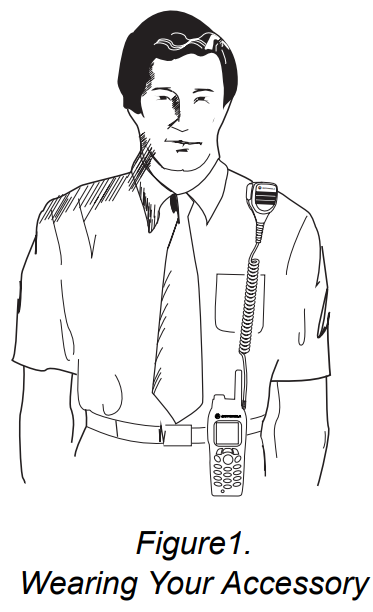
ReceivingWhen the RSM is connected to the radio accessory connector, the radio’s speaker is muted, and the audio is only heard from the RSM speaker. Similarly, when a secondary receiver audio accessory is plugged into the 3.5 mm audio jack, audio to the RSM is rerouted to the secondary accessory.TransmittingTo transmit using your RSM:
- Press and hold the Push-To-Talk (PTT) button on the RSM.
- Speak into the RSM.
- Release the PTT when finished.Note: Connecting the RSM to the radio does not disable the radio’s microphone and PTT.
REMOVING THE RSMTurn the radio off before removing the RSM from the radio. Remember to reattach the radio accessory connector seal to the side of the radio when an accessory is not being used.SERVICE AND WARRANTYOther than the replaceable cable assembly and clip, the NNTN8235, NNTN8236, PMMN4024, and PMMN4040 RSMs are not repairable.The following optional accessories and replacement parts are available for order from Motorola’s Radio Products and Services Division (RSPD).
| Part Number | Description |
| 4205823V01 | Short swivel clip |
| RLN6074 | Replacement coil cord |
| RLN4885 | Receive-only foam-covered earbud. |
| WADN4190 | Receive-only flexible earpiece. |
| PMLN4620 | D-Shell Style receive-only earpiece |
| RLN4941 | Receive-only earpiece with translucent tube and rubber ear tip |
| RLN4760 (S-right) RLN4761 (M-right) RLN4762 (L-right) RLN4763 (S-left) RLN4764 (M-left) RLN4765 (L-left) | Clear and comfortable earpieces for use with RLN4941 listed above. These earpieces are alternatives to the standard rubber ear tip and are available in Small, Medium, and Large; for the Left or Right Ear. |
Note:
- Some accessories stated above may have a regional prefix attached to the part number. (i.e. MDRLN4885)
- Parts RLN4885, WADN4190, PMLN4620, and RLN4941 are not applicable for the NNTN 8235 and PMMN4040 RSM.
MOTOROLA, MOTO, MOTOROLA SOLUTIONS, and the Stylized M Logo are trademarks or registered trademarks of Motorola Trademark Holdings, LLC and are used under license. All other trademarks are the property of their respective owners. © 2006, 2011 Motorola Solutions, Inc. All rights reserved.![]()

[xyz-ips snippet=”download-snippet”]