![]()
Neomounts D025BLACK CPU Holder Instruction Manual
CPU-D025BLACK
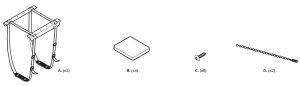
PARTS
Installation
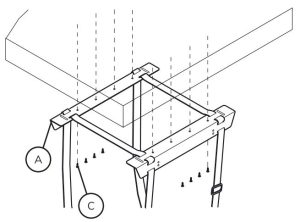
STEP 1
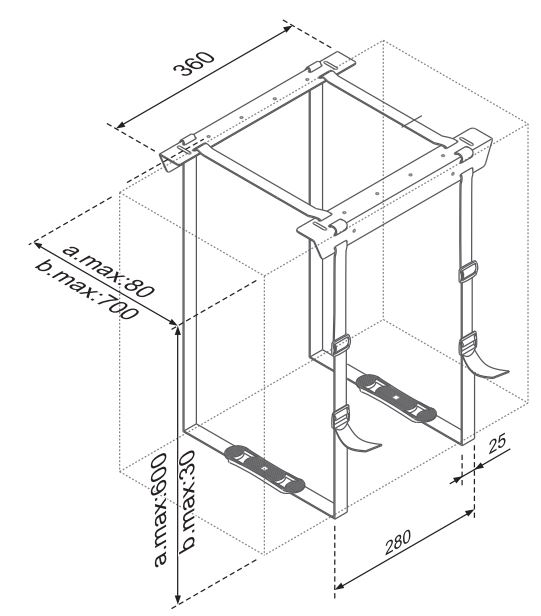
Install the PC holder under the desk
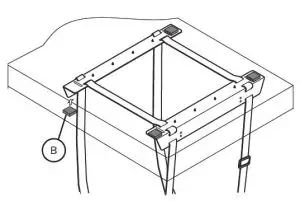
STEP 2
Place the protective strips
STEP 3
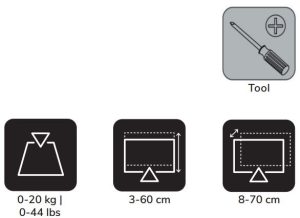
Place the PC and adjust depth if necessary

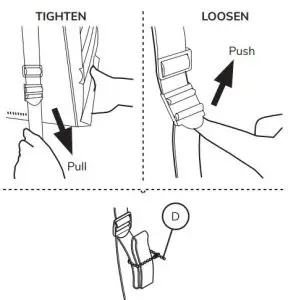
STEP 4
Adjust the mount to your desired position
![]() CAUTION
CAUTION
- To ensure safety, please read this manual carefully before installation and follow the instructions. Store this manual in a secure place for future reference.
- The manufacturer shall not be legally responsible for any equipment damage or personal injury caused by incorrect installation or operation other than that covered in this manual.
- The mount is designed for easy installation and removal. The manufacturer shall not be liable for damage to equipment or personal injuries arising out of human factors or acts of nature, such as earthquake or typhoon.
- It is recommended that the mount be installed by qualified personnel only.
- At least two persons are needed to install or remove the product to avoid the hazard of falling objects.
- Please carefully inspect the area where the mount is to be installed: – Avoid places that are subject to high temperatures, humidity or contact withwater – Do not install the product near air conditioning vents or areas with excess dust and fumes. – Only install on vertical walls and avoid slanted surfaces. – Do not install in places subject to any shock or vibration. – Do not install in places subject to direct exposure to bright light, as it may cause eye fatigue when viewing the display panel.
- Maintain sufficient space around the display to ensure adequate ventilation.
- To ensure safe installation, first check the structure of the wall, ceiling or floor and select a secure mounting location.
- The wall, ceiling or floor should be strong enough to sustain a weight of at least four times of the display and mount combined. The mounting location must be able to withstand earhquake or other strong shock.
- Do not modify any accessories or use broken parts. Contact your deale
- Tighten all screws (do not exert excessive force to avoid breaking the screw or damaging its thread).
- Drill holes and bolts will be left in the wall, ceiling or floor once the display and bracket are removed. Stains may occur after extended use.
- Since the manufacturer has no way to control the wall, ceiling or floor type and installation of the mount, the warranty of the product shall only cover the body of the mount. The warranty period of the product is 5 years.
- Please consult the English language manual for any dispute on conditions.
References
[xyz-ips snippet=”download-snippet”]