![]()

PAX1800 Quick Start Guide
INTRODUCTION
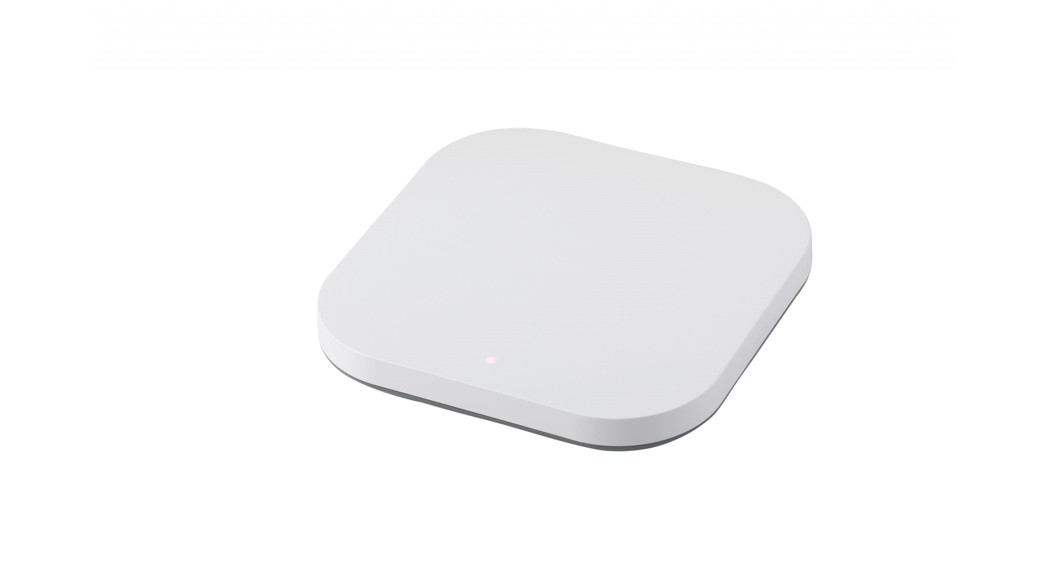
Thank you for purchasing the PAX1800, a WiFi 6 AP.This Quick Start Guide is designed to guide you through the installation process.
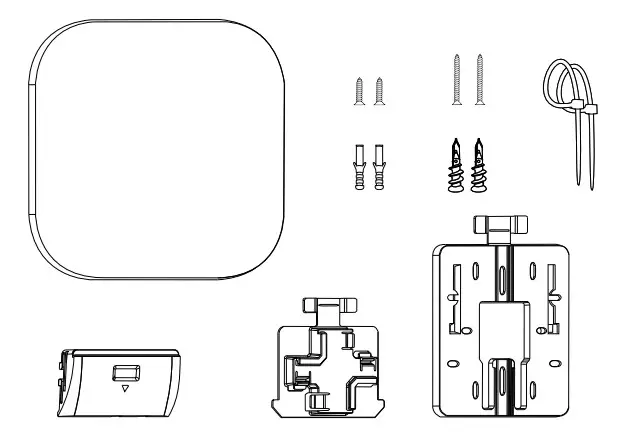
PACKAGE CONTENTS
- Access Point
- Mounting options (ceiling, wall, pole, t-rail)
- Closed cable housing lid
- Screws and screw plugs for various surfaces
- Cable ties
https://www.plasma-cloud.com/product-detail/pax1800/
CLOUD MANAGEMENT
- Sign up at console.plasma-cloud.com.
- Create your first organization by navigating to Organisations → Create a new organization. Fill in the form and click Create.
- You can now create your first network. Navigate to Networks → Create a new network, fill in the form and click Create.
- Setup your network by navigating to Settings → Network.
- Create and configure your first SSID by navigating to Settings → SSIDs → Create a new SSID.
- Go back to Overview and click on the map to add your first Access Point. The last point can be repeated to add as many Access Points as needed.
You can now plug in your Access Point and connect it to the Internet. The Plasma Cloud configuration only takes a few seconds!
PHYSICAL INSTALLATION
This Access Point is designed to be installed virtually anywhere and can operate between 0°C ~ 40°C (32°F ~104°F).It comes with a set of mounting options that can be used to install this device on various surfaces such as: ceilings, walls, poles, and T-rails of various sizes.This Access Point can be powered by:
- a 12V/2A DC power adapter*
- a 48-54V/0.5A PoE injector (802.3at)**

* The output shall comply with the requirement of SELV of IEC 60950-1 or ES1 of IEC 62368-1 and in compliance with the requirements of the limited power source of IEC 60950-1 and IEC 62368-1. Connect dealer or distributor for standard PS.** All ethernet cables are designed for intra-building connection to other equipment. Do not connect these ports directly to communication wiring or another wiring that exits the building where the appliance is located.
T-RAIL MOUNTING

Slide the T-rail mount into the slot of the Access Point.
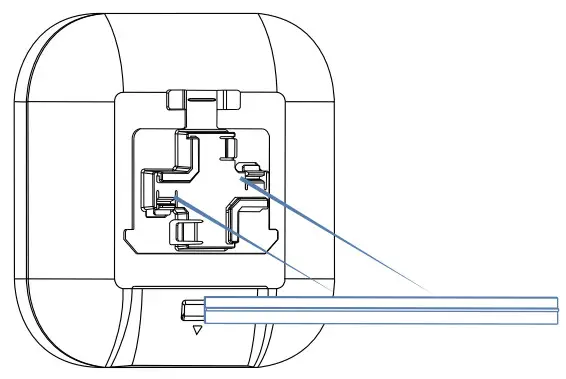
Hook the stationary end of the mount bracket to the T-rail.

Your Access Point is now safely clipped to cthe T-rail.
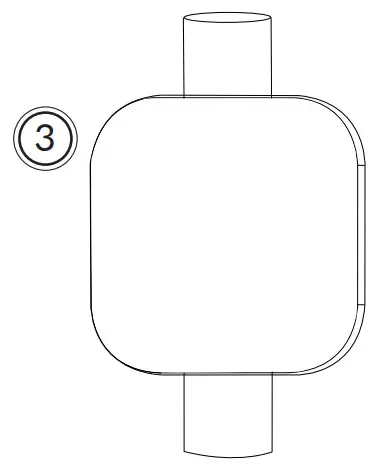
MOUNTING BRACKET OVERVIEW

WALL MOUNTING

Use the provided screws and screw plugs to fix the mounting plate on the wall.
 Slide the Access Point over the mounting plate.
 Your Access Point is now safely attached to the wall.
SUPPORT
Feel free to visit https://support.plasma-cloud.com for additional technical guidance or to contact our support department.
©2020 Plasma Cloud Ltd. All Rights reserved5/F Yat Chau Building, 262 Des Voeux Road Central, Hong Kongwww.plasma-cloud.com
The software included in this product contains copyrighted software that is licensed under GPL.A copy of that license, along with instructions on how to obtain the source code, is available athttps://www.gnu.org/copyleft/gpl.html
POLE MOUNTING

Slide the cable ties through the mounting plate and fasten them around the pole.
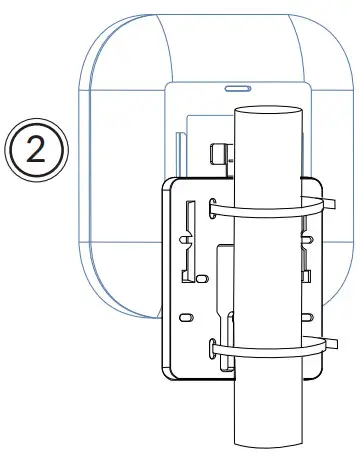
Slide the Access Point over the mounting plate.
Your Access Point is now safely tied to the pole.
FCC COMPLIANCE NOTICE
Any changes or modifications not expressly approved by the party responsible for compliance could void your authority to operate the equipment.Note: This equipment has been tested and found to comply with the limits for a Class B digital device, pursuant to part 15 of the FCC Rules. These limits are designed to provide reasonable protection against harmful interference in a residential installation. This equipment generates, uses, and can radiate radio frequency energy and, if not installed and used in accordance with the instructions, may cause harmful interference to radio communications. However, there is no guarantee that interference will not occur in a particular installation. If this equipment does cause harmful interference to radio or television reception, which can be determined by turning the equipment off and on, the user is encouraged to try to correct the interference by one or more of the following measures:
- Reorient or relocate the receiving antenna.
- Increase the separation between the equipment and receiver.
- Connect the equipment into an outlet on a circuit different from that to which the receiver is connected.
- Consult the dealer or an experienced radio/TV technician for help.
This equipment complies with FCC RF radiation exposure limits set forth for an uncontrolled environment. This equipment should be installed and operated with a minimum distance of 20 centimeters between the radiator and your body.
IC COMPLIANCE NOTICE
IC statement: CAN ICES-003(B)/NMB-003(B)This product meets the applicable Innovation, Science, and Economic Development Canada technical specifications.This device complies with Industry Canada’s license-exempt RSSs.Operation is subject to the following two conditions:
- This device may not cause interference; and
- This device must accept any interference, including interference that may cause undesired operation of the device.
This device complies with the ISED radiation exposure limit set forth for an uncontrolled environment. This device should be installed and operated with a minimum distance of 22 cm between the radiator & your body. This transmitter must not be co-located or operating in conjunction with any other antenna or transmitter.
CE COMPLIANCE NOTICE
This equipment complies with EU radiation exposure limits set forth for an uncontrolled environment. This equipment should be installed and operated with a minimum distance of 20 cm between the radiator and your body.

The marking information is located at the bottom of the apparatus.
PRIVACY NOTES
 report this ad
For our customer privacy policy, please visit:
 https://www.plasma-cloud.com/customer-policy/
References
[xyz-ips snippet=”download-snippet”]