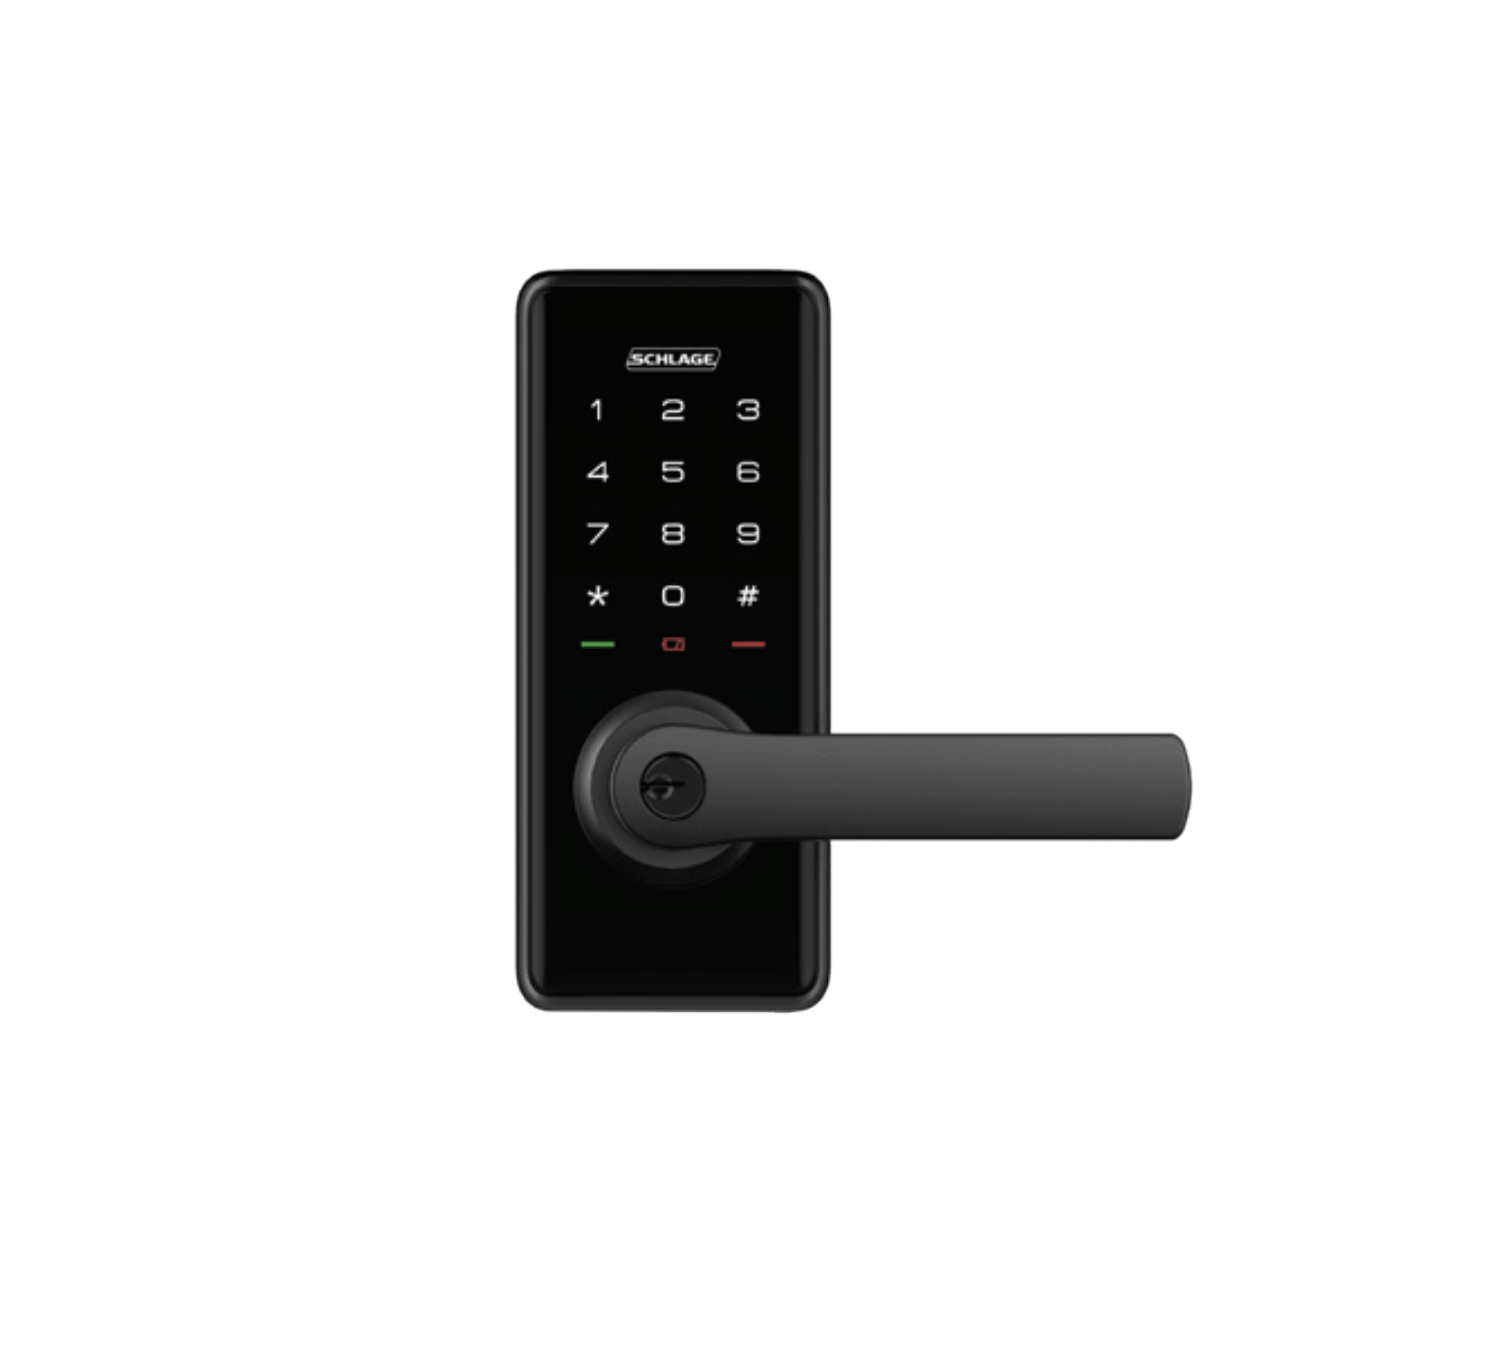
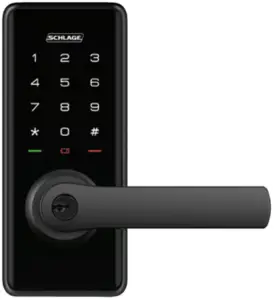
Schlage Ease S2
Parts
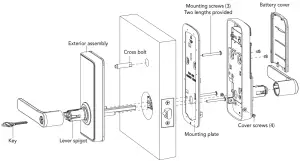
Also includes (not shown):a) Strike plate & screwsb) 4 x AA Alkaline batteries
Exterior assembly
Interior assembly

 |
Master and User PIN codes have 4-10 digits.The default master PIN code is [12345678].Please change it prior to programming of the lock. |
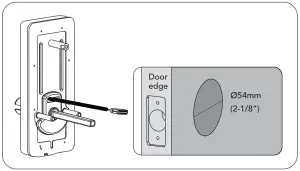
Preparing for installation
- Measure the dimension of the hole on your door to ensure you have a 54mm hole, or use the drilling template provided.

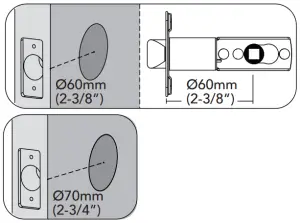
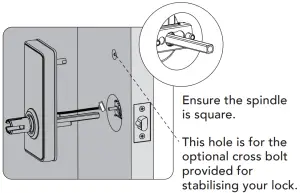
- Adjust the latchbolt.Slide the spindle hole position to suit 60mm (2-3/8”) or 70mm (2-3/4”) backsetNOTE: Latch ships with backset in 60mm (2-3/8″) position. If required, turn the latch case and pull to extend to 70mm (2-3/4″) backset position.
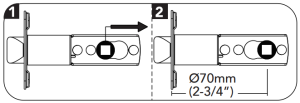 NOTE: Latch ships with backset in 60mm (2-3/8″) position. If required, turn the latch case and pull to extend to 70mm (2-3/4″) backset position.
Installation
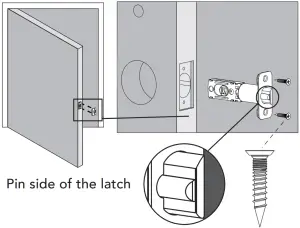
- 1. Install latch on the door, ensuring the pin side of the latch is facing away from the door jamb/frame.
- Install exterior assembly flush to the door.If you drilled a hole, securely tighten the post before mounting on the door.
NOTE: Cable must go through door hole above the latch. - Position the inside mounting plate to sit flush on the door, ensuring the cable and spindle go through the holes in the mounting plate. Secure both assemblies using 8/32 screws provided. Make sure the exterior assembly is vertically aligned. If you added the cross bolt, securely tighten the post to the exterior Ease unit with the additional screw provided.
- Attach cable assembly to the interior assembly PCB by lining up notches on top of cable connector to slots on PCB connector. Press connector in firmly until completely connected.
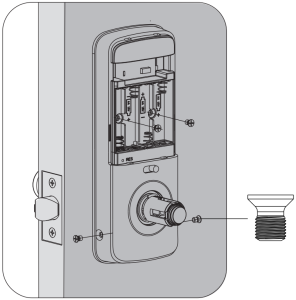
- Install interior assembly on inside mounting plate. Secure using 4 screwsthrough the interior assembly onto the mounting plate.
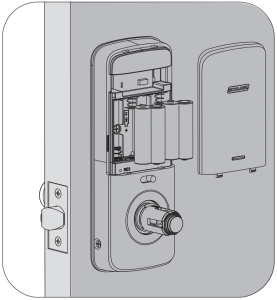
- Install batteries and battery cover.
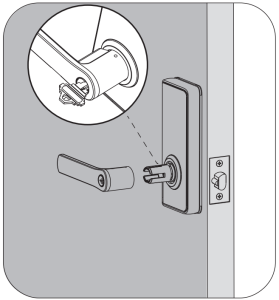
- Insert the cylinder into the lever.
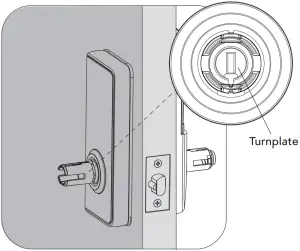
- Using a flat head screwdriver, ensure the turnplate is set vertical.
- Insert the key into the cylinder and ensure the key is horizontal. Check handing to ensure the lever is pointing towards the hinges. Push the lever onto the lever spigot until it clicks into place.
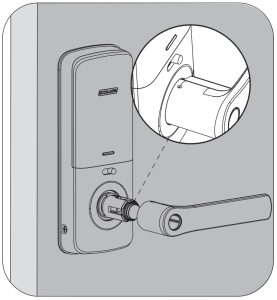
- Install the internal lever ensuring the handle points towards the door hinges.
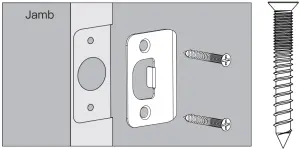
- Install strike into door jamb.
 If you drilled a hole, securely tighten the post before mounting on the door.
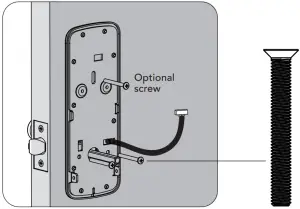


Warnings
- Do not install batteries until the lock is completely installed on the door.
- Failure to follow these instructions could result in damage to the product and void the factory warranty.
- The accuracy of the door preparation is critical for the functioning and security of this product. Misalignment can cause performance degradation and lessening of security.
- Finish Care: This lockset is designed to provide the highest standard of product quality and performance. Care should be taken to ensure a long-lasting finish. When cleaning is required, use a soft, damp cloth. Do not use lacquer thinner, caustic soaps, abrasive cleaners or polishes as these can damage the coating and result in tarnishing.
Definitions
Fake PIN code:Random numbers that are added before or after the user PIN. This prevents the user PIN from being exposed.
Master mode:The master mode could be entered by entering [**Master PIN Code #] to program the lock.
Master PIN code:The master PIN code is used for programming and for feature settings.
Passage mode:The lock can be switched to passage mode by toggling the switch on the internal side. In this mode, it is unlocked inside/out and you may enter freely. You may still lock the unit externally by holding any key for 2 seconds. It will resume passage mode when unlocked via PIN or key override until the passage mode switch is shifted to the locked position. Note: Enabling and disabling passage mode can only be done on the internal side of the unit via the switch.
Reset button:After reset operation, the lock will be restored to factory default settings, all user credentials will be deleted. Refer to page 11 for instructions on how to reset your lock.
Shutdown time:The lock will shutdown for a default of 3 minutes and not allow operation after the wrong code entry limit (5 times) has been met. When the unit is in shutdown, the light will flash if you are trying to use the keypad.
Silent mode:Disables the tone sound.
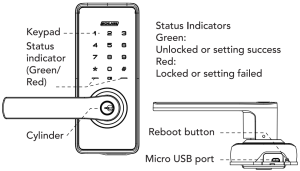
Status indicators:Located on exterior assembly.
User PIN code:The user PIN code operates the lock. Maximum number of user PIN codes is 20.
Hardware specifications
| Item | Specifications | Notes |
| External assembly | 165mm (L) x 70mm (W) x 22mm (D) | Operation temperature: -20ºC to 55ºC |
| Internal assembly | 196mm (L) x 73mm (W) x 28mm (D) | |
| Battery | AA alkaline battery x 4 (Operation voltage: 4.6~6.0V) | Lasts up to one year (10 times open/close per day) |
Lock operation

Notes:
- Beeps sound only when sound is enabled.
- If the indicators show 3 red lights and 3 beeps, your setting has failed. The system will exit master mode.Please enter master mode to try again.
- Refer to page 9 for guidelines on setting PIN codes.
Setting PIN codes
- Master PIN Code (4~10 digit): Default master PIN code is “12345678”, please modify it after installation. If you forget your master PIN code, you can reset your lock back to factory settings (refer to page 11 for instructions).
- User PIN Code (4~10 digit): User PIN codes can be set up through master PIN code. Up to 20 user PIN codes can be stored.
- Both master and user PIN codes don’t support the following combination of numbers.A. Forward number sequence.
B.
Backward number sequenceC.
Repeat number sequenceD. If
Then and
 Then
Then  and
and 
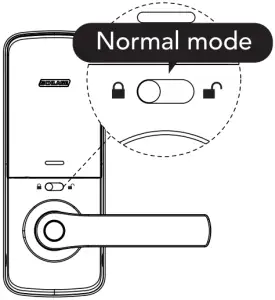
Normal mode
- Enter the master or user PIN code, followed by #, then rotate the lever to open the door. Door will automatically re-lock 7 seconds later. If you wish to deactivate the 7-second auto re-lock feature, switch to passage mode (page 10).
- Alternatively, use the backup key provided.

Passage mode
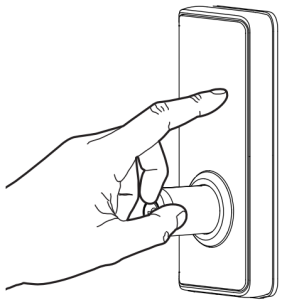
- Rotate the lever directly to open the door.
- Press any key on the keypad for 2 seconds to lock the door.

Unlock with fake PIN code
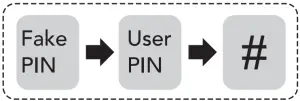
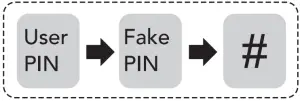
User can prevent PIN code exposure from strangers by entering random digits before or after PIN code.
Emergency powerIf unit is locked and you require emergency battery power, located on the bottom of the external unit is a micro USB port (refer to the exterior assembly diagram on page 3). Using a micro USB cable and charged power bank, you can power the lock to regain access as required.
Warranty
The Schlage Ease™ provides a 2 year warranty.Our goods come with guarantees that cannot be excluded under the local consumer law. You are entitled to a replacement or refund for a major failure and for compensation for any other reasonably foreseeable loss or damage. You are also entitled to have the goods repaired or replaced if the goods fail to be of acceptable quality and the failure does not amount to a major failure.
Factory default settings
| Settings | Factory default |
| Master PIN code | 12345678 |
| Beeper | Enabled |
| Wrong code entry limit | 5 times |
| Shutdown time | 3 minutes |
| Bluetooth mode | Enabled |
If you need to reset your lock, the reset button is located under the left-most battery in the battery casing. Use a pointed object, press and hold the reset button for over 5 seconds until you hear a beep.
Get mobile access with Schlage Abode
For an enhanced experience and additional functionality, try using the Schlage Ease™ with the Schlage Abode mobile application. Simply download the Schlage Abode app from the Apple App Store or the Google Play Store. Manage and control your lock with the ease of your smartphone with greater control and access.
![]()
 |
 |
Schlage Wi-Fi Bridge (AB100)
Empower your Schlage Ease- lock with Wi-Fi capability. The Schlage Wi-Fi Bridge (AB100) pairs to your Schlage Ease™ lock, to provide you with a real-time connection through your smartphone.
Ask your retailer about the Schlage Wi-Fi Bridge (AB100), sold separately.

For more information visit www.allegion.com.au/ease or www.allegion.co.nz/ease
Australia1800 098 094[email protected]www.allegion.com.auNew Zealand0800 477 869[email protected]www.allegion.co.nzSouth East Asia+65 6488 2562[email protected]www.allegion.com
 report this ad
[xyz-ips snippet=”download-snippet”]