
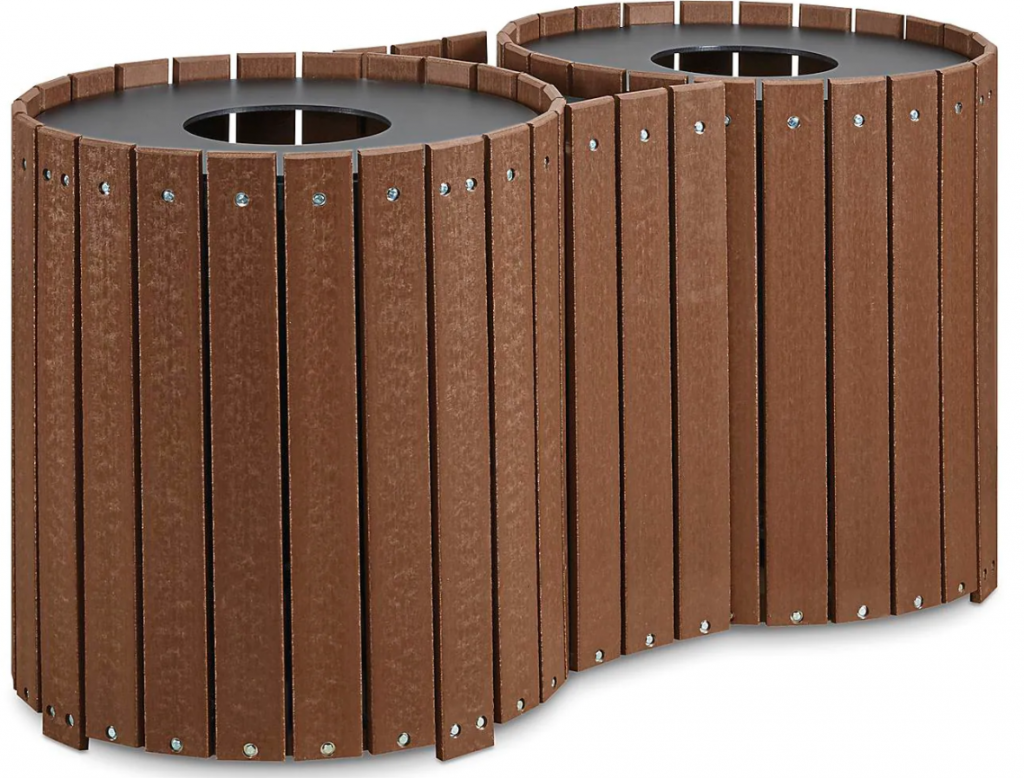
ULINE H-7238 Recycled Double Receptacle
TOOLS NEEDED

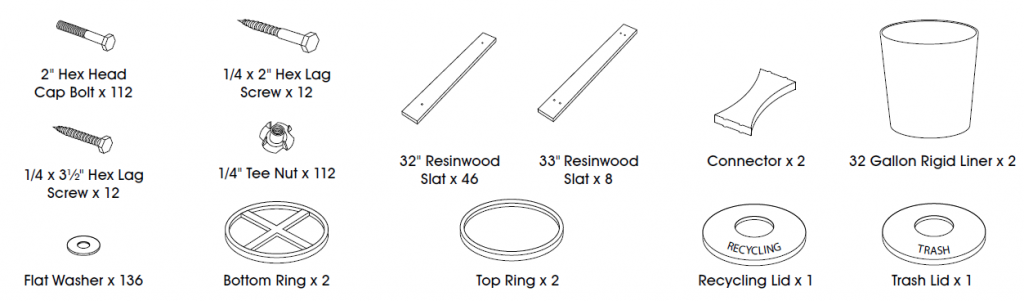
PARTS
ASSEMBLY
- Verify all parts are present before beginning.NOTE: Before starting, note that four resinwood slats are longer (33″) than the rest to lift can off the ground. These must be evenly spaced apart with shorter (32″) slats between them.
- Take the bottom ring and begin with one of the two longer 33″ resinwood slats, which have two holes on top and two on bottom of plank.NOTE: The slats have a top and bottom. The top edge is beveled, while the bottom edge is flat. Recessed holes need to face outward.
- Place the 33″ resinwood slat on outside of the bottom ring.Place hex head cap bolts and washers through the slat then through pre-drilled holes in the bottom resinwood ring.NOTE: Tap screws into place with hammer if difficult to push in.
- Take 1/4″ tee nuts and align with holes (prongs facing into inside of bottom resinwood ring) and tighten. (See Figure 1)NOTE: Place round portion of tee nut inside pre-drilled holes on ring. (See Figure 1A) Apply pressure to nut while drilling bolt to prevent nut from popping out.NOTE: Do not over-tighten, as resinwood slats must still be attached to top ring.
- Fasten five of the 32″ resinwood slats then fasten another 33″ resinwood slat.
- Repeat this process with each resinwood slat until all resinwood slats have been attached to the bottom ring. (See Figure 3)
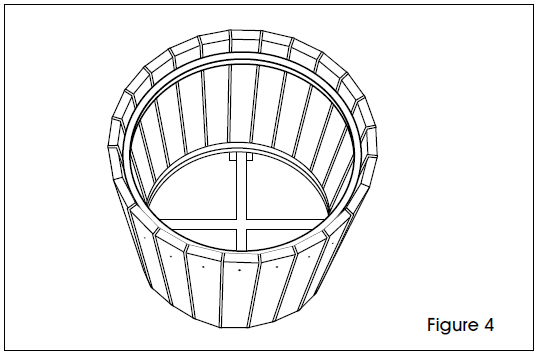
- Using the same directions listed in steps 2, 3 and 4, line up the top ring with the resinwood slats and repeat the process until all resinwood slats have been attached to the top ring. You may now tighten all bolts, remembering to ensure can is put together evenly. (See Figure 4)
- Repeat for the second receptacle before proceeding to the next step.
- In the top ring, remove the three finger-tight cap screws, flat washers and tee nuts. Leave the slats in place. (See Figure 5)
- Place the curved portion of a connector against the slats on the upper ring. The center point of the connector should be in line with the center point of the ring. The holes for the mounting hardware in the slats should be at the mid point of the connector.(See Figure 6)
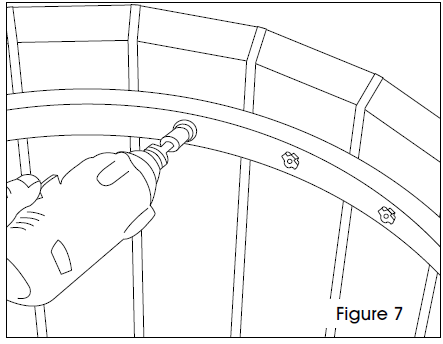
- From the inside of the receptacle, attach the connector using 3½” hex lag screws and flat washers. Maintain firm pressure on the connector when driving the lag screws. Flip the receptacle over and repeat steps 9, 10, and 11 to attach the connector to the lower ring of the receptacle. (See Figure 7)
- Stand the receptacle back upright. Remove the finger tight hardware from the three slats on the second receptacle. (See Figure 8)
- Slide the slats back into position and move the receptacles together to hold the slats firmly. Attach the connector to the second receptacle, repeating step 9, starting with the upper ring. (See Figure 9)
- Carefully lay the attached receptacles on their side and attach the connector to the second receptacle at the bottom ring using the 3½” lag screws and flat washers. (See Figure 10)
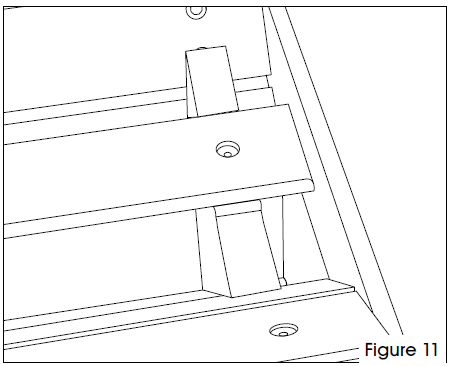
- With the receptacles on their side, place three of the remaining slats on the connector in the designated slots. You can use a long level or similar flat piece to properly align the tops of the slats. (See Figure 11)
- Attach the slats to the connector using the 2″ lag screws and flat washers. (See Figure 12)
- Carefully flip the receptacles and lay them on the opposite side. Attach the slats to the connector using the 2″ lag screws and flat washers. (See Figure 12)
- Place the rigid liners inside the cans and place the plastic reclycling and trash lids on top.(See Figure 13)
 NOTE: Place round portion of tee nut inside pre-drilled holes on ring. (See Figure 1A) Apply pressure to nut while drilling bolt to prevent nut from popping out.NOTE: Do not over-tighten, as resinwood slats must still be attached to top ring.
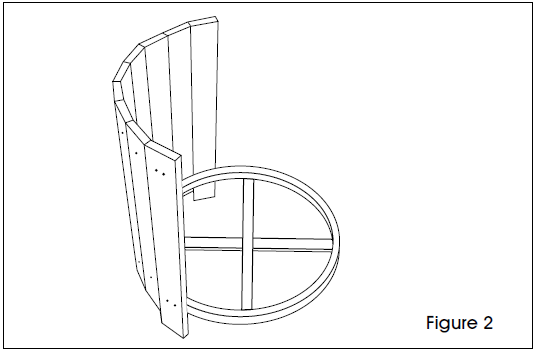


1-800-295-5510 uline.com
[xyz-ips snippet=”download-snippet”]