VUZIX Remote Assist User Guide
Introduction
Welcome to Vuzix Remote Assist. The place where you optimize fieldworker communication. This start-up guide will guide you through the process of creating your own, private environment.
Next to that, it will guide you through the steps of getting started with Vuzix Remote Assist, installing software on the glasses and more.
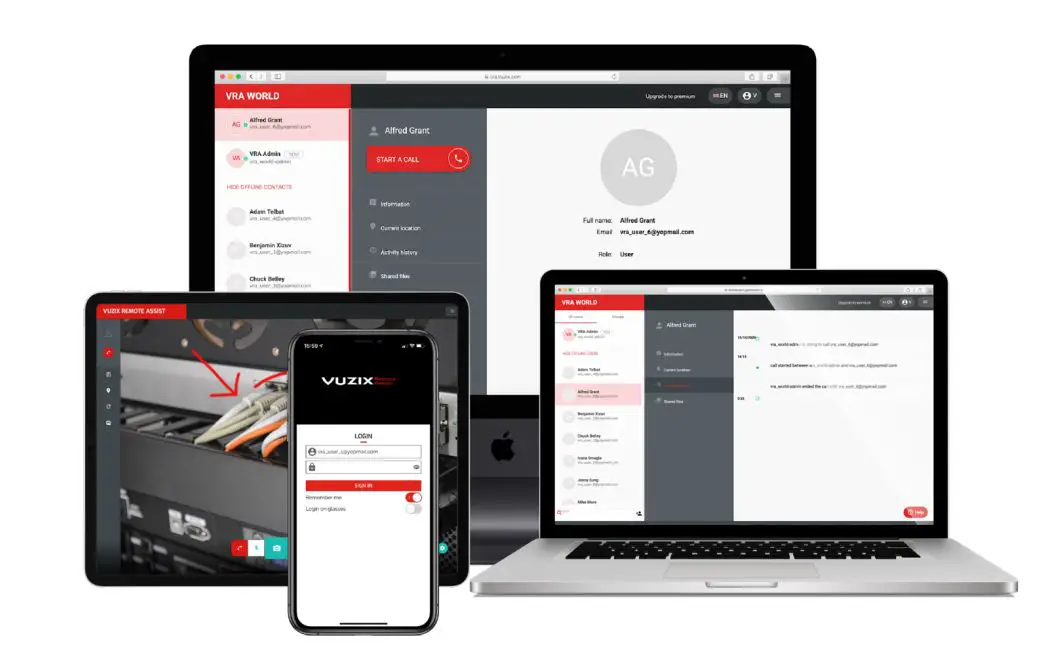
Vuzix Remote Assist is made to fit every device and to meet the needs of different industries. So. whether you work in healthcare, industry, maritime or another industry, Vuzix Remote Assist will provide a fit.
Vuzix Remote Assist Academy
Are you familiar with the interactive Vuzix Remote Assist Academy? This where you learn everything there is to know about using Vuzix Remote Assist and setting up smart glasses. You can sign up for free and take the courses that are most relevant for you. This the list of the courses that we offer free of charge:
- Vuzix Remote Assist Setup & Start
- Users & User management
- Augmented video call
- Groups & Teams
- Workflows & Digital instructions
- Vuzix Remote Assist & Smart Glasses.
Go to https://academy.vuzix.com/ to subscribe to a free course.
Creating an account for Vuzix Remote Assist
Have you already completed registration for Vuzix Remote Assist? If not, just follow the steps and create your account. Make sure you confirm your e-mail address. An e-mail is automatically sent to your e-mail address. You will be able to invite users, download software and manage the team in a later stage.
Go to https://vra.vuzix.com to sign up!

Users & User management
Once your account has been activated, it’s time to add users. We have internal users and external users.
Users
- Users are for example colleagues, field workers or any other ‘users’ that you cooperate with. These users are sometimes referred to as ‘field users’. They are part of the organisation, but often operate remotely. When these users have an activated account, they can be added to groups, start a videocall for remote support, or use digital workflows.
Inviting users
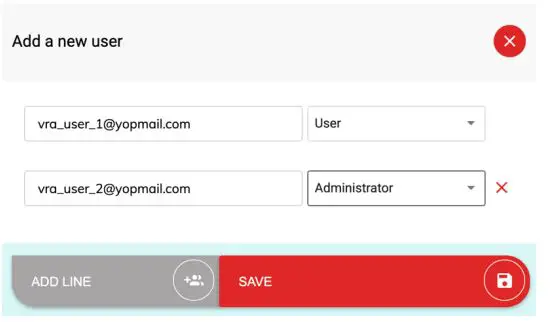
When you select `add users‘, you can fill in their email addresses and select a user type. If a user will use Vuzix Remote Assist with smart glasses, a mobile device or desktop, you will select `user’. If they need to be able to edit user information or make groups, select `administrator’.
Please note: you can add multiple users with different roles by clicking `add line’ and adding an additional user.
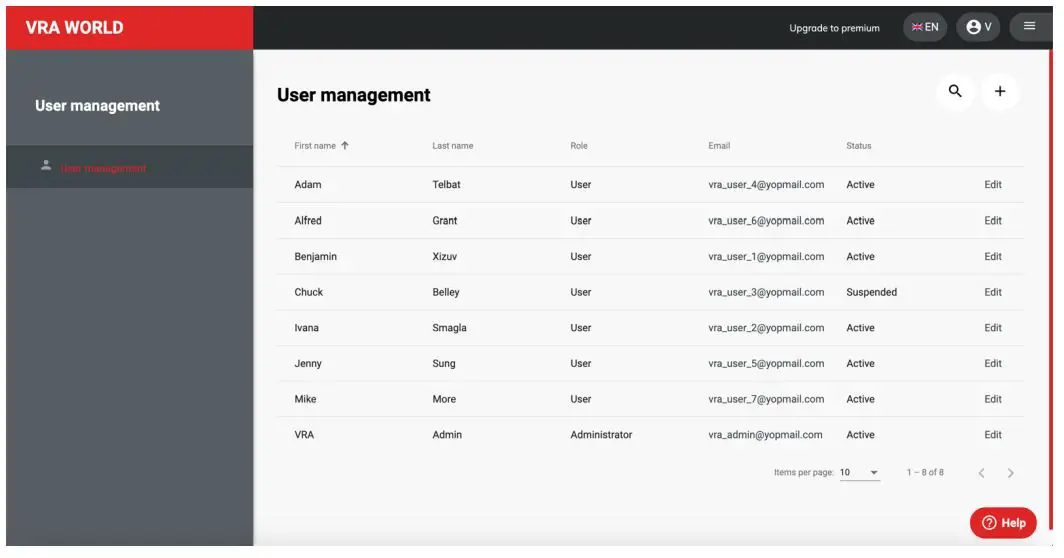
User management
From the menu we can navigate to the user management module. This is where administrators edit user information and can check on activity. Other features are resetting passwords, suspending or removing accounts and checking device serial numbers. When a user uses smart glasses, the serial number of those glasses is automatically paired and saved user’s account. But when this user logs into a smartphone app for example, the serial number will reset.
Please note: Invited users that have not completed registration yet, also show up in the list and can be edited or removed.
When users take pictures and safe them during a videocall, they will be saved in the shared files directory. The users can access, download and rematch them there. All the other activities from a call a registered in the activity log. This is ideal to trace back your steps and see who you talked to and what you’ve shared. If you’re an admin, you can view the activity of multiple users. Go to the designated user and click on activity history or shared files.

Groups
The group feature is used to create private platforms for a group of users. This `group’ could for example function as an independent store or a separate location connected to a larger chain.Members of a private group will only see the users that are in that particular group. If users are invited to join two or more groups, then they will see them separately, but in one environment and do not need multiple accounts.All the group data, pictures and calls are only visible for your team members. This is to ensure maximum privacy.
- Go to `Groups’ from the menu.
- Select `Add a group’
- Type the name of the new group
- Select `Create group’
- Go to you newly create group
- Select `Group members’
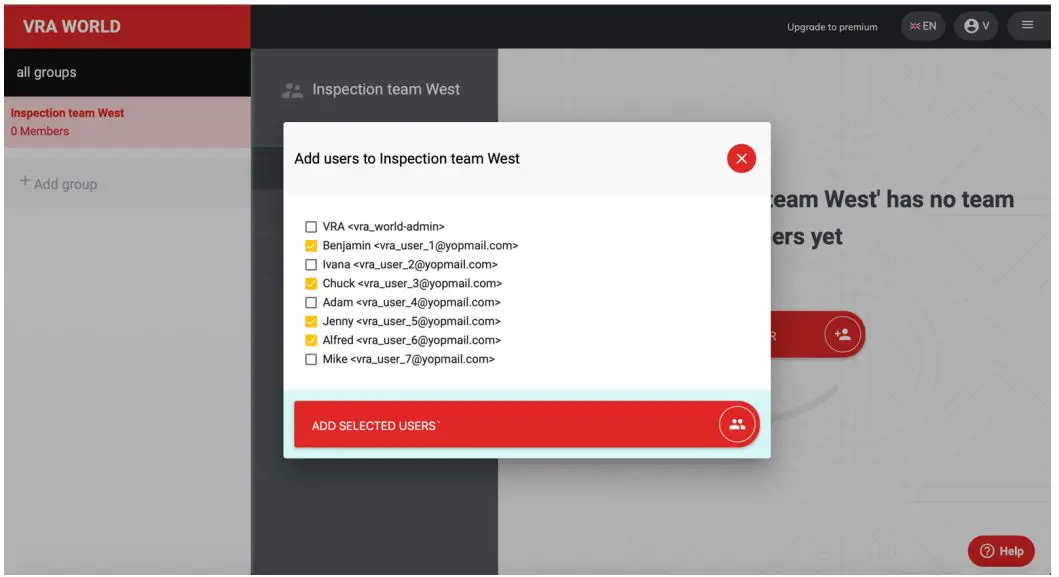
- Select `Add members’
- Select the users you want to add
- Press `Add selected users’
Before users can be added to a group, they need to be invited to your environment first. After they completed registration, you can add them to a team. By selecting the group, you can edit the group and its members.
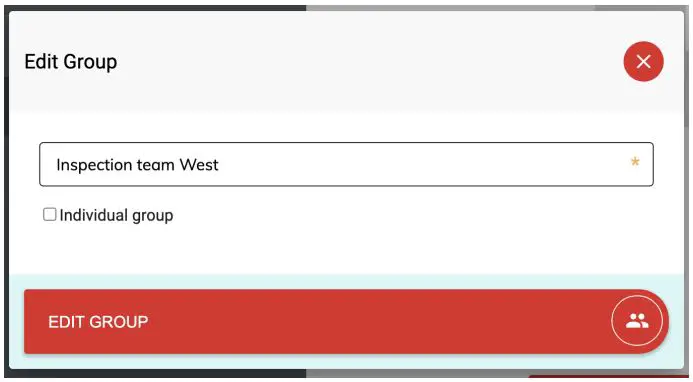
Individual groupIn some cases, it is necessary that members of a group, cannot see other members of a group. This means they can be called but cannot initiate a call themselves. If you need this feature, edit the group and select `individual group’ to activate this.
Augmented Videocall features
The Augmented Video call is one of the core features of Vuzix Remote Assist’s communication platform. You can start a video call from almost every device. When you use a pc or laptop, you can access Vuzix Remote Assist from your browser, preferably Google Chrome or Firefox. Field users can use a smartphone or tablet with the Vuzix Remote Assist Android or iOS application, or access their account from a mobile web browser.
And last but not least: you can use Vuzix Remote Assist on smart glasses. Vuzix Remote Assist has a dedicated application in de Vuzix App store. In another course we’ll help you set up and install Vuzix Remote Assist on smart glasses.
Start a video call
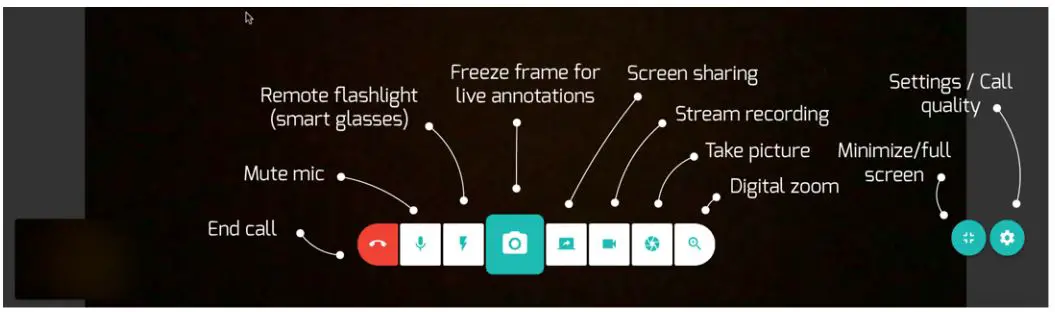
If you want to start a call, look for the user in the list and check if he or she is online. Select the user and start the call. Once the other user accepts the call, a video connection is established. During the call, you can adjust the video quality to different levels such as HD and audio only. It’s important to know that the actual quality and speed of the connection itself will determine the quality of the video call. Even when you have HD enabled. All the features shown below will be explained in the next couple of pages.
The visual below shows the features of the call dashboard:
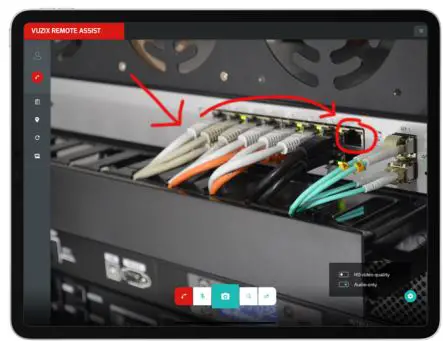
Augmented instructions
Or live annotation is drawing and writing on a ‘frozen’ screen snapshot of what the caller sees. In essence, you can give augmented instructions from any device with a web browser. This means, not from a smartphone, tablet or smart glasses application. This is because this application is mostly used by field users, that request help through the video call.
Once you’re connected with a colleague in the field, you can use augmented instructions. When you click on the camera icon, it will freeze the video call. You’ll see that the features to draw and write on the screenshot become available. Draw on screen and use different colours and font sizes to instruct the user as best as possible. And do you need to save the screen with instructions for future use? Then you can save the picture. Finally, when you’re done with this instruction, you can go back to the live stream by clicking `go back to live’.
Screen sharing
Screen sharing is the next tool in the remote workers’ toolbox. Fast, clear and available from desktop to all mobile devices.Screen sharing is the fastest way to show someone in the field what you’d like to show on your screen. Screen sharing works from a pc or laptop to a smartphone, tablet or smart glasses. When you initiate screen sharing, click through the instruction that appear on your screen.
Did you know that you can even stream video’s from YouTube through screen sharing to users in the field?
Stream recording
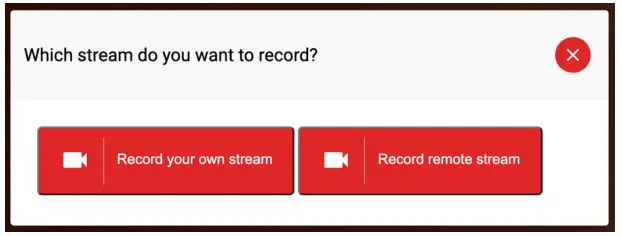
Recording a stream can add so much value to the remote support activities. Recording, re-watching a videocall or using video content for training purposes. With stream recording you can do just that and more! Recording your stream means recording what your camera sees. Recording the stream of the caller is recording what they see.
This is currently a `clean’ video without drawings and other augmented instructions. You can later add saved screens with instructions in the edit. This could be great for training purposes or quality assurance.
So, choose what side you’d like to record and just continue with the job at hand.
Digital zoom
Digital zoom, for when you want to see what the caller sees, but up close.
Please remember that the quality of the zoom is also based upon the quality of the stream and connection. Digital zoom enlarges the image digitally, since smartphones or smart glasses do not have optical zoom.
Use the magnifier icon with the plus to activate digital zoom from a desktop device. Digital zoom is the feature that allows you to zoom into a specific area that for example a smart glasses user is looking at.Because the users aren’t able to zoom in, you can enlarge the image to get a better look, freeze the screen and provide augmented instructions.
Remote flashlight
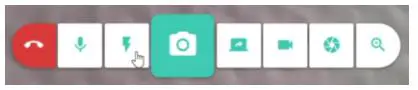
The flashlight feature comes in handy when the work area isn’t well lit. You can turn this on remotely during a videocall. So, for example: an expert on its pc uses the feature to turn on the smart glasses flash to illuminate the area.
Step 1: Make sure you have a live video callStep 2: Use the button with the ‘Flash’ icon to activate and deactivate the flashlight
The flashlight can be turned on from the dashboard.
Guest call
Using a guest call means inviting a nanoplatform user, or `anonymous user’ to join a meeting.
You can copy the link, share it through email, or invite a guest through SMS. They will receive the meeting link in a SMS message. Fill in a phone number and your name and press `send’.
To access the meeting, save the link to the meeting room and access it from your browser. You can also access it directly from the page.
Please note that the link is only valid for 24 hours. So, create a link just before the meeting and share it with your guest.

Workflows
The workflow builder is great for learning on the job by giving field workers an on the job digital guide. Next to that, these workflows can be used for inspection, data collection, quality assurance and much more. The generic setup allows you to use this for many different use cases. This is because the content makes it branch specific.
A workflow is a set of steps that help workers complete a job, or make sure that a procedure is followed to the letter. This can reduce errors or enable learning on the job. The current workflow builder is a linear setup. This means you cannot use `if-this-then-that’ logic and have conditional sections that branch of to alternative instructions
The workflow and the stepsIn the workflow you can make use of different types of steps. You can use a written instruction, show a photo or video and let the user scan a QR-code to validate information such as a serial number of a machine. Once a workflow is created, it is available for all users that are linked to your platform. These users can choose to download certain workflows locally in the mobile or smart glasses app. Once downloaded, they can use them offline. When the workflow is not downloaded, it will fetch the photos and videos when you start with a workflow using your internet connection. Not downloading all the content is to prevent your device from using too much storage space.
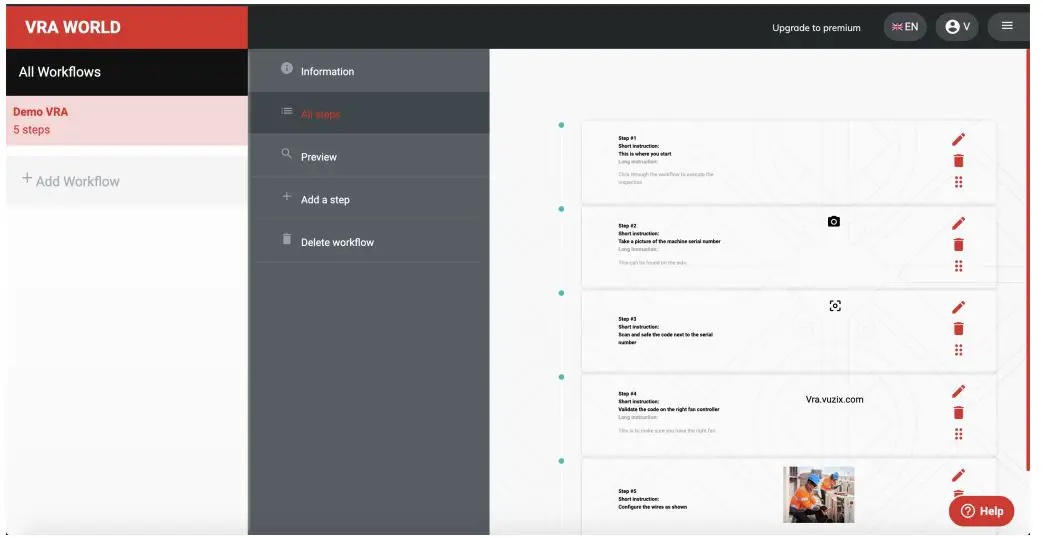
Creating a workflowLet’s walk through the workflow builder and create a few steps.
- Create and name your workflow.
- Then select the workflow in the left column and click on: `add a step’.
This is also where you can `view all steps’ of your workflow, test it with the `preview’ feature and continue adding steps.
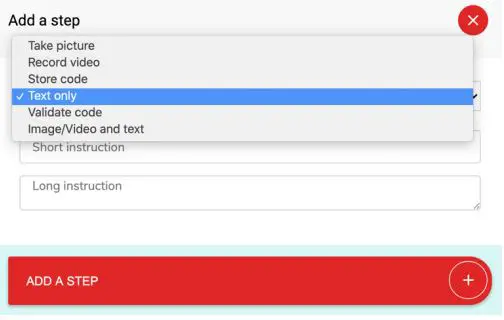
Adding steps
- Select `Add a step’.
- The first option from the dropdown is a step fortext instructions.
- Create a title and write a short instruction.
I recommend keeping it short, especially when you design a workflow for smart glasses. Furthermore, never use more than one instruction per step.
QR code: The next option is to add a QR code. This is used to validate items such as serial numbers of machinery, kinds of medicine or any other information you need to validate. This could be done before starting a workflow, or during a workflow before a certain instruction. Before you use this feature, make sure you have the QR-codes in place on the item that has to be validated. (You can use an existing QR code, or use the QR code that is generated by the platform, visible from the preview window)
Next, add a title and a short description. This could be about the location of the QR code itself, or an instruction on what has to be validated in this step. If you do not know exactly what information is in the QR code, scan it with your smartphone camera and it will tell you exactly what it is. It could be a serial number, a name, a URL or any other type of information. Copy-paste this information into the step.
Picture or video: Next up: the step with a picture or video. Check before you upload whether the picture is not too large, as this will make the workflow slower when it is not stored offline to the device. This also counts for the videoclips. It’s better to have to multiple steps with two short clips, than one large movie. Also make sure that the pictures and videos are as close to the subject as possible. The closer it is, the better you can see it on the small smart glasses screen.
- So, set a title and write a short description about the step.
- Then select the media and upload it to the workflow.
Once you’re ready, preview and test the workflow you’ve built. The workflow is automatically available to every user in the platform.
Take a picture in the workflow: You can also take a picture and upload it in the workflow while you’re working the field. The step where you select `take picture’ is a feature where you can take a picture in the workflow. This is used for when you have to save a proof of work, take pictures during an inspection or any other situation that requires a visual recording. So, if you use this step in the workflow, write a short instruction about what has to be photographed.
Record video in the workflow: Next to taking a picture, you can also record content with the step: recording a video. Once the user has made a video in the workflow, the video will be uploaded to the platform automatically and will be available from the `shared files’. And if there is no internet connection, it will store it and upload it automatically once the connection is restored.
Scan QR code to log in report: We also have the option to scan a QR code and put that in the workflow report. This is to show what machine, equipment or area you’ve worked on.
Offline workflows
Normally the workflows fetch content such as photos and videos when the workflow is operational. But when you operate in a place without a n internet connection, it’s necessary to have the workflow offline, including all the content.
Smart Glasses: To download a workflow in your smart glasses:
- Go to; `workflows’ and navigate to the one you want to download.
- Long press the first button on the smart glasses until the message box pops up.
- Then choose `download’.
- To remove the workflow, repeat the steps and select `remove’.
When you remove the workflow, it will never disappear completely. You will only delete the media such as the photos and videos that are stored on your device.
Mobile devices: To download a workflow in the mobile app:
- Go to: `workflows’, navigate to the one you want to download and use the slider button to download the workflow.
- To remove the workflow, slide the button back and the workflow will be removed.
So, now you know how to use the workflow builder. Make sure to always test your workflow on different devices to ensure good readability.
Workflow support call
Once you’re in the field and using the workflow, you might have some questions about the workflow or the situation. You can start a remote support call from within the workflow.
Use the menu to display the `video call’ option from within the smartphone or tablet application. On smart glasses, long press the first button for the M-Series smart glasses or tap and hold on the Vuzix Blade while in the workflow to reveal the option to call a colleague. Once you’re done, you can continue the workflow.

Smart Glasses
Using Vuzix Remote Assist with smart glasses is where hands-on work becomes hands-free. We support Vuzix smart glasses and will explain how to set them up.
Glasses Manual: Do you also need written manuals for your smart glasses? These are available on the Vuzix website.
WIFI and connection setup
Connect to Wi-Fi via QR-Code:
- Generate a Special Wi-Fi QR-Code via the VRA app using the WiFi QR Code option to generate the special QR-Code or in our webpage: https://www.vuzix.com/wifiqr
- On you M-Series Device, Open the Scanner app and scan the QR-Code. The scanner will prompt to connect to the Wi-Fi and follow the instructions on the smart glass.
Connection setup with Companion App:
- Get your smartphone and download the Vuzix Companion App from the store.
- Launch it and follow the instructions;
- Go to settings and turn on the Bluetooth
- Select connectivity or connected devices
- Select `Companion app’ and scan the QR code presented on your phone.
- Continue through the steps.
- Go to settings in the Companion App and select WIFI to fill in your network credentials.
- You can even use this app as a `virtual trackpad’ to navigate through the smart glasses app.
Vuzix app store account to install VRA
Before you can install Vuzix Remote Assist you have to create a Vuzix App Store account, if you haven’t done this already. It’s actually similar to what you do with a smartphone.
- Get your laptop and go to the vuzix website.
- Sign up, activate your account and log in on the Vuzix website.
- Next up we have to connect your pair of glasses to your account, in order to install Vuzix Remote Assist.
- So, go to your account and select `devices’.
- Click on `add new device’ and scan the QR-code with the scanner app on your smart glasses.
Once completed, your glasses will show up under `my devices’. Now we continue to the Vuzix App Store page and search for Vuzix Remote Assist.
- Select and add this app to your library.
- Select your type of glasses and continue.
Once you’re finished, the app is pushed to your glasses automatically. Make sure it’s switched on and connected to the internet.
Get you glasses and check if Vuzix Remote Assist is installed. You’re now ready to enjoy Vuzix Remote Assist!
Installation with Vuzix companion app
Vuzix has made the `Companion app’. This is an application for smartphones and tablets, that lets you configure your smart glasses.Installation with the companion app is compatible with: BladeSo, get your smartphone or tablet, browse to your App store and look it up..
- Next up, get your smart glasses and swipe to settings, select connectivity, enable Bluetooth and then select `companion link’. You’ll see that this will launch the scanner.
Now back to your smartphone or tablet.
- Open the Vuzix Blade app and follow the instructions until a QR code is presented.
- Scan the QR code with your smart glasses.
- When your glasses are verified, you complete the steps and select Vuzix Blade store from the menu.
- Fill in your App store credentials, look for Vuzix Remote Assist in the list and press install.
Manual setup
This is for: M300, M300XL, M400, M4000. Only Blade glasses can be installed with the application This part shows the manual installation of smart glasses. This means you’ll have to use the smart glasses navigation to select the network and type in the password. Use this version when the Vuzix companion app does not work.
In order to install Vuzix Remote Assist, we need to configure your glasses if they are fresh out of the box. This means connecting the wifi and enabling app store connection.So, assemble your glasses and power up.
- Go to settings, network & internet and turn on the wifi.
- Next, select wifi and look for your network.
- Fill in the credentials and doublecheck the password by revealing it.
- Once you’re connected, go back to settings and select `apps & notifications’.
- Select `Vuzix App store’ and enable it.
Once that is connected, we can install Vuzix Remote Assist. Leave the glasses switched on, we’ll need them in a bit. Go back to the section: Vuzix app store account. You need an account to download Vuzix Remote Assist.
Login to your smart glasses
Once you have your account setup and the Wifi connected, you have to login to the glasses to start a call. This is done by scanning a QR code on the dashboard.
Option A
- Go to: https://vra.vuzix.com/#/glasslogin
- Fill in your user credentials
- Generate QR code
- Open the Vuzix Remote Assist app on the glasses
- Select the login option, scan the QR code and you’re in!
Option B: Dashboard
- Go to the dashboard and login to the desktop
- Click `Generate qr code login’.
- Fill in your credentials
- Generate QR-code
- Scan it with the scanner on you glasses.
Option C: VRA mobile
- Open the VRA application
- Activate the switch that says: Login on glasses
- Fill in your credentials
- Generate QR-code
- Scan it with the scanner on you glasses.
 report this ad
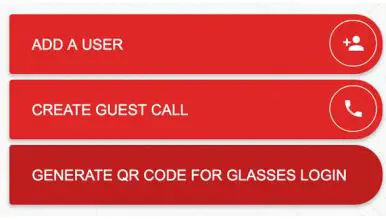
References
[xyz-ips snippet=”download-snippet”]