
![]()
![]()
61913-003 Rev 04 GED2100
Installation and User Guide
WeiserUSA: 1-800-677-5625Canada: 1-800-501-9471www.weiserlock.com

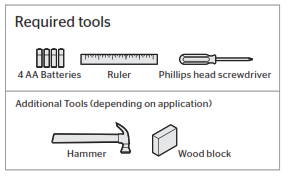
1 Prepare the door and check dimensions
If drilling a new door, use the supplied template and the complete door drilling instructions available at www.weiserlock.com/doorprep.
A Measure to confirm that the hole in the door is either 2-1/8″ (54 mm) or 1-1/2″ (38 mm).

Note: Additional door preparation may be required for doors with 1-1/2″ (38 mm) holes. Consult the deadbolt drilling instructions at www.weiserlock.com/doorprep.
B Measure to confirm that the backset is either 2-3/8″ or 2-3/4″ (60 or 70 mm).

C Measure to confirm that the hole in the door edge is 1″ (25 mm).

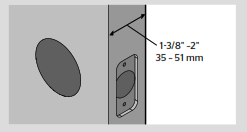
D Measure to confirm that the door isbetween 1-3/8″ and 2″ (35 mm and 51 mm) thick.
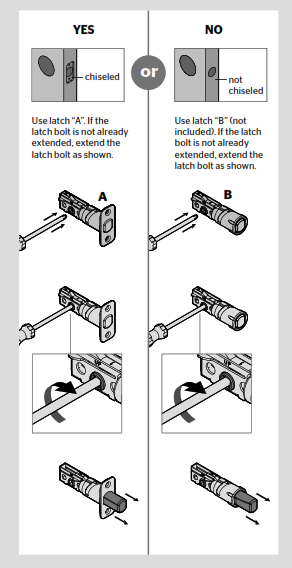
2 Install the latch and strike

A Is the door edge chiseled?

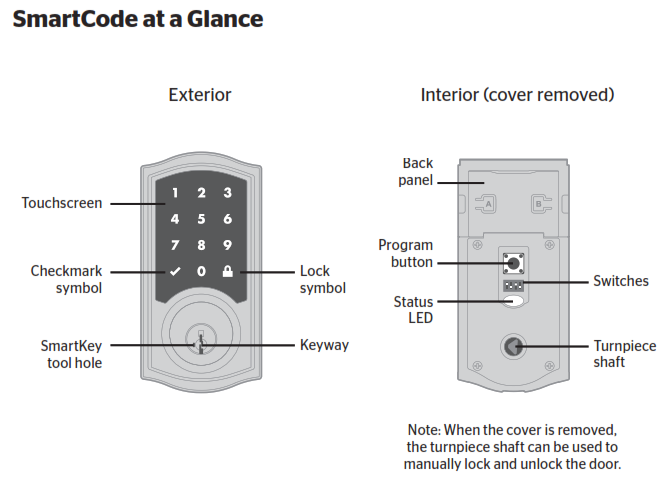
3 Install the exterior touchscreen
A What is the diameter of the hole in the door?
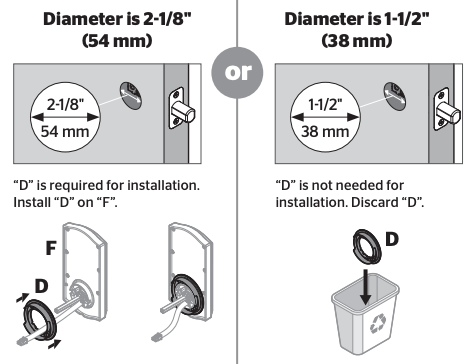
B Locate screws for step 3C and keep them within reach.

C Install exterior touchscreen and mounting plate.

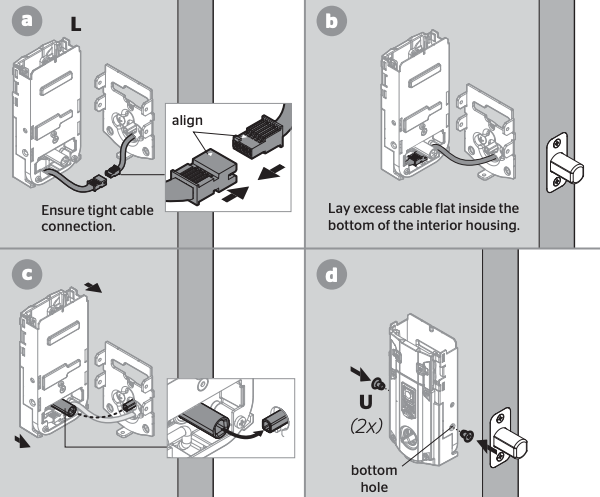
4 Install the interior assembly

A Remove battery cover and battery pack from interior assembly.

B Install interior assembly onto mounting plate.
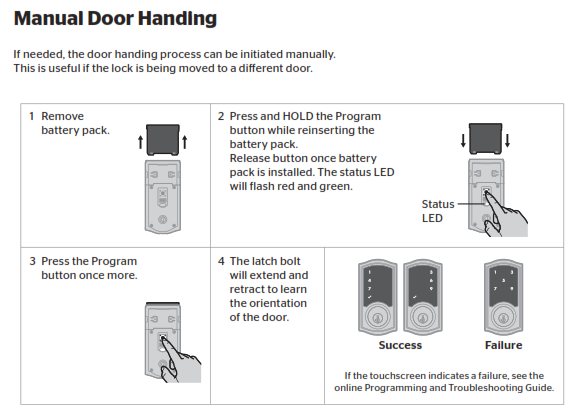
5 Install the batteries and perform the door handing process
This step will teach your lock the orientation of your door and is crucial to lock operation.
A Install 4 AA batteries in battery pack.

B Make sure the door is open, and insert the battery pack.

C After a few seconds, the latch bolt will retract and extend on its own to learn the orientation of the door. This is called the door handing process, and it is crucial to lock operation.

D If the touchscreen indicates a failure, attempt this procedure again.
If the door handing process is still unsuccessful after a second attempt, consult the Programming and Troubleshooting Guide on the SmartCode 10 Touchscreen page at www.weiserlock.com.
6 Add user codes (16 max)
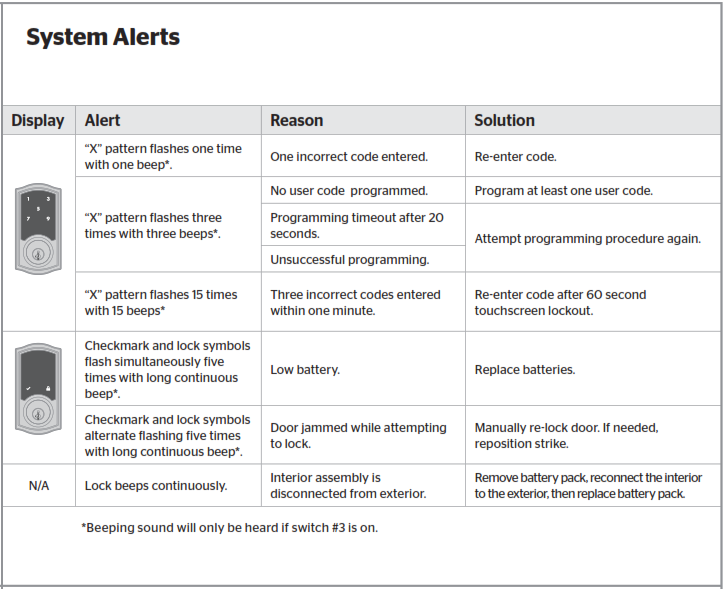
Programming TimeoutDuring programming, if the screen is not pressed for 20 seconds, the system will time out (indicated by three beeps and the “X” pattern flashing three times), and you will need to restart the procedure.
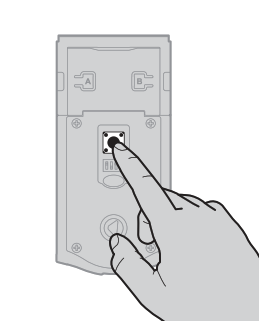
B Press the checkmark symbol once.
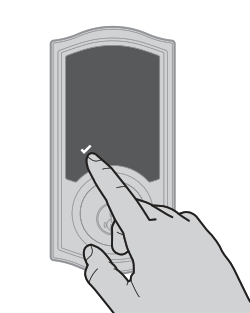
C Enter user code. A total of 16 user codes may be programmed.

D Press lock symbol once.
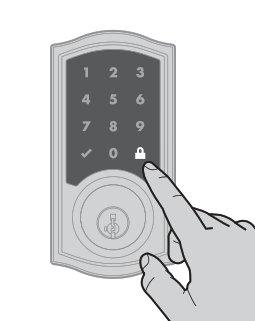
E What digits and sounds did the lock produce?
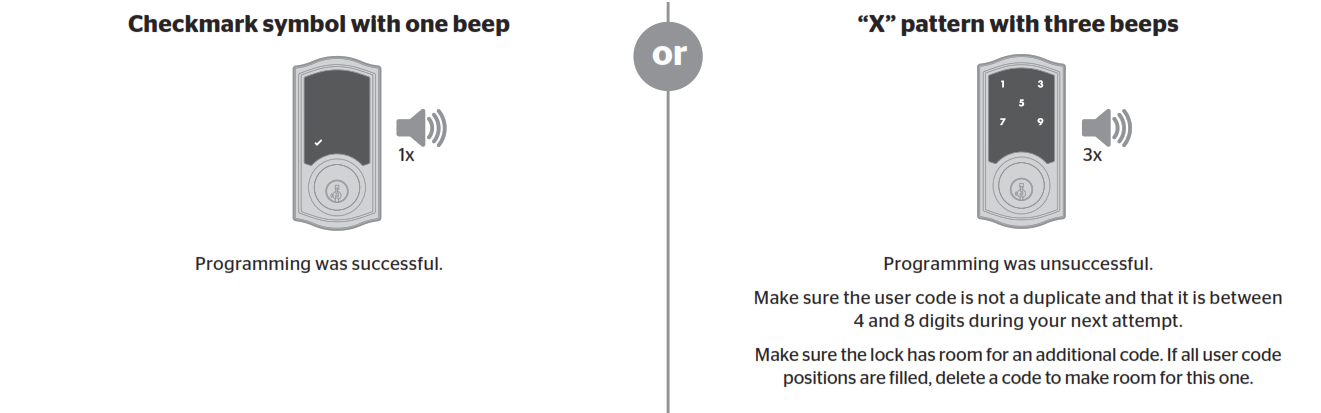
*Beeping sound will only be heard if switch #3 (on the lock interior) is in the on positon. See “Switches and Status LED Colors” on page 4.
MastercodeFor enhanced security, a mastercode may be used when adding and deleting user codes. For more information about the mastercode, download the Programming and Troubleshooting Guide on the SmartCode 10 Touchscreen page at www.weiserlock.com.
7 Test the lock (review normal operation)
Confirm that the code(s) added in previous step can unlock the door.


8 Re-key the lock (if needed) and install the battery cover


Reference Guide

Deleting a single user code
Note: All codes may be deleted at once if the mastercode is enabled. For more information about the mastercode, consult the online Programming and Troubleshooting Guide.
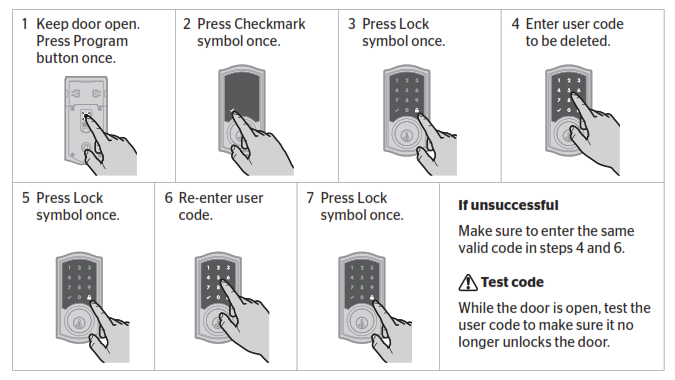 If the screen is not pressed for 20 seconds, the system will time out, and you will need to restart the procedure.
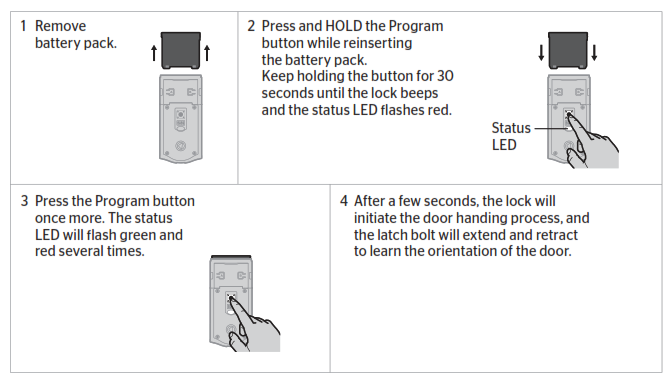
Factory Reset
A factory reset will delete all codes associated with the lock.
Important Safeguards
-
- Read all instructions in their entirety.
- Familiarize yourself with all warning and caution statements.
- Remind all family members of safety precautions.
- Protect your user codes and mastercode.
- Dispose of used batteries according to local laws and regulations. CAUTION: Prevent unauthorized entry. Since anyone with access to the back panel can change the user codes, you must restrict access to the back panel and routinely check the user codes to ensure they have not been altered without your knowledge. The use of a master code can help protect your system’s settings.
WARNING: This Manufacturer advises that no lock can provide complete security by itself. This lock may be defeated by forcible or technical means, or evaded by entry elsewhere on the property. No lock can substitute for caution, awareness of your environment, and common sense. Builder’s hardware is available in multiple performance grades to suit the application. In order to enhance security and reduce risk, you should consult a qualified locksmith or other security professional.
SmartCode 10 Touchpad Electronic Beadbolt GED2100 User Manual – SmartCode 10 Touchpad Electronic Beadbolt GED2100 User Manual –