
63995 / 01 , GED1490, Stand-Alone
Installation and User Guide
WeiserUSA: 1-800-677-5625Canada: 1-800-501-9471www.weiserlock.com
1 Prepare the door and check dimensions
If drilling a new door, use the supplied template and the complete door drilling instructions available at www.weiserlock.com/doorprep.
A Measure to confirm that the hole in the door is either 2-1/8″ (54 mm) or 1-1/2″ (38 mm).
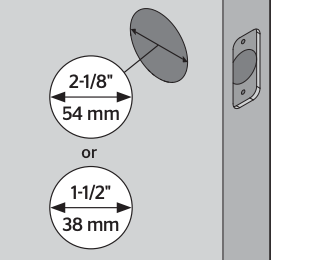 Note: Additional door preparation may be required for doors with 1-1/2″ (38 mm) holes. Consult the deadbolt drilling instructions at www.weiserlock.com/doorprep.
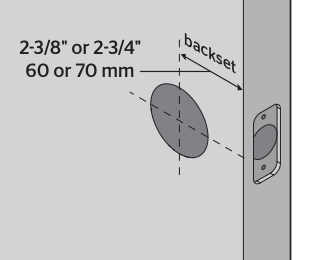
B Measure to confirm that the backset is either 2-3/8″ or 2-3/4″ (60 or 70 mm).
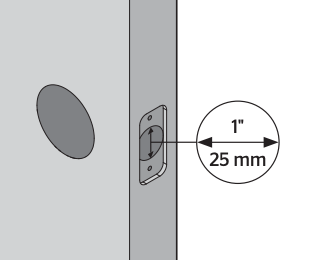
C Measure to confirm that the hole in the door edge is 1″ (25 mm).
D Measure to confirm that the door is between 1-3/8″ and 1-3/4″* (35 mm and 44 mm*) thick.

*Service kits for 2-1/4″ (57 mm) thick doors are available through Weiser.
2 Prepare

A Is the door edge chiseled?

B Hold the latch in front of the door hole, with the latch face flush against the door edge.
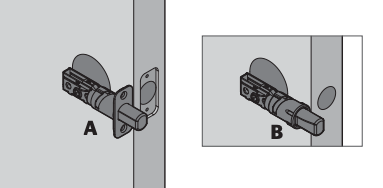
C Are the latch holes centered in the door hole?

D Which latch are you installing?

E Install strike on the door frame.

3 Install the exterior keypad

A Insert cylinder into keypad.

B What is the diameter of the hole in the door?
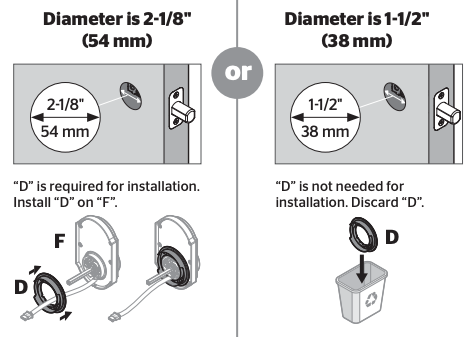
C Install exterior keypad and mounting plate.
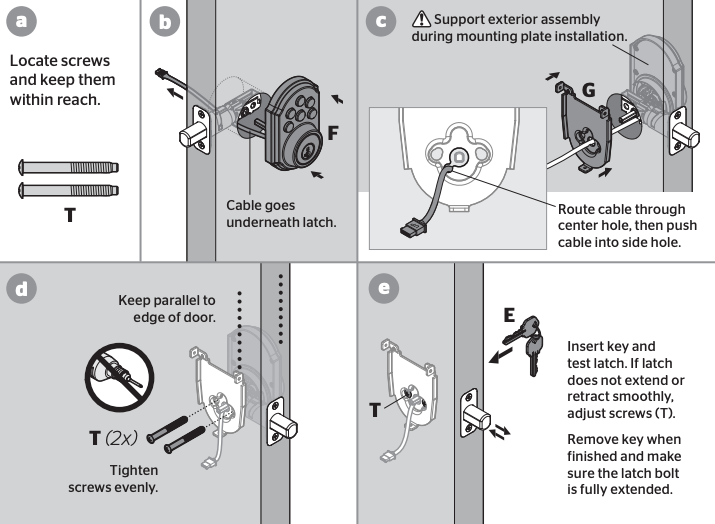
4 Install the interior assembly

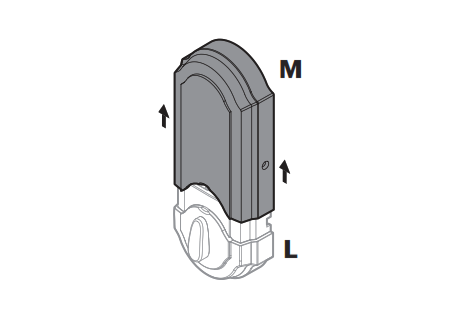
A Remove battery cover.
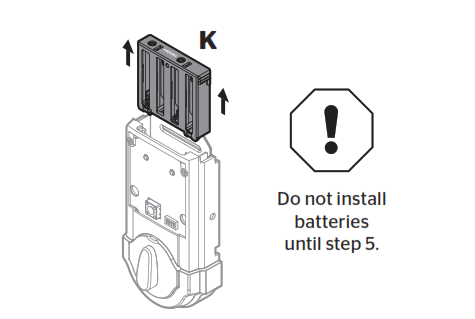
B Remove battery pack.
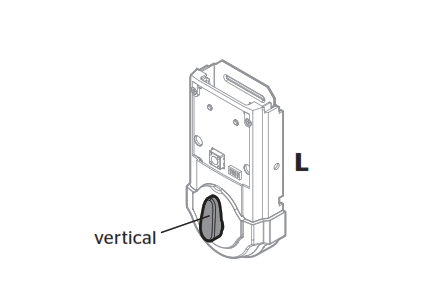
C Make sure the turn piece is in the vertical position.
D Connect cable. Ensure tight cable connection.
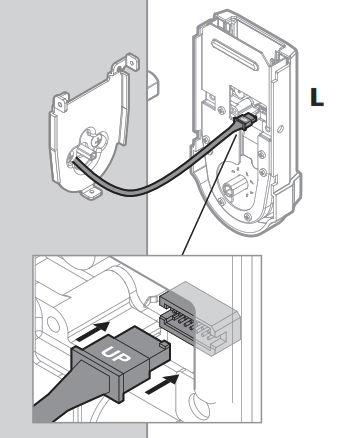
E Lay cable flat against the interior housing.

F Push turnpiece shaft onto torque blade.
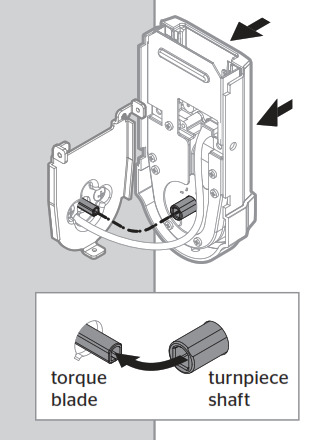
G Secure interior assembly with supplied screws.
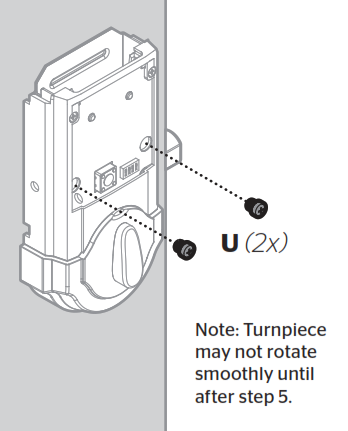
5 Install the batteries and perform the door handing process
This step will teach your lock the orientation of your door and is crucial to lock operation.
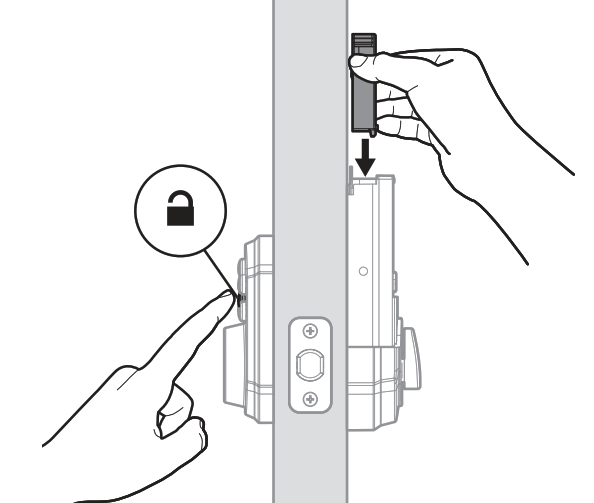
A Install 4 AA batteries in battery pack.
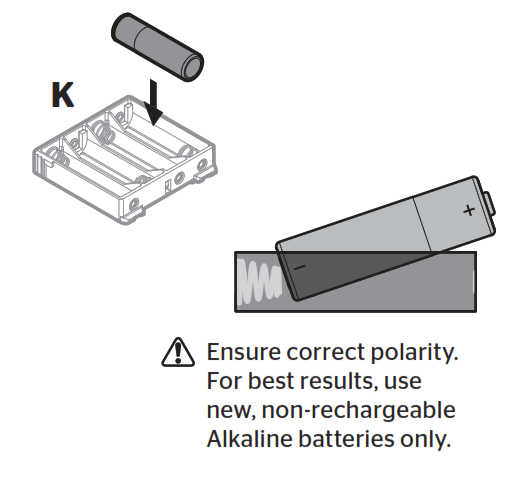
B Press and HOLD the Lock button while installing battery pack.
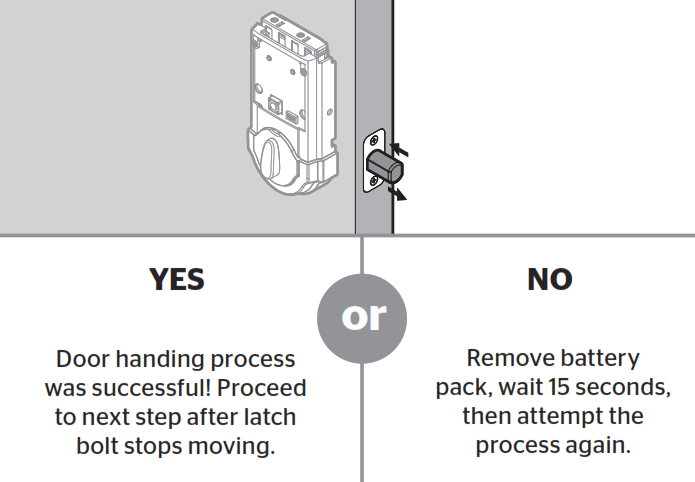
Hold button until the latch bolt starts moving on its own.
C Did the latch bolt retract and extend on its own when the battery pack was installed?
6 Add user codes (8 max)
Programming TimeoutIf no button is pressed for five seconds, the system will time out and you will need to restart the procedure.
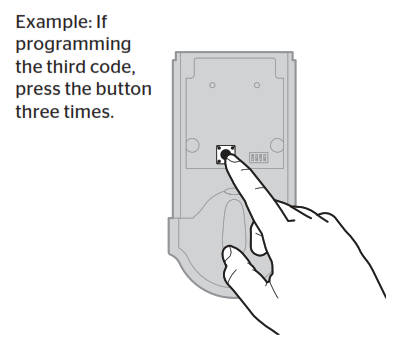
A Make sure the door is open. Press the Program button the number of times that corresponds to the user code position being programmed.
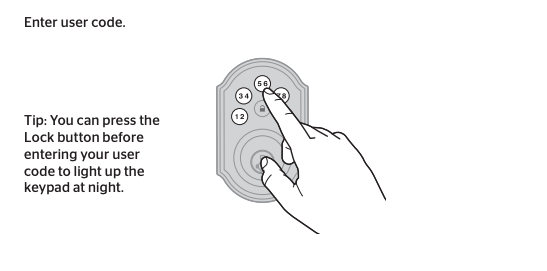
B Enter user code. A total of 8 user codes may be programmed.
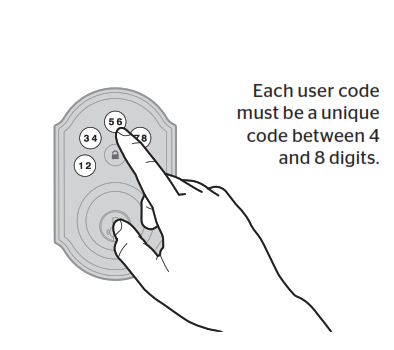
C Press Lock button once.

D What lights and sounds does the lock produce?


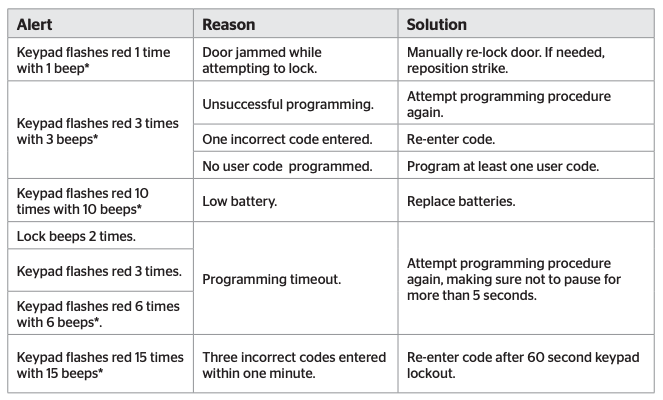
*Beeping sound will only be heard if switch #3 (on the lock interior) is in the on positon. See “Switches and Status LED Colors” on page 4.
MastercodeFor enhanced security, a mastercode may be used when adding and deleting user codes. For more information about the mastercode, download the Programming and Troubleshooting Guide on the SmartCode 5 Deadbolt page at www.weiserlock.com.
7 Test the lock (review normal operation)
Confirm that the code(s) added in previous step can unlock the door.
Locking the Door
Press Lock button once.


Unlocking the Door
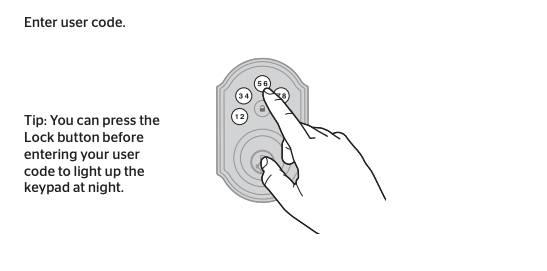

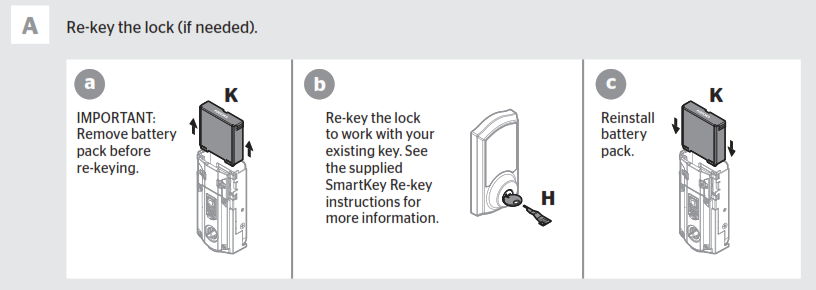
8 Re-key the lock (if needed) and install the battery cover

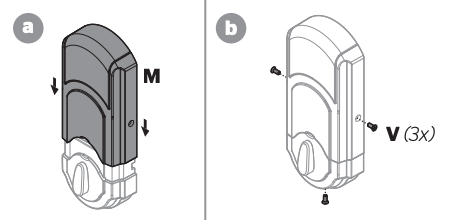
B Install the battery cover.

Reference Guide
SmartCode at a Glance
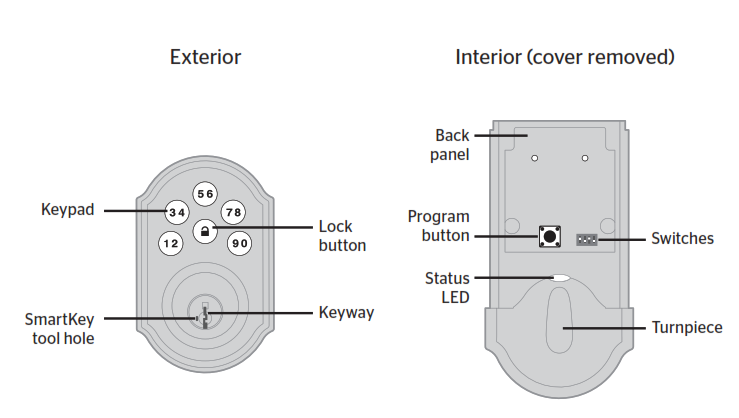
System Alerts

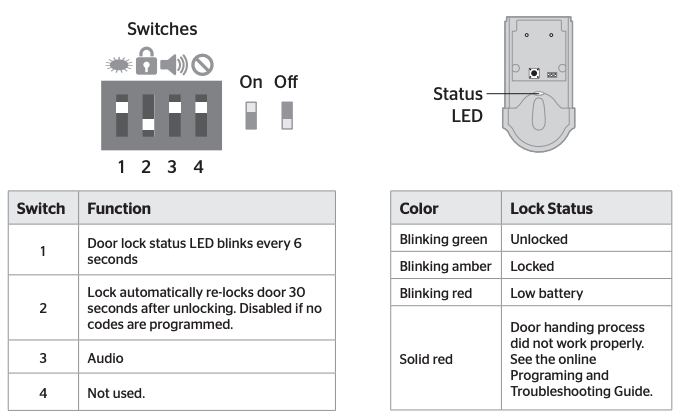
Switches and Status LED colors

Troubleshooting
A complete SmartCode 5 Deadbolt Programming and Troubleshooting Guide is available at www.weiserlock.com.
Deleting a user code
In order to delete a user code, you must override the code by adding a different user code in the same position. For example, if you want to delete the third code, add a different user code in position three.
![]()
![]()
![]()
![]()
If you cannot remember the user code position, you may wish to perform a factory reset to delete all codes associated with the lock.
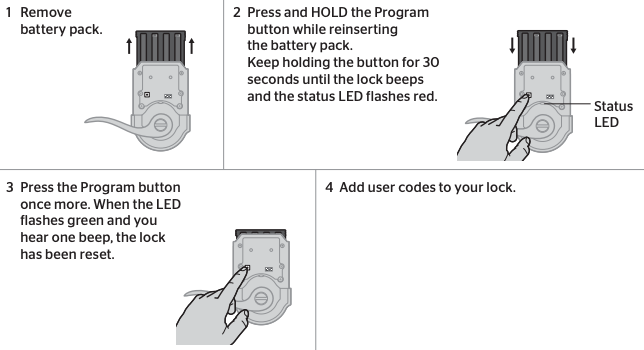
Factory Reset
A factory reset will delete all codes associated with the lock, and it will remove it from your smart home system.

Important Safeguards
-
-
-
- Read all instructions in their entirety.
- Familiarize yourself with all warning and caution statements.
- Remind all family members of safety precautions.
- Protect your user codes and mastercode.
- Dispose of used batteries according to local laws and regulations.
-
-
![]()
![]()
![]()
![]()
![]()
![]()
![]()
![]()
SmartCoode 5 Touchpad Electronic Deadbolt GED1490 Instruction Manual – SmartCoode 5 Touchpad Electronic Deadbolt GED1490 Instruction Manual –

