Installation Guide
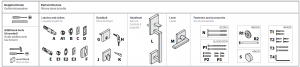
 Prepare door and check dimensions
If drilling a new door, usethe supplied template andthe complete door drillinginstructions available atweiserlock.com/doorprep 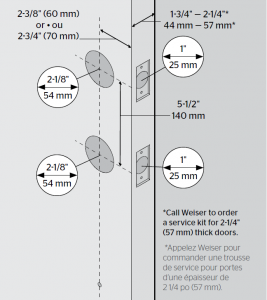
 Confirm bottom hole location
 Confirm bottom hole location
 Fold the supplied template alongthe fold line and place on theexterior side of your door so thatthe holes in the template are alignedwith the holes in your door.
 If you already have the bottom holedrilled in your door, confirm that itslocation falls between the highestand lowest holes at the bottom ofthe template. If it does not fall withinthis range, drill a new hole in step 3.If the bottom hole is not drilled, usethe template to mark the location ofthe new hole on your door. Make sureit is aligned with the other holes in thedoor. Drill a new hole in step 3 at the9-1/8” (232 mm) mark on the template
Drill new bottom hole (if needed)
 Drill new bottom hole (if needed)
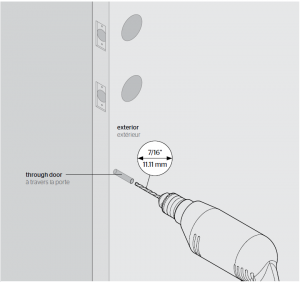
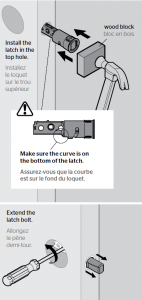
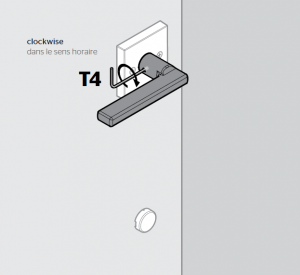
Extend the top latch bolt
 Extend the top latch bolt
Adjust the backset of the top latch (if needed)
 Adjust the backset of the top latch (if needed)
 Hold the latch in front of thedoor hole, with the latch case 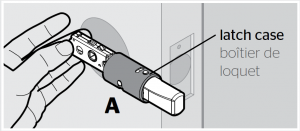 flush against the door edge.
If the D-shaped hole is centeredin the door hole, no adjustment 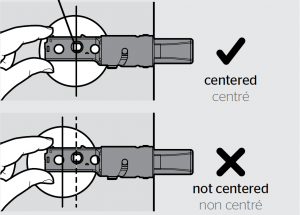 is required. Proceed to step 6.If the D-shaped hole is NOTcentered, adjust latch. See“Latch Adjustment” (step 5C)
 Latch Adjustment (only if needed)
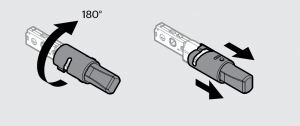
Rotate the front of thelatch to extend it.
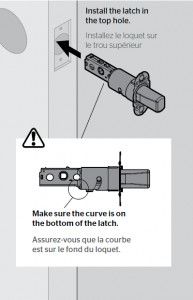
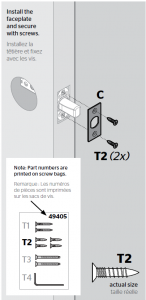
Install the top latch
 Install the top latch
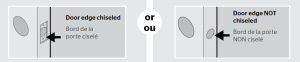
Install thebackplate. 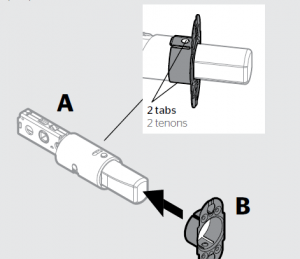
Ensure plate snaps into place.
Pull plate to test for tight fit.Use a screwdriver toretract the latch bolt. Prepare the bottom latch
 Prepare the bottom latch
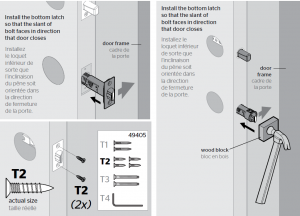
Install the latch face on the BOTTOM latch.

Install the backplate and rectangular faceplate.
Ensure faceplate and 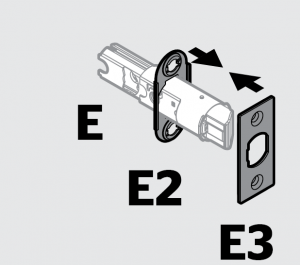 backplate snap together.
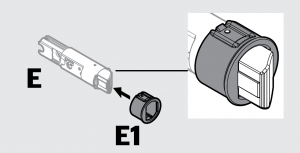
Install the drive-in collar.
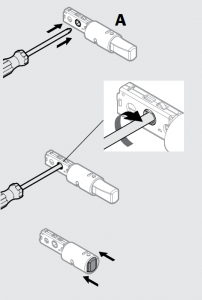
Hold the BOTTOM latchin front of the door hole, 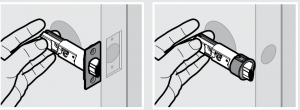 with the latch face flushagainst the door edge.
If the semicircular hole is centeredin the door hole, no adjustment is 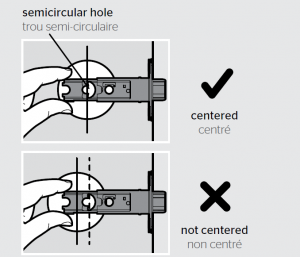 required. Proceed to step 8.If the semicircular hole is NOTcentered, adjust latch. See “LatchAdjustment” (step 7D).

Install the bottom latch
 Install the bottom latch
Install deadbolt
 Install deadbolt
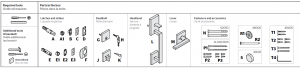
Locate the mountingscrews and keep 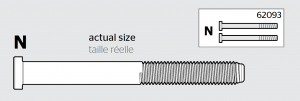 them within reach.
Make sure the interiorturnpiece is vertical. 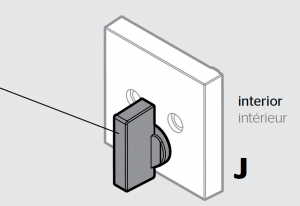
The mounting plate should bepre-installed on the interior. 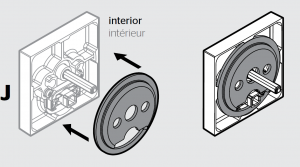 If removed, re-install.
 Insert the interior torqueblade through theD-shaped hole in the latch.
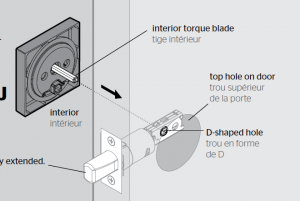
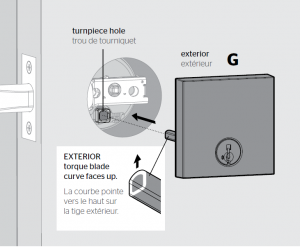
 Insert theEXTERIOR torque
blade into theturnpiece hole.
 Secure thedeadbolt withmounting screws.
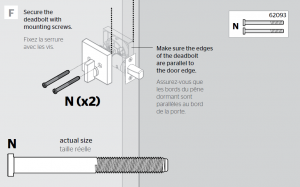
Troubleshooting
If the screws are difficult to tighten, makesure the latch is installed correctly. 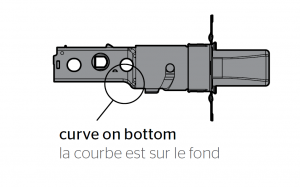
If the turnpiece does not rotate, makesure the turnpiece is vertical, the latchbolt is extended, and the curve of theexterior torque blade faces up.
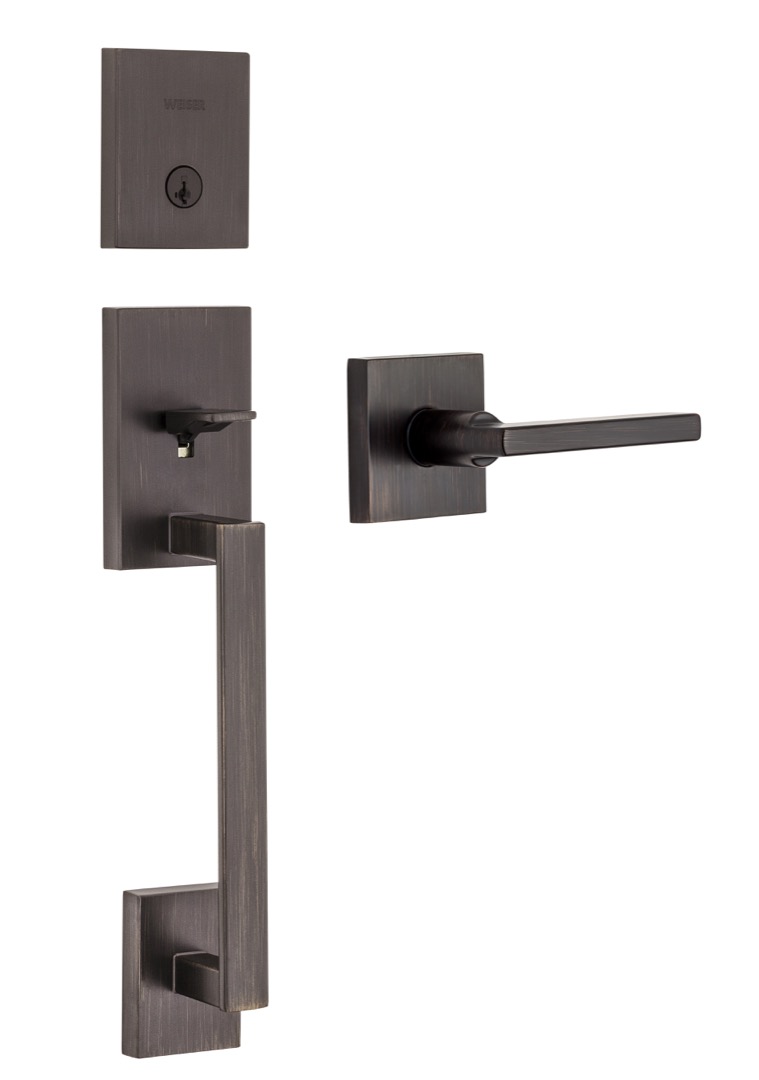
Install handleset
 Install handleset
Hold the handleseton the exterior sideof the door and makesure the round edgeof the spindle facesthe door edge.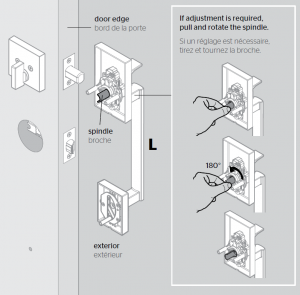
![]() Insert the spindle into thesemi-circular hole in thebottom latch, and insert thebottom post through thebottom hole in the door.
Insert the spindle into thesemi-circular hole in thebottom latch, and insert thebottom post through thebottom hole in the door.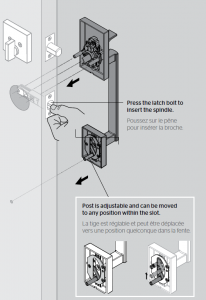
Secure the handleset with thewasher, screw, and screw cover. 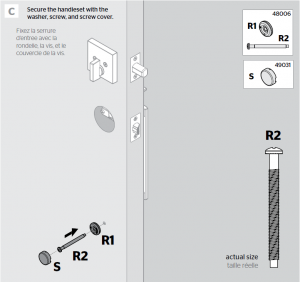
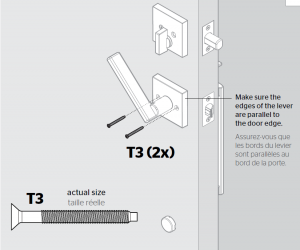
 Install leverInstallation du levier
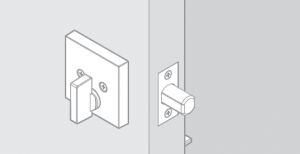

Rotate the leverupward to insert and  tighten the screws.
If the lever needs tightening, usethe supplied wrench to tightenthe pre-installed set screw.
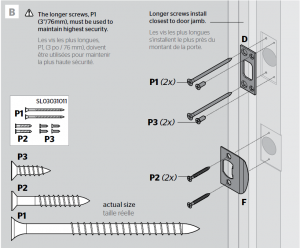
Install strikes
 Install strikes
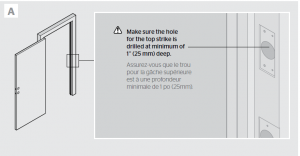
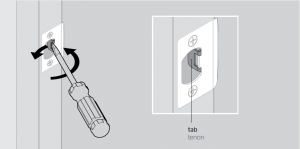
Close the door and test the handleset operation. If the latch is loose in the strike,adjust the strike tab so it grips the latch bolt better when the door is closed.
Re-key deadbolt (if needed)
 Re-key deadbolt (if needed)
Re-key the lock to workwith your existing key.Refer to supplied SmartKeyRe-Key instructions. 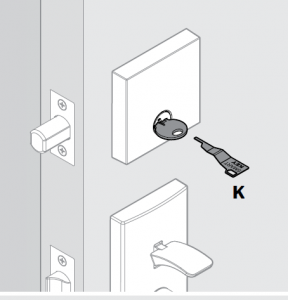
Note: The screws and plastic componenents used to secure thelock to the packaging are not needed for lock installation.
 WARNING: This Manufacturer advises that no lock can provide complete security by itself.This lock may be defeated by forcible or technical means, or evaded by entry elsewhere on theproperty. No lock can substitute for caution, awareness of your environment, and common sense.Builder’s hardware is available in multiple performance grades to suit the application. In orderto enhance security and reduce risk, you should consult a qualified locksmith or other securityprofessional.
Read More About This Manual & Download PDF:
Weiser GLA8471 Deadbolt User Manual – Weiser GLA8471 Deadbolt User Manual –