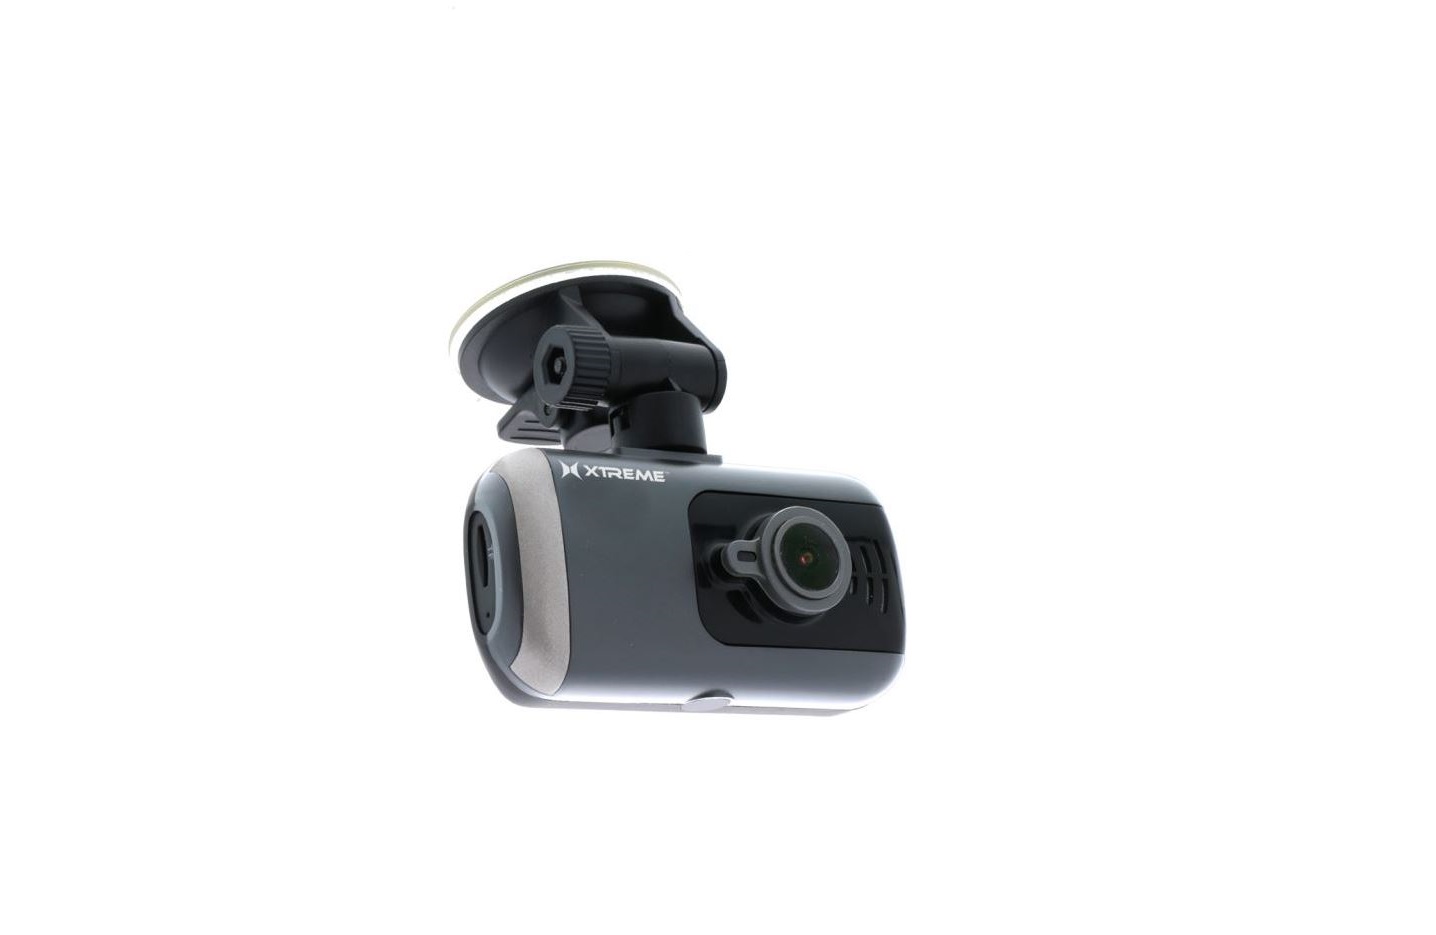
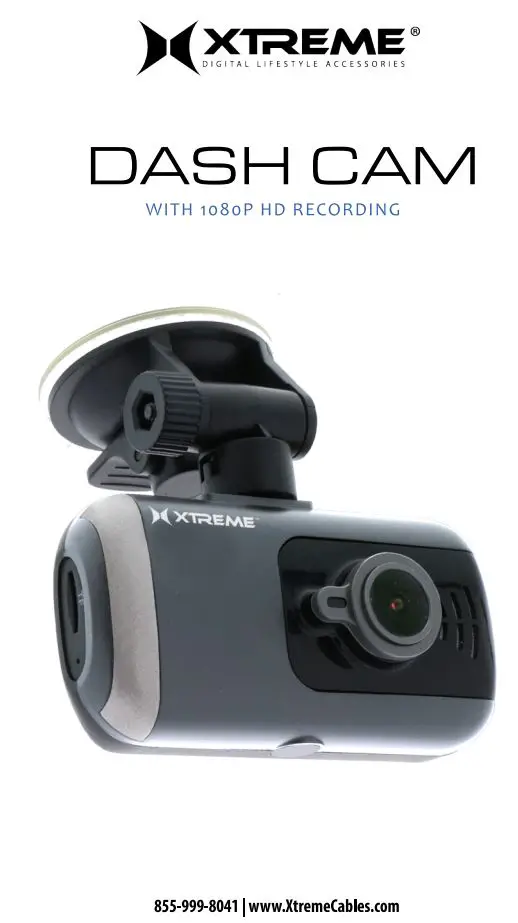
XTREME XDC6-1004 Dash Cam with 1080p
HD Recording User Manual
Caution:
- Please insert the card according to the right direction to avoid damage the card or DVR.
- It is recommended to format the card once a week. This product is not intended as an exclusive storage device. Please back up the important files to computer or other storage device immediately to avoid losing files.
- Please check the mount carefully after installation to avoid damage caused by poor installation
- Please do not use this product in a wet environment.
- Please do not record or take pictures directly of the sun, to avoid damage to the optical devices.
- Please do not use this product in excessive dust environment, in case of the lens and other components be contaminated and thus producing a lower quality video. Please keep lens clean using a microfiber clothmade for optical devices.
- This product uses precision electronic components. Please do not subject to intense impact or vibration.
- Please kindly note working temperature is 14°F- 140°F. Storage temperature is -4°F-l S8°F. Please do not isolate DVR for a long time.
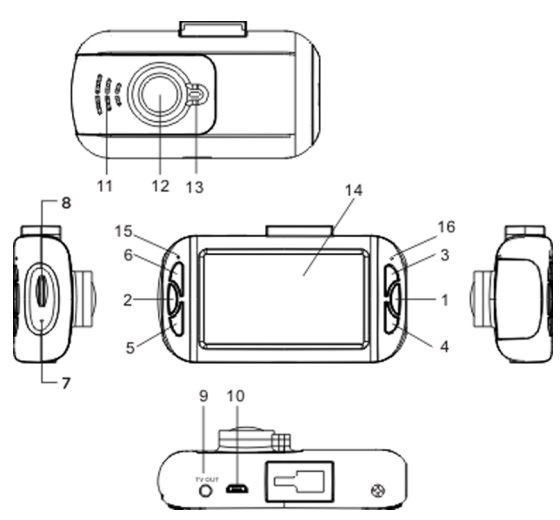
Structure:
- OK/REC
- Menu
- Up
- Down
- Mode
- ON/OFF
- Reset hole
- Micro SD Card Slot
- TVOUT
- USB Port
- Speaker
- Lens
- Working Indicator
- LCD screen
- Recording Indicator
- Charging Indicator
Operating the Dash Cam
Power On:
- In the off state, hold power
 DVR enters into video mode and will start recording automatically. Or when the device is connected with the car charger in the off state it will enter video mode and start recording automatically when the car is powered on. When the charger is disconnected, the DVR will automatically save the current file and shut down in 5 second delay.
 - Note: LCD screen will show ‘Please insert micro SD card’ if Micro SD card not inserted. If the Micro SD card is inserted with DVR in it’s working state, the DVR will automatically power off.
Power Off:
- In it’s working state, hold to power off.
- Note: In low battery state, the screen will display’ Low Battery’ and automatically saves the current file and shuts down.
Battery Charging:
- In the charging state, the display will indicate that the device is plugged in and charging.
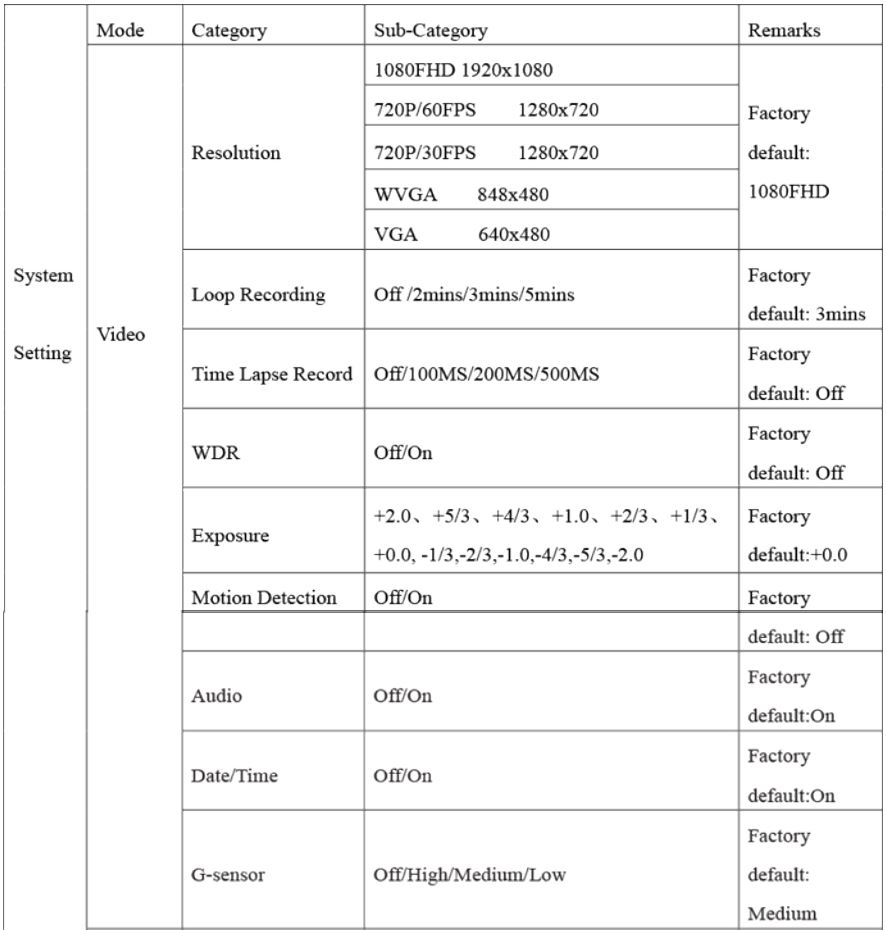
Video:
- Press to power on the device and enter into video mode automatically. Press ■ to stop recording and save the current file, the DVR will then go into standby mode. In standby mode, press the OK button to restart recording, press again to pause.
- In video mode, short press ▼ to turn on or turn off sounds.
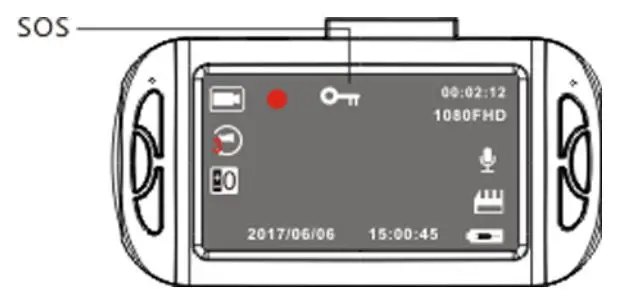
![]()
- Recording
- Video
- Loop Recording
- Exposure
- Date
- Time
- Recording Time
- Video Resolution
- Voice/Mute
- Micro SD Card in
- Charging
Photo:
- Press to enter photo mode, press ■ to take photo.
ONE YEAR WARRANTY
Xtreme warrants its products for ONE YEAR against defects in manufacturing under regular consumer use with original receipt of retail purchase.
We believe in our products and want to provide you with a replacement, if needed, but we have to know about the problem while the product is still under warranty. If you discover a defect covered by this warranty, please contact us about receiving a replacement. In order to use the products warranty the customer must provide proof of the retailers receipt.
*Any customers outside of the U.S. will be responsible for shipping andhandling charges if a replacement is required that is not due to a manufacturing defect.
Xtreme’s warranty is limited to our products only. Our warranty does not cover the replacement or repair cost of any third-party accessory, electronic device or personal property.
For instructions about how to obtain warranty service for your product, please contact Customer Service at [email protected]
Package Contents:
- Dash Cam
- Car Charger
- USB Cable
- Suction Cup Mount
- User Manual
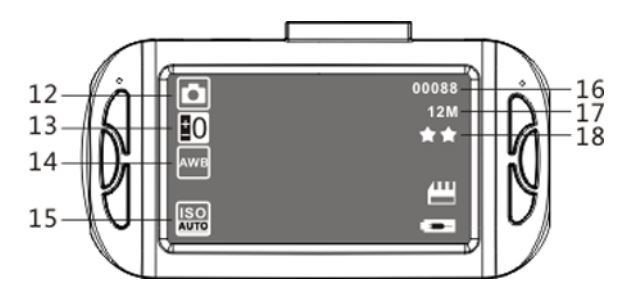
12. Photo13. Exposure14. White Balance16. Photo Quality17. Image Resolution18. Image Quality
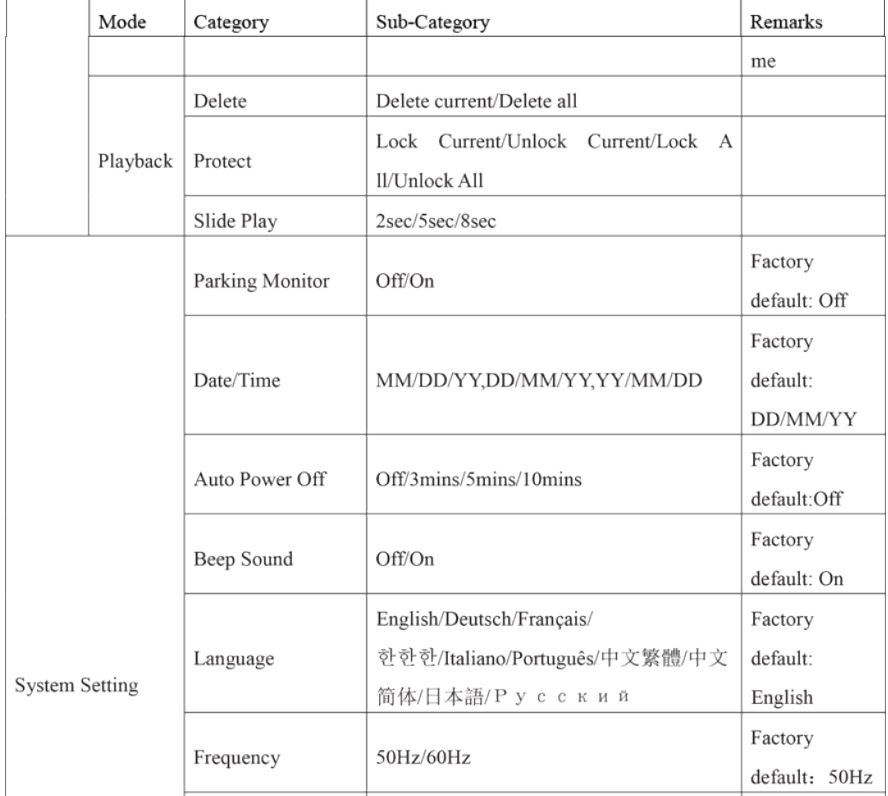
Playback and Delete:
In video standby mode, short press ![]() to enter into playback mode. Press ▲/▼ to select the file. ■ is used for play or pause. During video playback, press:: to stop, short press ▲/▼ to adjust the volume and hold ▲/▼ for 3 seconds to fast forward or reverse. Hold ▲/▼ for 3 seconds and the DVR will fast forward or reverse for 2x, 4x and max. 8x. To delete files, please stop the playback first and press :: to enter Delete Menu. Press ▲/▼ to select ‘delete current’ or’ delete all’ and press ■ to confirm. Press :: to exit and go back to playback mode.
to enter into playback mode. Press ▲/▼ to select the file. ■ is used for play or pause. During video playback, press:: to stop, short press ▲/▼ to adjust the volume and hold ▲/▼ for 3 seconds to fast forward or reverse. Hold ▲/▼ for 3 seconds and the DVR will fast forward or reverse for 2x, 4x and max. 8x. To delete files, please stop the playback first and press :: to enter Delete Menu. Press ▲/▼ to select ‘delete current’ or’ delete all’ and press ■ to confirm. Press :: to exit and go back to playback mode.
SOS:
- While recording, short press :: manually to save the currentvideo from being overwritten.
Digital Zoom:
- In photo mode, short press ▲ to zoom in max. 4x. Press ▼ to zoom out min. 1 :1.
LCD Off Shortcut:
- In recording/standby mode, short press to switch LCD on or off.
Parking Monitor:
- Parking monitor is for security monitoring in parking.
- Please set Parking Monitor ON in settings menu. There will be a “P” on the screen. (If Parking Monitor is OFF, “P” will be not there). After the car is turned off the DVR will power off accordingly. If the DVR detects vibration it will power on to record automatically for 30 seconds and then power off. If there is continuous vibration the DVR will keep recording.
- Hold z to turn on/off parking monitor after DVR powers on.
Time Lapse Recording:
- Time lapse record is to save memory capacity. In standby mode, short press :: to enter into setting menu and press ▲/▼ to select Time-lapse Record.
- Press ■ to select “Off/100ms/200ms/500ms” to activate this function. Short press :: to exit setting menu.
Motion Detection:
- In video standby mode, short press :: to enter into setting menu, then press ■ to select motion detection and press▲/▼ to turn on motion detection. When the DVR detects movement it will start to recordand indicator light flash. If there is no movement for 10 seconds the DVR stops recording and will default back to video standby mode.
Computer Connection:
- Connect device to PC with USB cable.
- Select Mass Storage and the DVR will detect inserted memory card to show files.
- When selecting PC Camera the DVR can be used as a PC Camera.
- Note: Incorrect operation can leads to system crash. Please use a pin or paperclip to press the reset hole to restart.
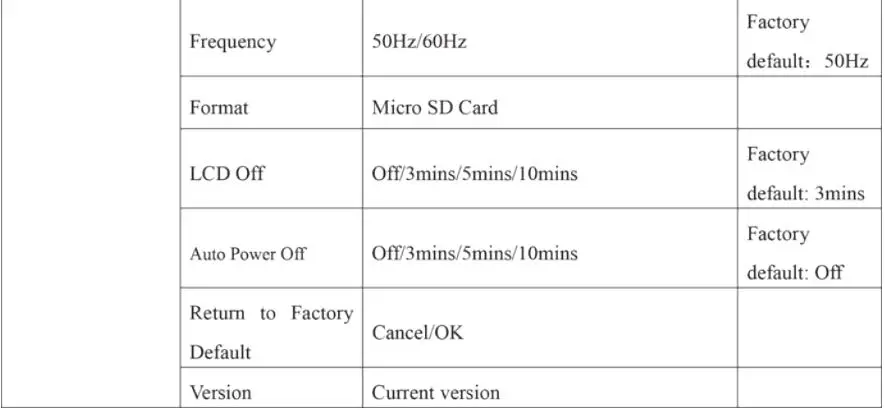
System Settings
- In standby mode, press :: to enter into system settings. Press ▲/▼ to select the setting item and press ■ to confirm. Press :: again to exit.

Specifications:
 report this ad
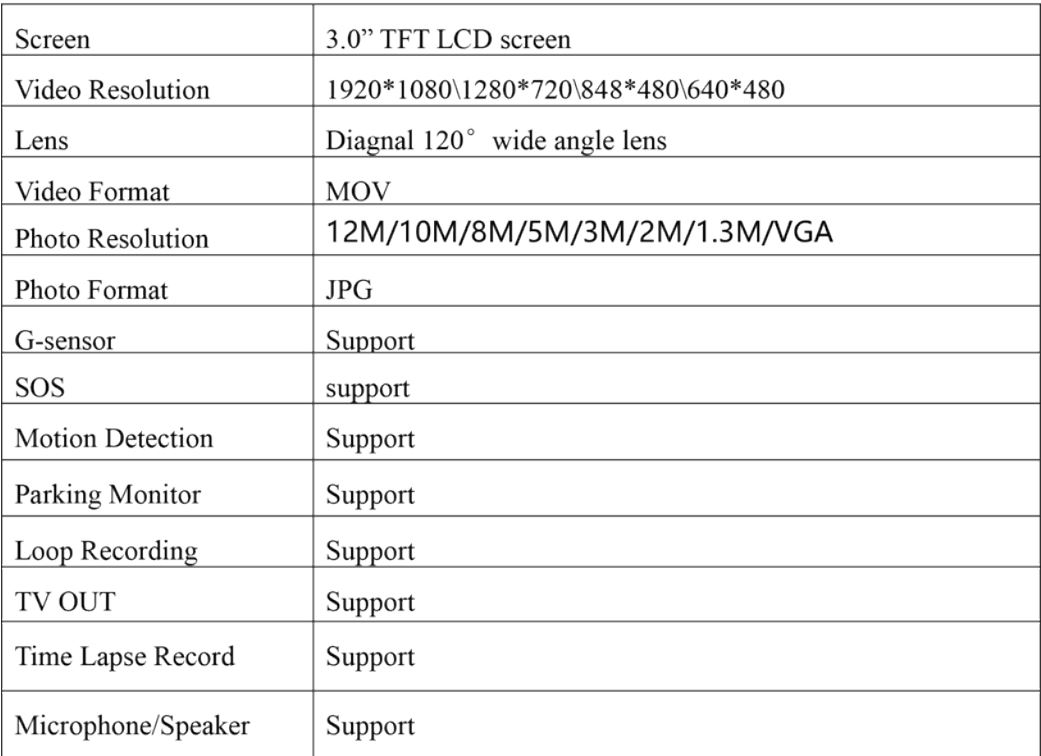

[xyz-ips snippet=”download-snippet”]