![]() LTE7485-S9054G LTE-A Outdoor RouterQuick Start Guide
LTE7485-S9054G LTE-A Outdoor RouterQuick Start Guide
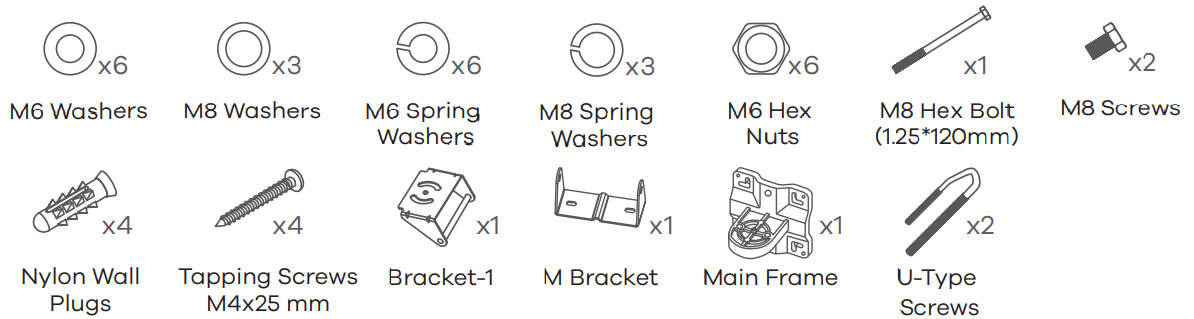
Package Contents

Mounting Kit
See the User’s Guide at www.zyxel.com for more information, including customer support and safety warnings.US ImporterZyxel Communications, Inc1130 North Miller Street Anaheim, CA 92806-2001https://www.zyxel.com/us/en/Copyright © 2020 Zyxel Communications Corp. All Rights Reserved.
Location Examples

![]() Place the LTE7485-S905 in an open area free of obstacles, and adjust the angle to point it towards the base station to have the strongest possible LTE signal.
Place the LTE7485-S905 in an open area free of obstacles, and adjust the angle to point it towards the base station to have the strongest possible LTE signal.
Step 1 SIM Card Installation
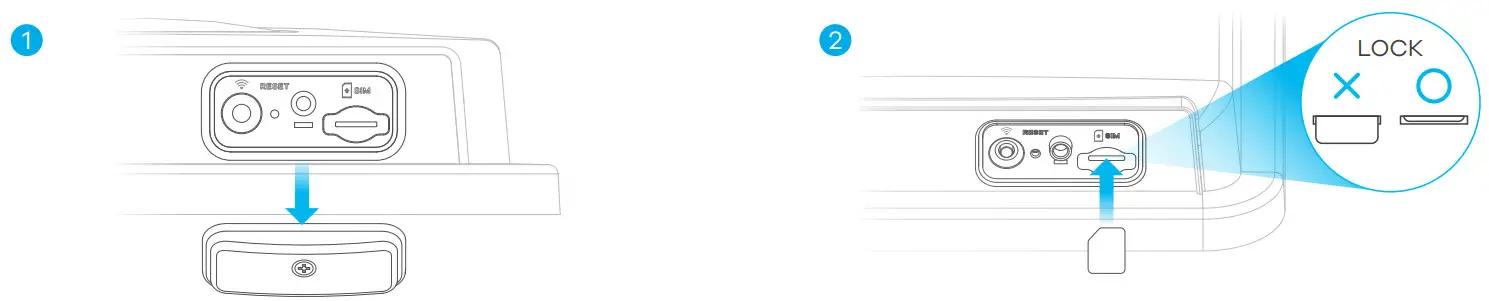
- Make sure the LTE7485-S905 is turned off. There should be no Ethernet cable connected to provide power using PoE. Unscrew the SIM card slot cover and remove it.
- Gently place a SIM card into the SIM card slot until it clicks into place.
Step 2 Cable Connections

1-4. Follow steps 1 to 4 in the drawing to connect an 8-pin Cat 5e Ethernet cable to the LTE7485-S905’s LAN port.
Step 3 Cable Connections
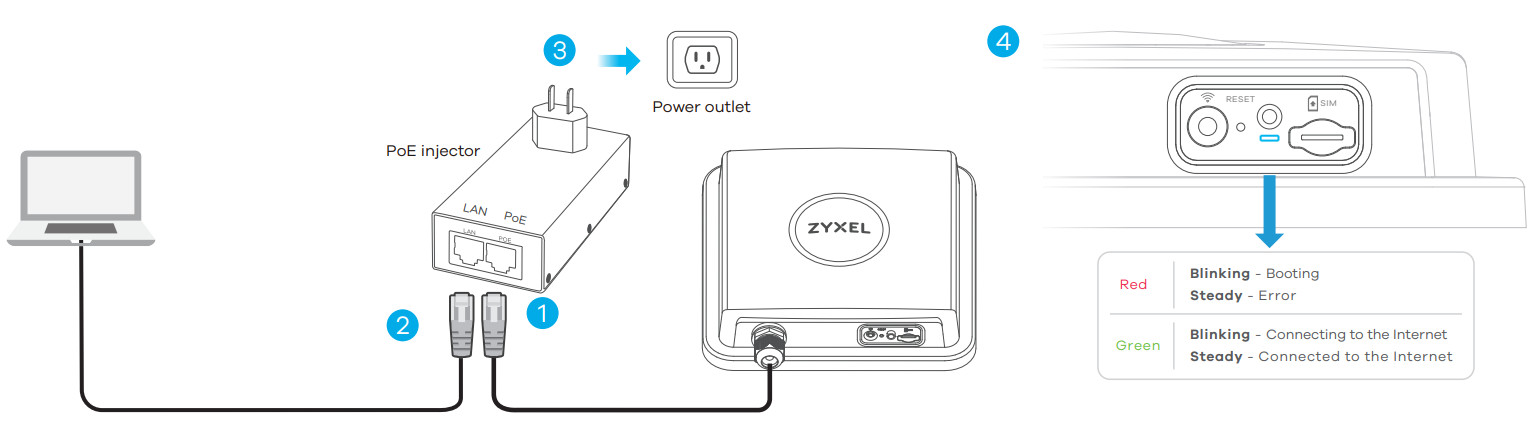
- Connect the Ethernet cable to the included PoE injector PoE port.
- Connect the LAN port of the injector to a computer or a router with the included Ethernet cable.
- Connect the power plug on the PoE injector to a power outlet.
- Check the LED next to the SIM card slot.
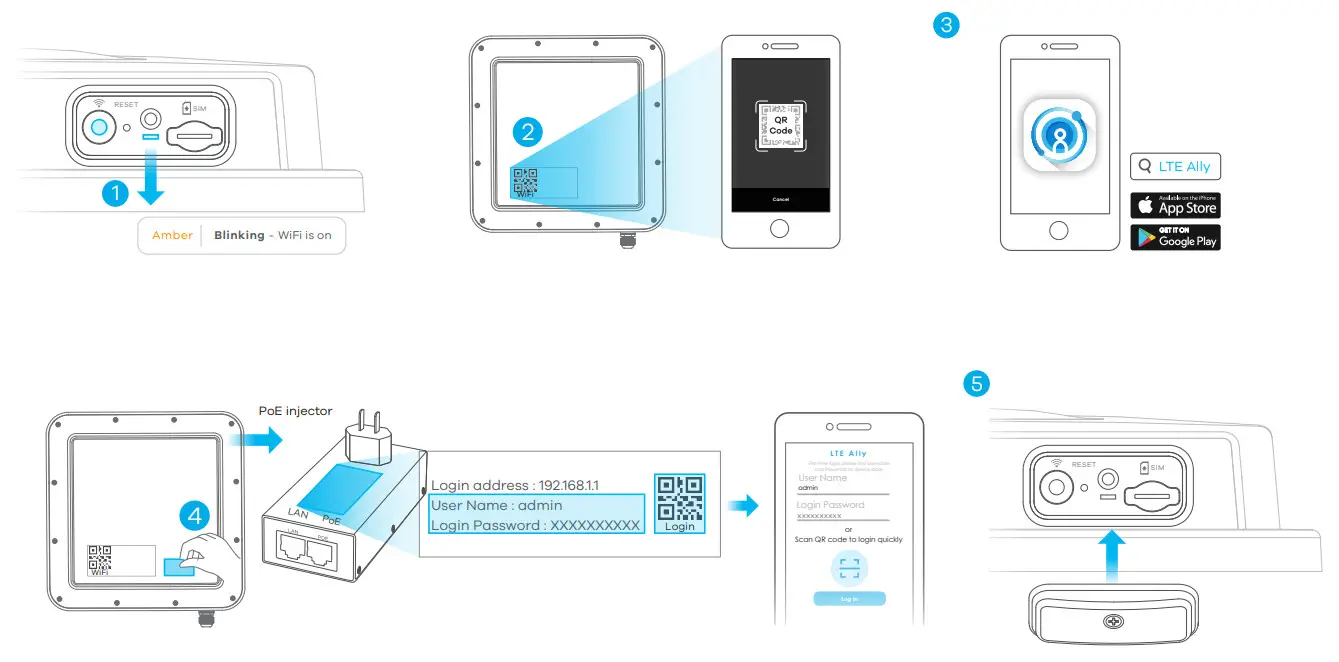
Step 4 Connecting WiFi to Your LTE7485-S905 for Easy Setup
 Check if WiFi is on – the amber LED is blinking. If not, press the WiFi button to enable WiFi.
- Scan the WiFi QR code on the device label then follows the prompts to connect to the WLAN on your mobile device.
- You can download the LTE Ally app or use the web configurator (see next) to manage the LTE7485-S905.
- Remove the label from the back of the LTE7485-S905 and put it on the injector. Scan the Login QRcode to use the default username and password to log in the LTE Ally app for the first time.
- Screw the SIM card slot cover back into place.
 Check if WiFi is on – the amber LED is blinking. If not, press the WiFi button to enable WiFi.
Configuring Your LTE7485-S905 (Optional)
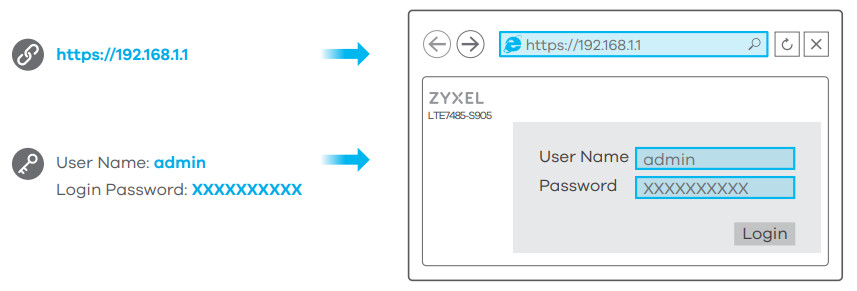
Open a web browser and go to https://192.168.1.1.Enter the default username (admin) and password (see label), and then click Login.See the User’s Guide at www.zyxel.com for more information.
Step 5 Pole / Wall Mounting: Connect M Bracket and Main Frame

1. Use washers, spring washers, and nuts to attach the M-type bracket to the back of the LTE7485-S905.2- 3. Follow steps 2-3 in the drawing to attach the rotating bracket to the mounting mainframe using washers, spring washers, and hex nuts. Do not tighten the nuts until you adjust the mounting angle in the final step.4. – 5. Follow steps 4-5 in the drawing to align the rotating bracket with the M-type bracket, insert the M8 bolt through the holes, and use washers and spring washers to secure it.
Wall Mounting (Optional)
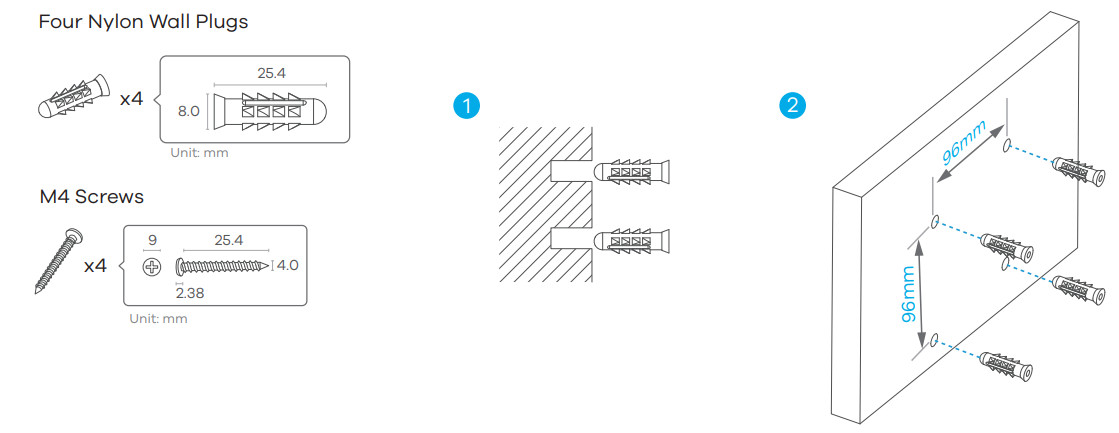
- Use the four corner holes of the M bracket to mark holes on a wall. Drill four holes in a wall.
- Insert the screw anchors and screws into the holes.
- Insert nylon wall plugs into the wall. Use mounting screws to secure the mainframe to the wall through the nylon plugs.

Pole Mounting (Optional)
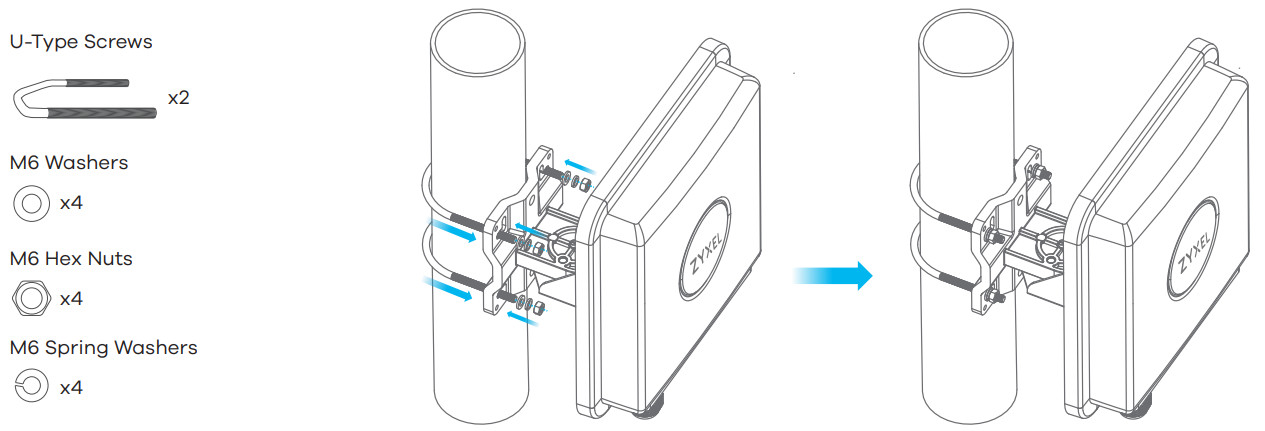
- Place the U-bolt around a pole. Insert the U-bolt into the holes on the mainframe. Use a wrench to secure the mainframe to the pole with the washers, spring washers, and nuts.
Step 6 Pole / Wall Mounting Angle Adjustment

Connect the PoE injector to a power outlet. Use the LTE Ally app to find the optimal LTE signal strength and manage your LTE7485-S905.Note: After configuring the LTE7485-S905, turn WiFi off.
Step 7 Grounding
 report this ad
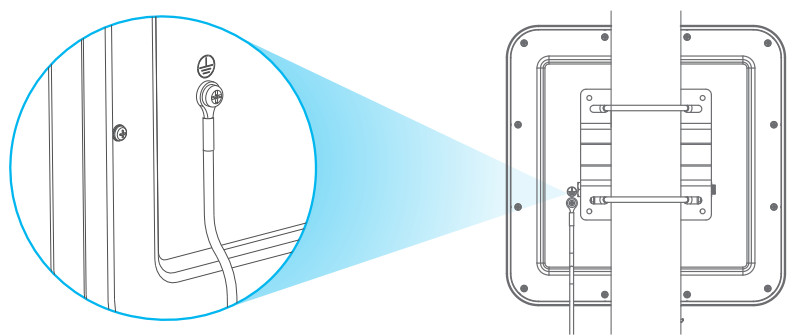
Secure a green/yellow ground cable (18 AWG or smaller) to the LTE7485-S905’s rear panel using the M4 ground screw. Attach the other end of the cable to the ground, either to the same ground electrode as the pole you installed the device on or to the main grounding electrode of the building. Follow your country’s regulations and safety instructions to electrically ground the device properly. Qualified service personnel must confirm that the building’s protective earthing terminal is valid.
Safety Warnings
- Humid 、dusty and extreme environments in which place the product and obstructing the device ventilation slots are prohibited, any kind of conditions above may harm your device.
- There is a remote risk of electric shock from lightning.do not install, use, or service this device during a thunderstorm.
- Connect only suitable accessories to the device; make sure to connect the cables to the correct ports.
- Do not open the device, opening or removing covers can expose you to dangerous high voltage points or other risks. Please contact your vendor for further information.
- Place connecting cables carefully so that no one will step on them or stumble over them and disconnect all cables from this device before servicing or disassembling.
- Please use the provided or designated connection cables/power cables/ adaptors. connect it to the right supply voltage (for example, 110V AC in North America or 230V AC in Europe), If the power adaptor or cord is damaged, it might cause electrocution. remove it from the device and the power source, repairing the power adapter or cord is prohibited, Contact your local vendor to order a new one.
- Risk of explosion if the battery is replaced by an incorrect type, dispose of used batteries according to the instruction.
- Please refer to the device back label, datasheet, or box specifications catalog information for the rated power of the device and operating temperature.
- The socket outlet shall be installed near the device and shall be easily accessible because it serves as the main disconnecting device.
Disposal and Recycling Information The symbol below means that according to local regulations your product and/or its battery shall be disposed of separately from domestic waste. If this product is end-of-life, take it to a recycling station designated by local authorities. At the time of disposal, the separate collection of your product and/or its battery will help save natural resources and ensure that the environment is sustainable development.
References
[xyz-ips snippet=”download-snippet”]