![]() NWA50AX802.11ax (WiFi6) Dual-RadioPoE Access PointQuick Start Guide
NWA50AX802.11ax (WiFi6) Dual-RadioPoE Access PointQuick Start Guide
Hardware Installation
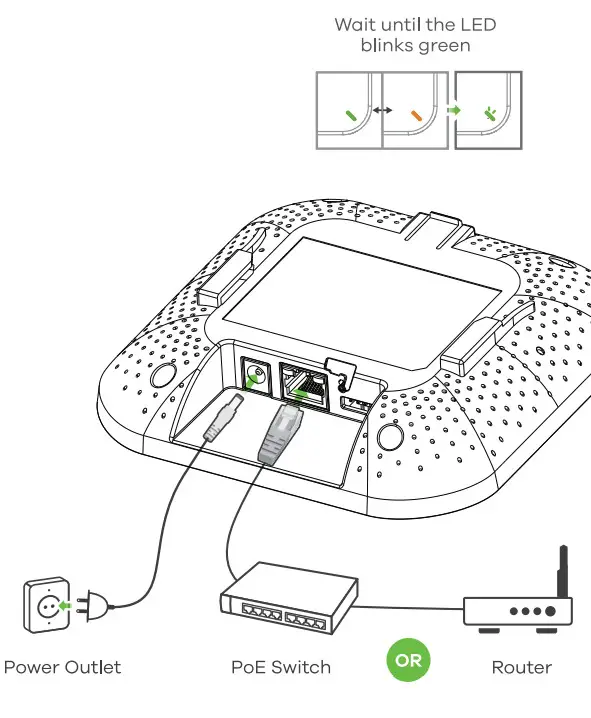
Connect the UPLINK port to a router with Internet access. If you are not using PoE, connect the NWASOAX power socket to an appropriate power source.
Option A Cloud Management
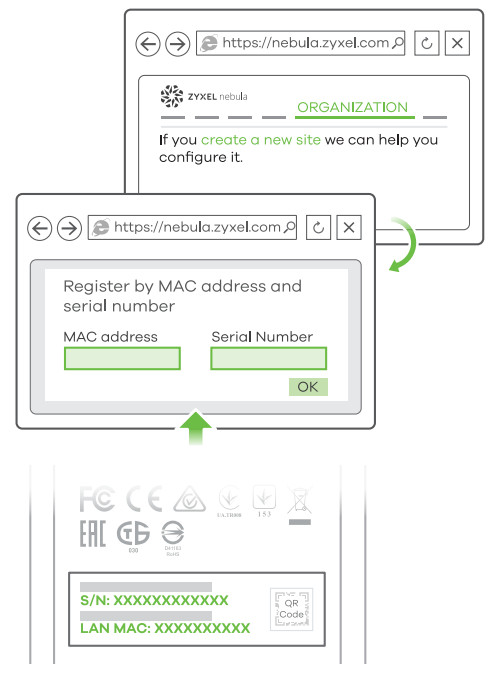
Option1: Use MAC address and Serial number to add a device in the NCC.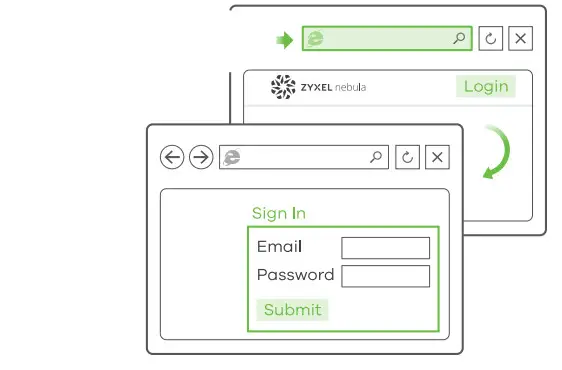
![]() https://nebula.zyxel.com
https://nebula.zyxel.com
Follow the steps below to manage the NWASOAX through the Zyxel cloud-based network management system.Note: Make sure the connected router has Internet access.
- Go to the Zyxel Nebula Control Center (NCC) website (https://nebula.zyxel.com). Click Get Started to sign up for my Zyxel account and log in.
- Create an organization and a site (network) in the NCC.

- Enter the NWASOAX’s LAN MAC address and serial number (S/N) (see the label on the device) in the NCC configuration screen.Note: The NWASOAX will go into cloud management mode automatically and restart after it is registered to a site. See the NCC User’s Guide for more information about configuring the NWASOAX through the NCC.
Option 2: Use the Zyxel Nebula Mobile app to add a device in the NCC.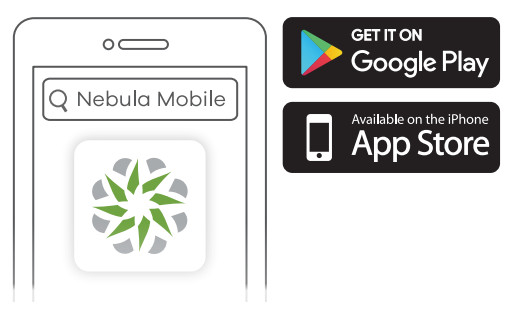
Where to find Qr code
 Download and open the Zyxel Nebula Mobile app. Log in with your my Zyxel account. Create an organization and site or select an existing site. Scan the NWASOAX’s QR code to add it to the site. (You can find the QR code in its web configurator or on a label on the device or its box.)Note: The NWASOAX will go into cloud management mode automatically and restart after it is registered to a site.
Option B Standalone Management
1-a WiFi connection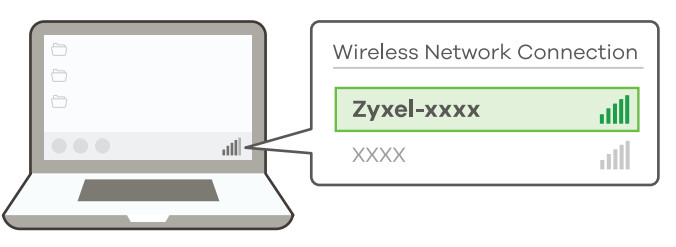
![]() http://1.1.1.1 (First-time configuration only)
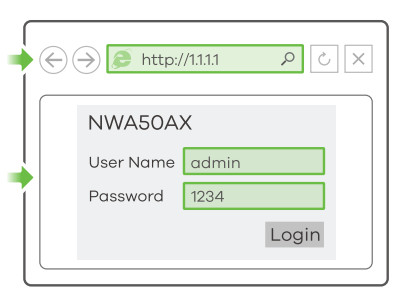
http://1.1.1.1 (First-time configuration only)![]() User Name: admin Login Password: 1234 (default)
User Name: admin Login Password: 1234 (default)
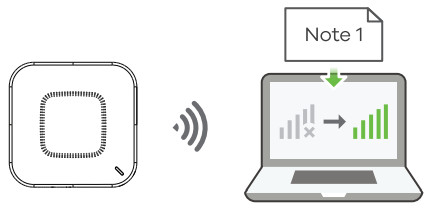
From a WiFi-enabled computer, search for the NWASOAX’s default WiFi network name (Zyxel-xxxx, where xxxx is the last four characters of the MAC address) and connect to it.Open your web browser and enter “http://1.1.1.1” for initial configuration. Enter the default user name (admin) and password (1234). Click Login.Note: If the NWASOAX cannot connect to the Internet, use the DHCP-assigned IP address of the NWASOAX to access its web configurator. Check the connected router or DHCP server for the IP address of the NWASOAX.
1-bWiFi connection
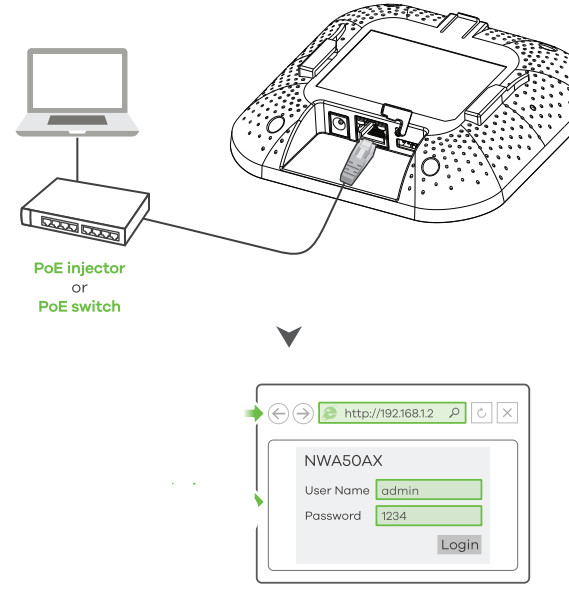
![]() http://1.1.1.1 (First-time configuration only)
http://1.1.1.1 (First-time configuration only)![]() User Name: admin Login Password: 1234 (default)
User Name: admin Login Password: 1234 (default)
Use an Ethernet cable to connect your computer to the UPLINK port of the NWASOAX through a PoE injector or PoE switch. Use its DHCP-assigned IP or default static IP address “http://192.168.1.2” to access the web configurator. Make sure your computer IP address is in the same subnet as the NWASOAX’s.2
3
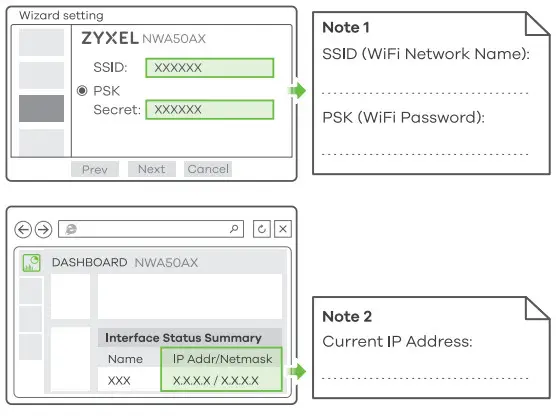
The wizard appears automatically. Use the wizard to set up your NWASOAX.Note: It takes 1 to 2 minutes to apply your wizard changes. The power LED will blink red and green alternatively. The power and WiFi LEDs then turn steady green when the system is ready. Check the Dashboard screen and note down the NWASOAX’s IP address in case you need to access it’s web configurator again.Note: The 111.1 is for initial setup only. It is not usable after the NWASOAX is configured. ® Use the NWASOAX’s new wireless settings (SSID and key) to re-connect to the NWASOAX’s WiFi network for Internet access if you change them in the wizard.
Wall/Ceiling Mounting
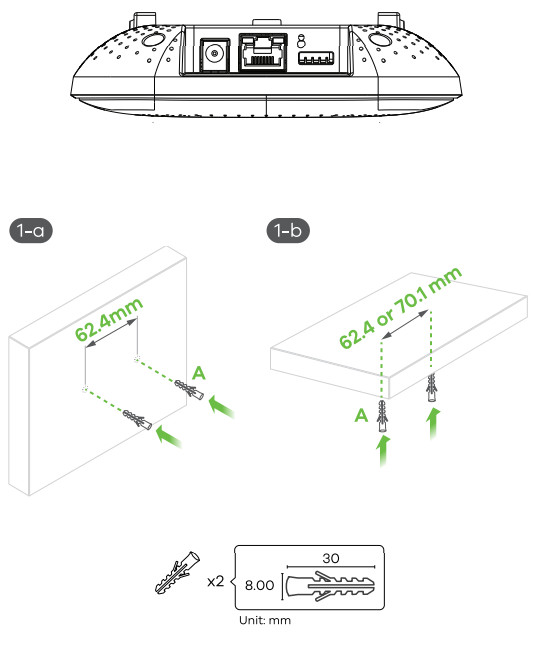
1-a Wall mounting: Drill two holes for the screw anchors (A), 62.4 mm apart. Insert the screw anchors into the wall.1-b Ceiling mounting: Drill two holes for the screw anchors (A), 62.4 mm or 70.1 mm apart. Insert the screw anchors into the ceiling.
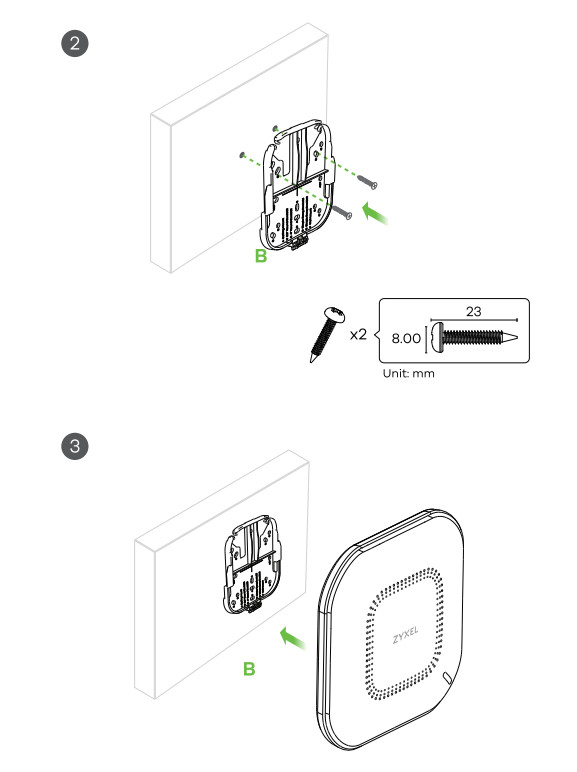
2. Install two mounting screws through the holes on the bracket (B) into the plugs/anchors to secure the bracket to the wall/ceiling. Make sure the screws are snugly and securely fastened to the wall/ceiling.3. After the bracket is attached to the wall/ceiling, slide the NWASOAX onto the bracket until it clicks into place.
T-bar Ceiling Mounting
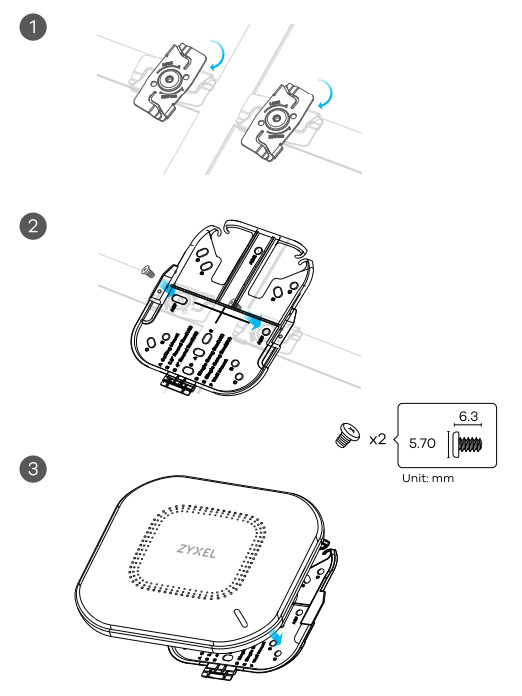
- Attach two clips to the ceiling grids as shown.
- Install two screws to secure the bracket to the clips.
- Slide the NWASOAX onto the bracket until it clicks into the place.Note: Clips (ACCESSORY-ZZ0105F) are sold separately.
Support Information
North America+ 1 800 25S 4101[email protected]EU support.zyxel.com.eu
See the User’s Guide at www.zyxel.com for more information, including customer support and safety warnings.EU Importer Zyxel Communications A/SGladsaxevej 378, 2. the. 2860 Sahara, Denmarkhttps://wwwzyxel.com/dk/da/UK ImporterZyxel Communications UK Ltd.2 Old Row Court, Rose Street, Woking ham, R040 1xz, United Kingdom (UK)https://vw.zyxel.com/uk/en/Communications Corp. All Rights Reserved.
 report this ad
[xyz-ips snippet=”download-snippet”]